Drawing a lynx in watercolor. This is childish think some, but believe me many artists love and draw only watercolors, no oil, no acrylics, namely watercolor, which is in their heart forever. I think there is no point in telling what watercolor is and why it is called that way, it is all described in Wikipedia and on the Internet.
And so, let me show you how to paint a small watercolor picture of bobcats in love. Watercolor drawings, it is always a glaze and thin layers through which you can see the structure of the paper and the lower layers.
How to draw a bobcat
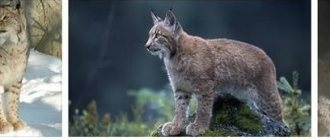
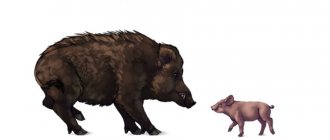
The lynx is a beautiful wild carnivore in the feline family. Being the size of a large dog, it has a very unusual characteristic appearance. The main color is a reddish color with darker spots. The distinctive feature is a short, moderately fluffy tail and tassels on the ears. The muzzle is expressive: large cat eyes and fluffy cheek fur. In this lesson, we'll figure out how to draw a lynx, using various methods and techniques.
Realistic example |
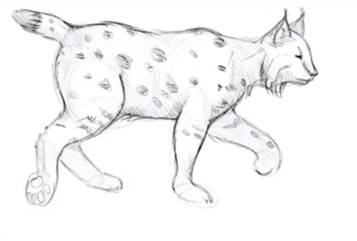
Running trot |
Lynx half-turned |
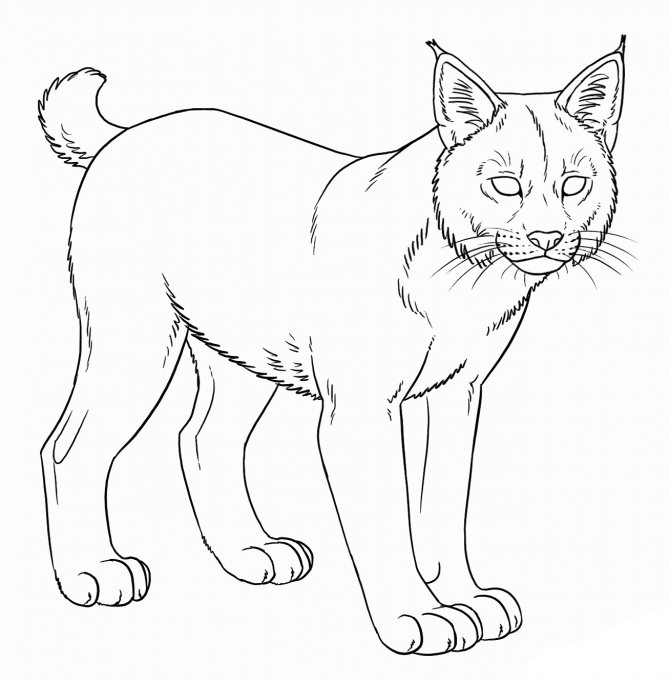
Child's drawing | Simple example from the side |
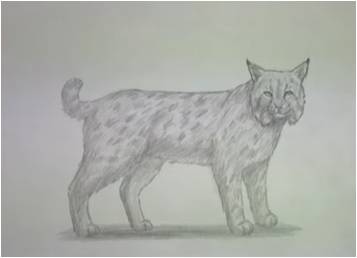

Realistic step-by-step example
To understand how to draw a lynx step by step, you just need to follow the sequence: sketch, detailing, filling with color. The quality of the sketch - the easier the work and the better the result. In this case, any, even not the simplest, at first glance, drawing will be easy and accessible.
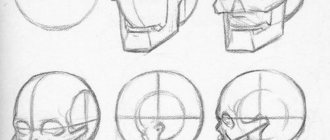
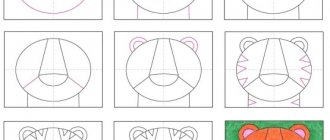
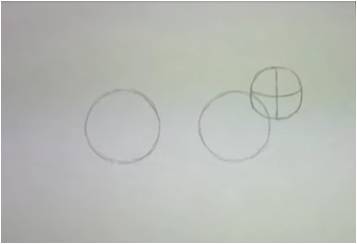
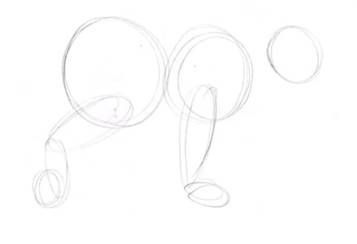
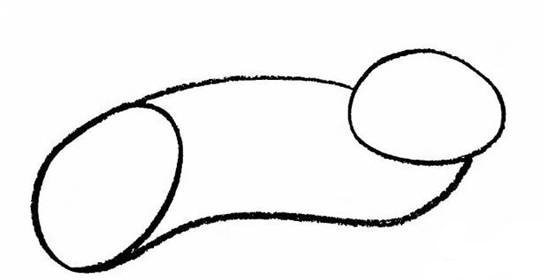
Step 1
First draw two auxiliary circles for the future torso. Just above and to the right of one, with a slight intersection, we draw another circle a little smaller - the head. It is divided into 4 parts for further drawing details muzzle.
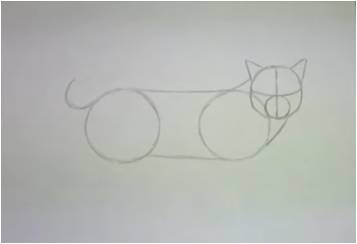
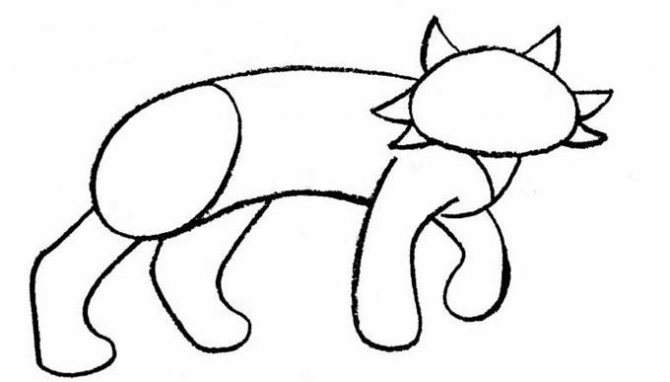
At the bottom of the circle of the head add another one. Torso connect, add ears and a tail.
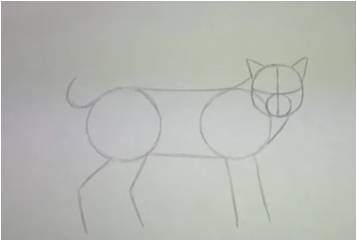
Complete the sketch schematically portrayed paws.
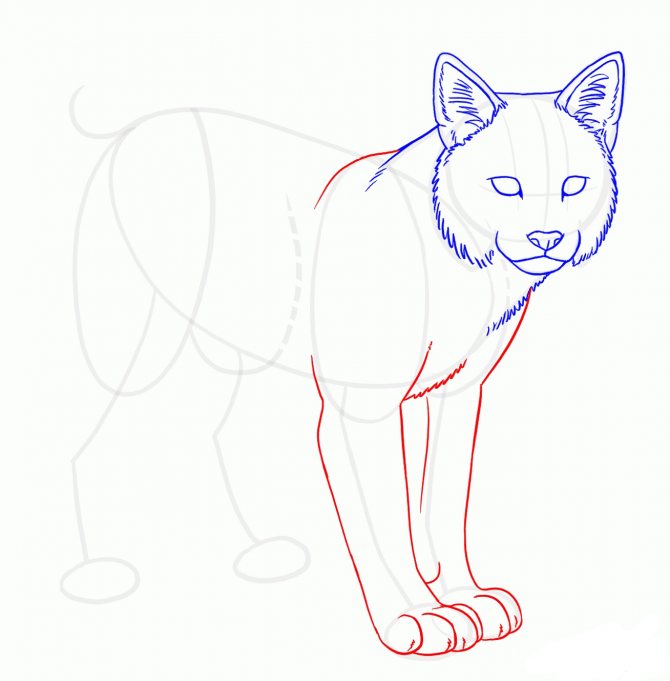
Step 2
The detailing of the drawing will begin with the head. We'll start with the eyes, shaped as a cat. Then we'll work on the muzzle, as shown in the picture: the nose, the mouth.
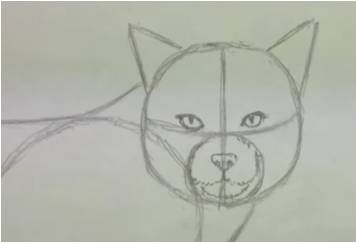
Then add mustache and hair on the ears, paying attention to the formation of characteristic tassels.
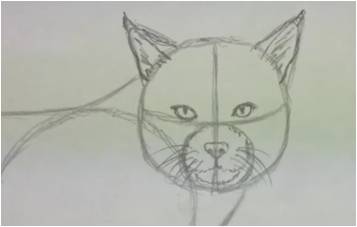
The whole contour of the head of the animal, fluffy cheeks, stroke, imitating fur.
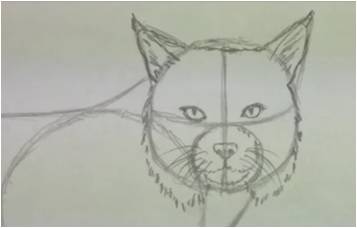
Now it's turn of paws. They are harmonious raptor, moderately long and strong. Give them volume and outline the entire contour with the same shading that was used for the head.
Do not forget about the tail.
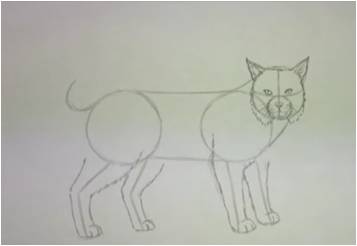
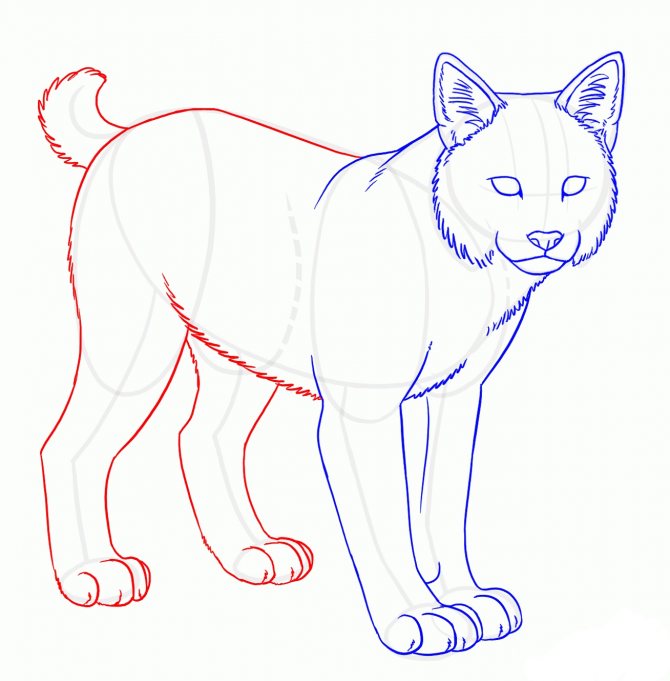
Step 3
Before painting, remove unnecessary lines.
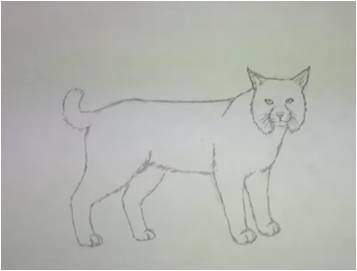
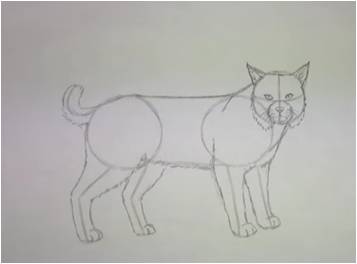
Give the whole figure volume by applying shadows.
In the end shading the whole picture, with darker spots depicting the camouflage coloring of the skin.
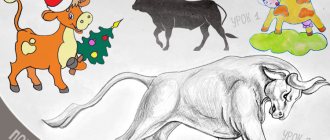
How to draw a tribal pit bull tattoo step by step
We are in a serious mood at the beginning of autumn and we can no longer enjoy the school season, as in the old days. So in keeping with that, the drawings will go more serious and somber. We enjoy doing them and indulge our own desires. But we are still sure that you will like the drawings and you yourself will easily be able to draw them. Now let's draw a tattoo again and this time let's see, How to draw an angry pit bull tattoo step by step. Our tattoo collection has a large collection and we're starting to love them a lot for your interest in the section. Everyone loves pit bulls, so we'll take a look at how to draw dogs with his example and we're sure this lesson will hit the top! Good luck with the lesson How to draw pit bull tattoos!
How to draw a tribal pit bull tattoo step by step
Step 1.
Start by drawing wide eyebrows for pit bull eyes in a wide angular tribal style. Sketch them in a dark color. The shapes and lines should be bold, thick, and stand out prominently on the canvas.
How to draw a tribal pit bull tattoo step by step
Step 2.
Outline the pit bull's eyes. Let's add shading around the eyes and with that you should make sure that the eyes end up looking very expressive and fitting for our dog.
How to draw a tribal pit bull tattoo step by step
Step 3.
Let's start the trayball drawing. Draw the shape of the nose and then add big lines to form the pit bull's cheeks and lips. You should also get angled lip linings to make them expressive.
How to draw a tribal pit bull tattoo step by step
Step 4.
Start drawing the left side of the dog's muzzle, which turns out to be at some angle. Take your time, as designing our tattoo is like carving it out of stone.
How to draw a tribal pit bull tattoo step by step
Step 5.
Let's draw the right side of the pit bull's face similarly, but slightly increase the shadow for the top part. Try to be symmetrical in outline.
How to draw a tribal pit bull tattoo step by step
Step 6.
Draw the dog's lower lip and chin.
How to draw a tribal pit bull tattoo step by step
Step 7.
Almost done. Draw simple shapes for the top of the pit bull's head, so that you get both ears and the shape of the skull.
How to draw a tribal pit bull tattoo step by step
Step 8.
Finally, you will need to draw fine lines for all the details on the shape of the dog's face to reinforce the bridge of his nose and the place between his eyes.
How to draw a tribal pit bull tattoo step by step
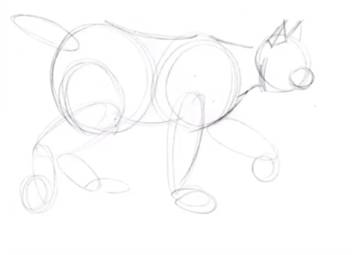
Running bobcat in pencil
The basic order of action when using this method, explaining how to draw a lynx in pencil, is similar to the previous one. A few differences only in the preparation of the sketch of the running animal.
Sketch of the body also consists of two circles, just ahead of another one - the head. The preliminary image of the legs is already three-dimensional, they are located, as should be in a running animal.
Connect the individual elements in a single figure with smooth lines. We add a snout, ears, and tail.
Detail starts with a more dense line outlining the entire body. Draw the head and paws.
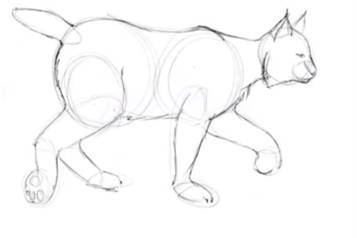
The resemblance will be enhanced by the imitation of wool on the sides, tail and cheeks.
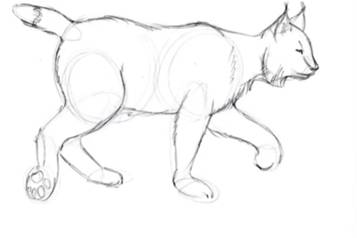
All that remains is to erase the auxiliary lines with an eraser and fill the finished drawing with color.
Lynx in a half-turn
Another interesting way to draw a lynx in pencil step by step, but in a slightly different perspective. The order of work is the same.
A preliminary sketch contains an oval of the body, marking the position of the paws, the head.
Working through the details it makes sense to start with the head. Tracing the contour with short strokes, tracing muzzle, gradually moving on to the body.
Neck, feet, and the rest of the body to specify pro using the same line of strokes. We pay attention to toes with claws, fluffy ears with tassels.
At the end it is necessary to remove unnecessary things and add volume by means of folds of hair as it is shown in the drawing.
A child's drawing
One of the easiest and uncomplicated ways to draw a lynx for children. It is easy to do and will suit those who are just learning to draw.
First, we draw two ovals, slightly at an angle to each other, which we connect to each other, as shown in the picture. This is the head and body of the animal.
Then we add paws, ears and fluffy cheeks.
Trace fingers on the paws, add a tail and the image of the muzzle.
Complete the drawing by removing unnecessary lines and finishing the wool with the appropriate coloring.
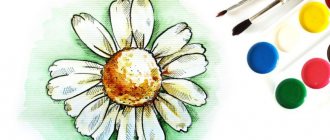
What you'll need
In order to draw a lynx we may need:
- Paper. It's better to take a special medium-grained paper: for beginners it will be much more pleasant to draw on it.
- Sharpened pencils. I advise to take several degrees of hardness, each of which should be used for different purposes.
- Eraser.
- A stick for rubbing out hatchings. It is possible to use a usual paper curled in a cone. It will be easy to rub the hatch, turning it into a monotone color.
- A little patience.
- A good mood.
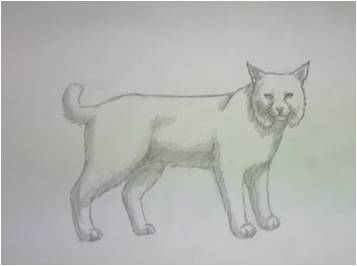
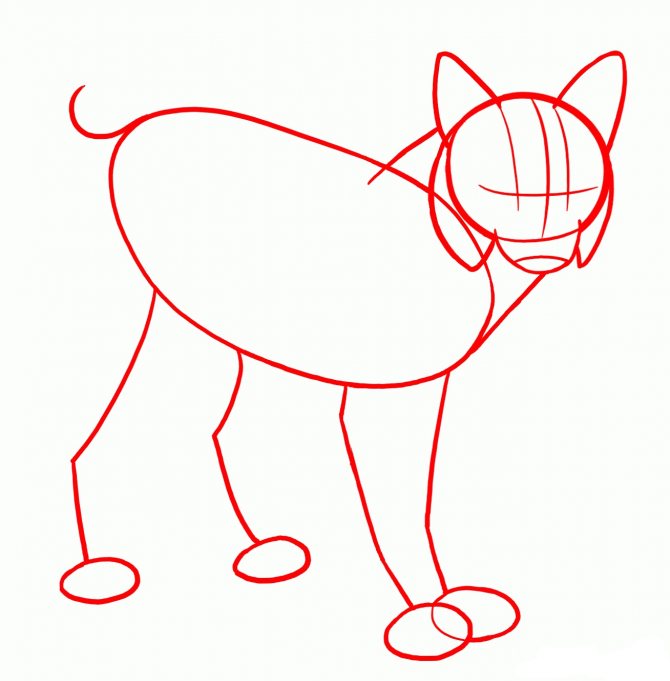
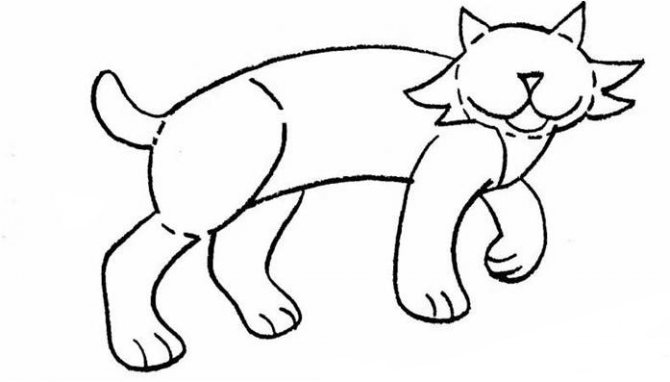
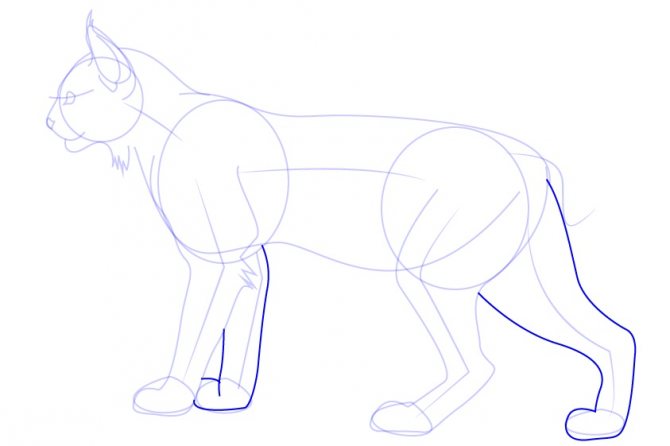
A simple example from the side.
A good way to draw a lynx step by step for children. The correct sequence of work is observed, and the animal is quite realistic. In this case, the process itself will be possible even for artists with minimal experience.
Prepare an auxiliary sketch: two ovals for the body and a circle for the head. Let's connect them to each other and add paws, slightly bent, as if the animal is preparing to run.
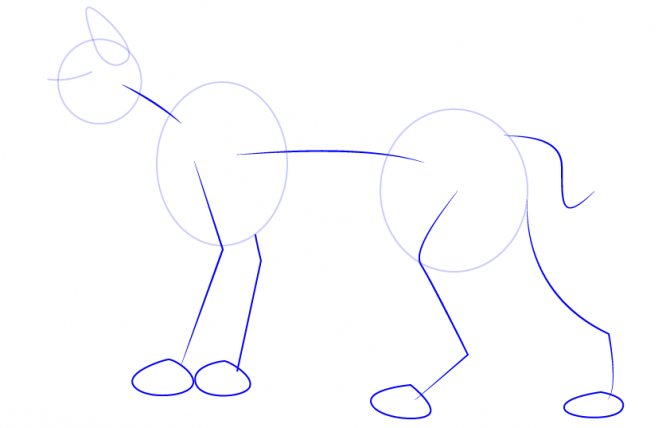
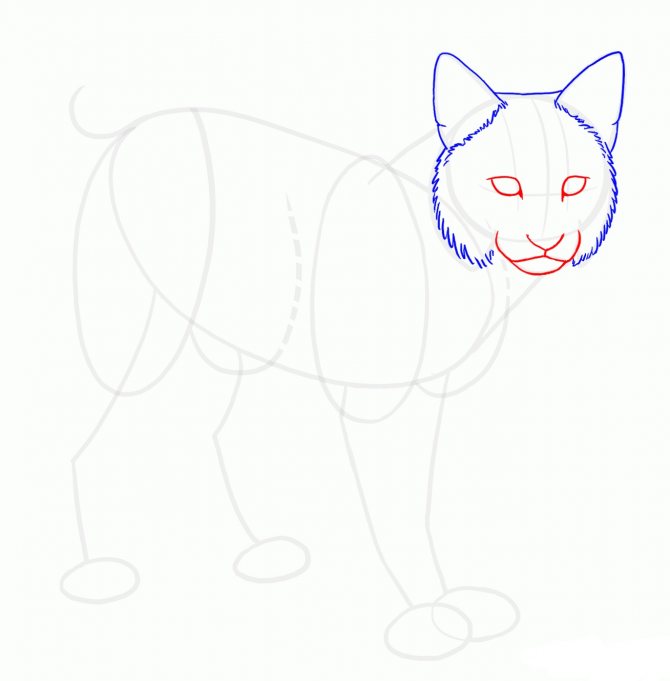
Begin to detail the image of the head. Trace its contour, trace large ears and fluffy fur on its snout. Add eyes and nose.
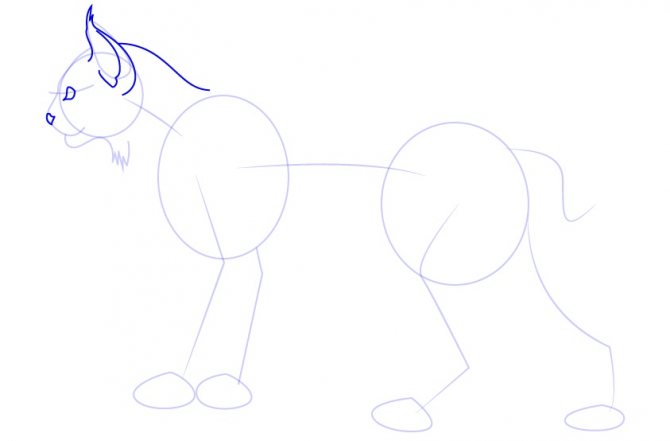
Let's make the body more precise by drawing it as shown below.
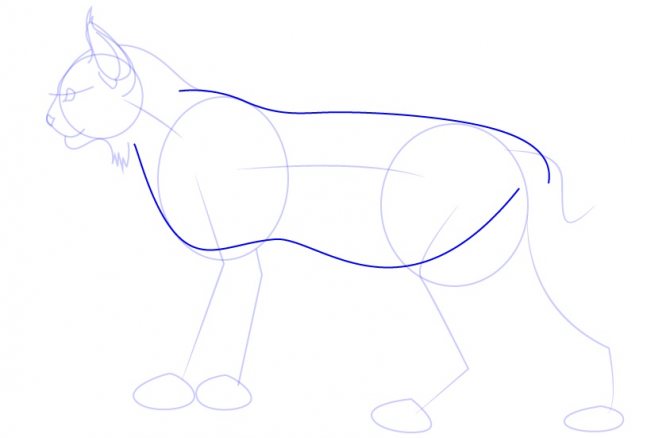
Let's work out the paws. First visible left, then more distant from the observation point right.
Let's take care of the finer details: tail, toes, whiskers and fur.
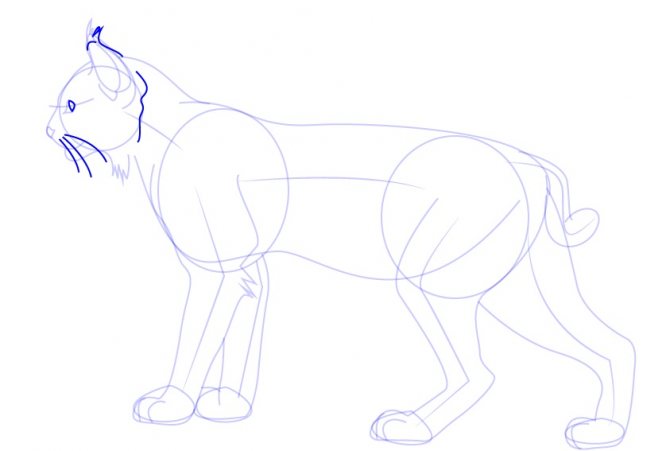
Lastly, auxiliary lines are removed and characteristic spots on the pelt are added.
Source
Pit bull tattoo: depending on the features of the sketch
Now let's talk about what is the pit bull tattoo value, depending on the features of the sketch. After all, the additional elements represent special traits and characteristics.
With demonic features.
Often such a drawing prefer to apply to their bodies men - strong, strong, self-confident. It can also indicate some features of employment or hobbies of its owner. For example, he may be:
- a boxer;
- a wrestler;
- or a simple man who likes martial arts.
Such a tattoo is a warning to others. It is as if it says that it is better not to joke with a man! He at any time can fight back, to stand up for themselves, their relatives, friends, and no one will not forgive the offense.
By the way! But also indicates that the bearer of the tattoo is vindictive. He will remember the offense until he takes revenge.
Although it is commonly believed that the demonic pit bull is also a talisman that protects against dark forces.
With a rail in its teeth
A little strange sketch for those who are just learning the art of tattooing. But in fact, this version of the drawing is relatively common. It hides a deep hidden meaning. The tattoo is perfectly suited for application on the shoulders or chest. It is chosen by strong men engaged in martial arts. The image suggests that the man can be violent, but he appreciates justice. He has a strong spirit and will persevere in hardships and difficulties. And also - will fight his enemies, resist them to his last breath.
Pit bull grin
Another common pit bull tattoo is a grinning dog. Perhaps the most aggressive version of the drawing. People who choose such drawings do not hide their character, ready to declare it at any moment. In addition, they are particularly wary of those around them, there is cruelty in their character, but, above all, to their enemies. But do not treat the grinning tattoo as a negative symbol. There may be positive traits in it as well:
- Leadership of its wearer;
- power;
- a high position and status in society.
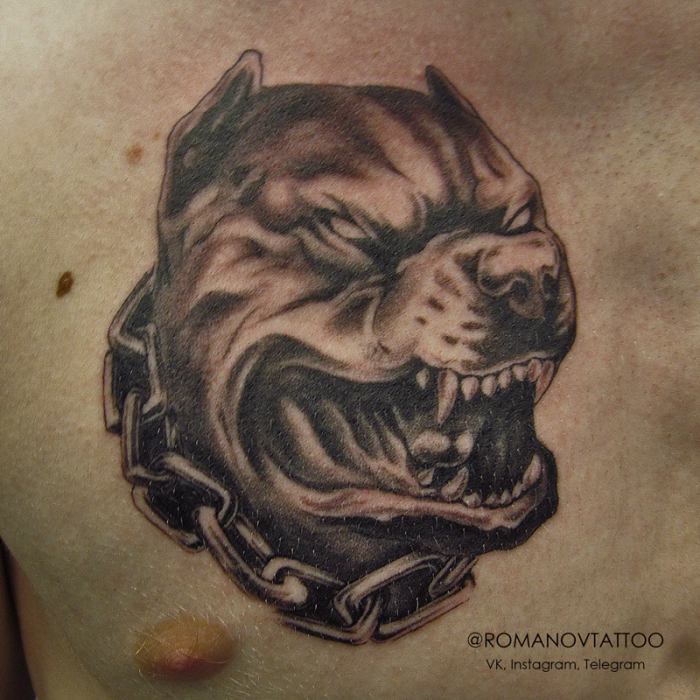
That is, by choosing to decorate the body with a biting pit bull, a person simply emphasizes his importance. But at the same time he is ready at any moment to express his own point of view, to defend it, to be on guard of his principles and beliefs. To protect family and friends. And most importantly, the pit bull tattoo, depicting a grinning dog, indicates that the man is stable in relation to his principles and beliefs. He does not succumb to influence, but he also may not recognize the established, generally accepted laws. Also, he is extremely vengeful and ready to punish the enemy for the slightest offense. Even if they did not inflict it, but it seemed to the man that they are ready to do it.
How to paint a watercolor lynx (photo and video)
Drawing with watercolor. Some might think it's childish, but believe me, many artists love and paint only with watercolors, neither oil nor acrylics, but watercolors, which are in their heart forever. I think there is no point in telling what watercolor is and why it is called that way, it is all described in Wikipedia and on the Internet.
And so, let me show you how to paint a small watercolor picture of bobcats in love. Watercolor painting, it is always a glaze and thin layers through which you can see the structure of the paper and the lower layers.
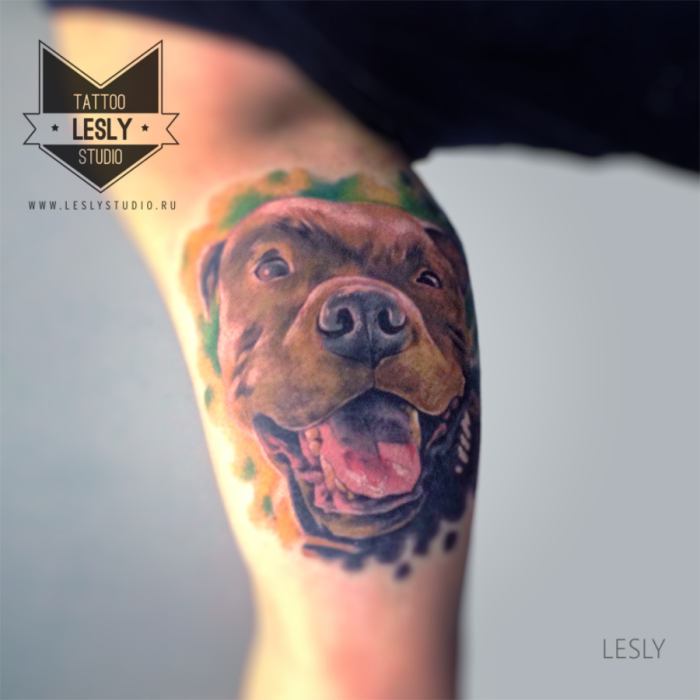
The meaning of tattoos for girls
It is typical for women to choose pit bull drawings in a funny style, more like cartoon characters. Cute dog face denotes the qualities of the girl's character, which she considers the main. Most often, the tattoo is associated with loyalty, sincerity, the ability to be friends and help.
For pit bulls it is very important to communicate, they can't stand loneliness, so the symbol of a pet adorning the body is a sign of friendly disposition, openness, sociability. Funny images indicate a good sense of humor of the owner, mental ease, the ability to calmly solve any conflicts and problems.
Leadership features denotes a tattoo with a pit bull, grinning fangs. They choose the girls with a strong mind, accustomed to achieve everything decisively and boldly. The authoritative nature of these individuals often helps them to achieve a high position in society, rapid career growth. The significance of their status is emphasized by choosing a fierce image for the tattoo.
The first transparent layers in watercolor
So acted and I, using a thick brush dampened the paper and "poured" warm and cold colors, large "masses" of snow surroundings and lynx hair.
Watercolor is painted a little differently than oil or acrylic (although both oil and acrylic can be painted the same way - in glazes). I've been painting from a light tone, gradually darkening it and enriching it with different shades. You can see on the picture that I have added purple on the snow, and there is more red on the fur of each of the lynxes. This is such a sort of underdrawing in watercolor.
Watercolor. Dark on light.
Once the background is created and the different shades of wool are filled in, you can work a little to darken those places that are in shadow (I used purple for this) and outline the dark spots on the wool. Do not use pure black for this, it is better to mix a few colors to get dark or alternately add blue and purple to the even. Once this is done, there is immediate volume and the bobcats are perfectly drawn and stand out.
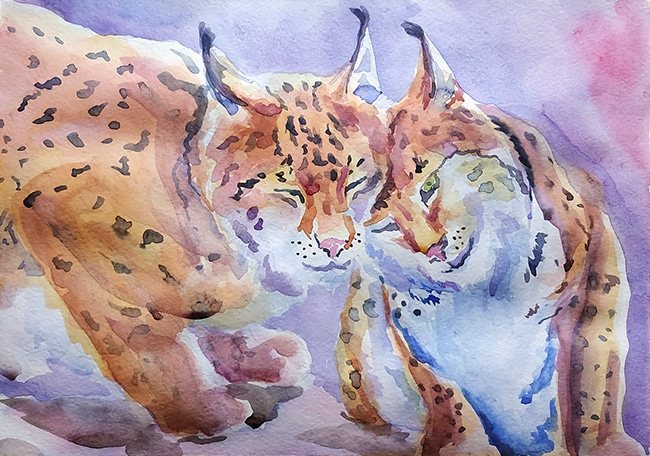
Masking Fluid or Watercolor Acrylic.
I could have stopped there, but I wanted to add snowflakes on the bobcats' fur. This is often done using watercolor masking fluid, which is applied to the paper before you start painting. After it dries, it easily rubs off the paper and leaves areas untouched by the paint. If you do not have this liquid, you can use acrylic or gouache which overlap the water colors if you paint on top of it.
Here is such a quick watercolor painting, on the example of which I briefly tried to explain the basic principles of watercolor painting. Also, don't forget to watch the video, which is located on the page above.
Did you like the article? Like it!