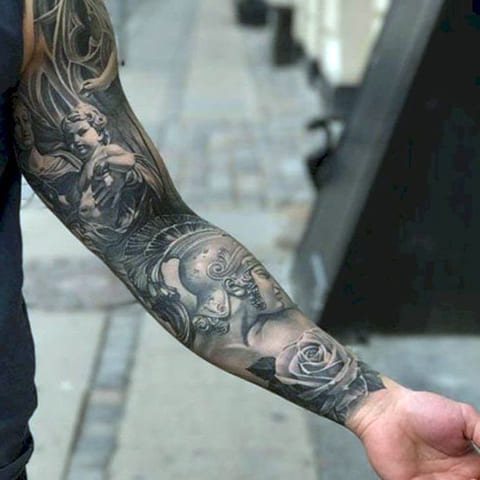
Tattoo of a man's sleeve
Tattoo sleeve for men - One of the most popular options for a large-scale tattoo. Among girls, of course, also meet such work, but less often.
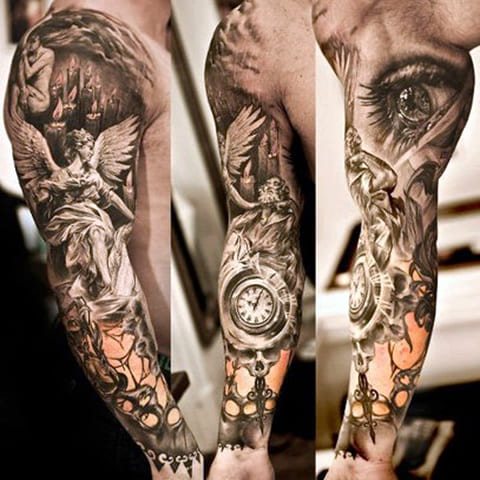
Tattoo sleeve for men - photo
In recent years, tattoo culture has become so popular that many already consider tattoos mainstream, rather than a way of self-expression or an indicator of an outstanding personality. There is some truth in this statement, but it is worth distinguishing between works made simply as a tribute to fashion, and real works of art made by talented masters and occupying large areas of the body, such tattoos certainly do not beat simply to keep up with fashion trends. Sleeves refer to just such works.
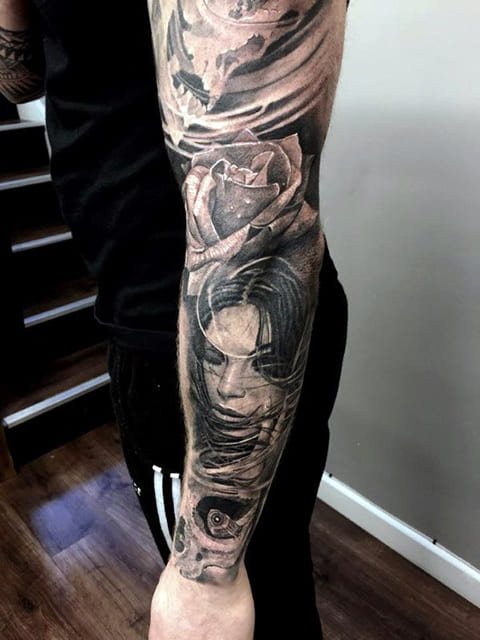
Sleeve tattoo for men
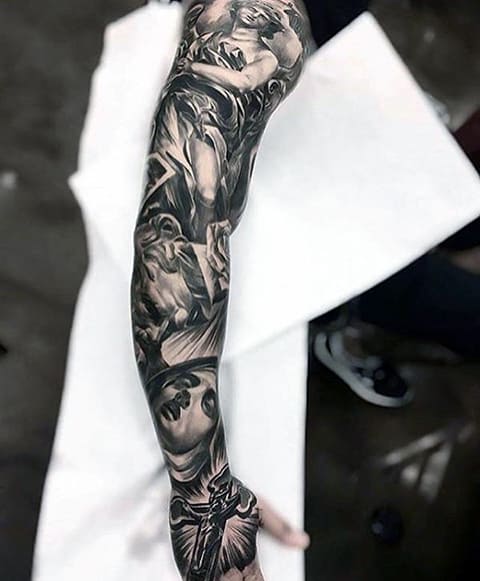
Tattoo sleeve for men
Today we will talk about the features of men's sleeve tattoos, suggest some interesting ideas about style and composition, and talk about some important nuances of the very process of drawing and further care.
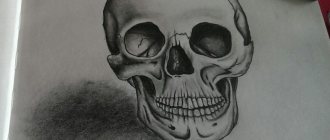
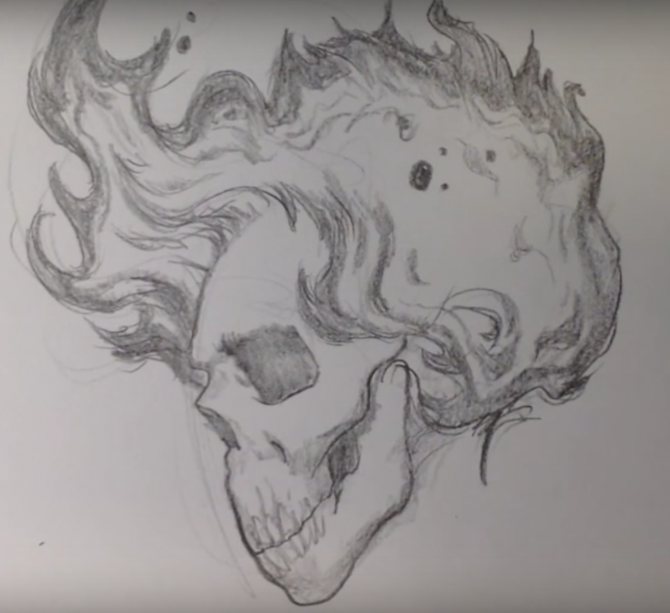
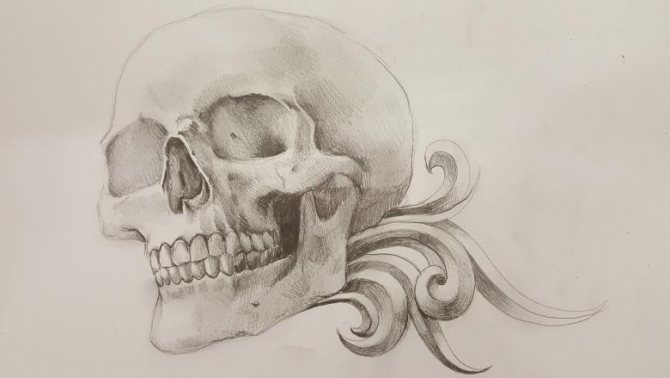
Finishing off the skull
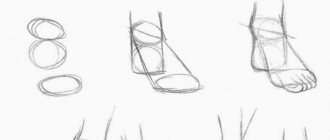
Step 1
The sketch is finished! For the final outline, we use a black pen or marker, for example, or we put enough transparent paper over the sketch to see the outline, and outline the skull.
First we draw the outline of the skull.
Step 6
Now, with a little pressure on the handle, we add details on the skull. Nothing super complicated, just a couple of "stitches" between the skull bones.
Step 7.
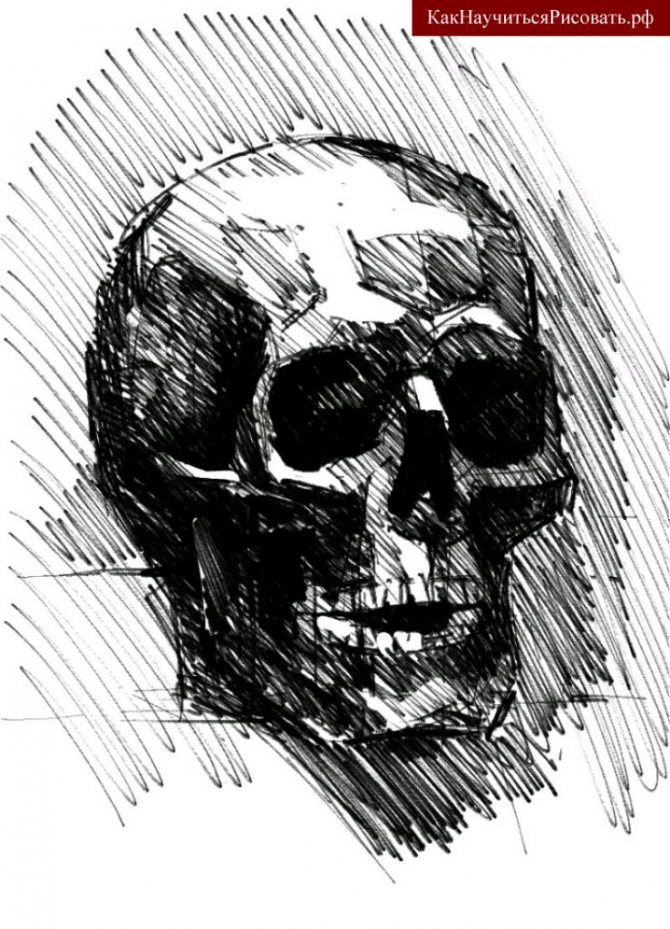
Using shading, apply shadows to give the effect of a drawing from a vintage book.
Great job!
From this lesson you learned how to draw a skull step by step. We also suggest reading other lessons, such as .
The skull tattoo has different meanings. In most cultures, the skull is considered a symbol of death. The tattoo can be used as a symbol that one is not afraid of death or as a symbol that life is fleeting and everyone will die, so each day is worth living as the last. Because of this symbolism, the skull tattoo can symbolize the death of a friend or loved one. Depending on the style of performance tattoo sketch can be intimidating and brutal or vice versa, colorful and bright.
Once upon a time such a tattoo was worn by people wishing to appear intimidating and terrifying. Used in prison tattoos and criminal gang tattoos. The skull tattoo for bikers is a talisman against death. From an artistic point of view, the sketch can be very spectacular by itself or in combination with other images: animals, fire, flowers, playing cards, wings, weapons, dice, jewels and coins. The choice of location on the body for the sketch is varied.
Drawing the base of the skull
Step 1
To start we draw a simple line. The length of the line depends on your preference - the longer, the larger the drawing will be. If necessary, do not be afraid to use a ruler.

Step 2
Determine the center of the line and mark it.

Step 3
Draw a new line perpendicular to the previous line. Let it be slightly longer than the first line.

Step 4
Draw a copy of the first line on the opposite side, forming a cross shape.

Step 5
From the resulting cross we will draw an oval. If you have difficulties with drawing such figures, do the following: start with light strokes between the two ends of perpendicular lines.

Then along these strokes, put a clear line.

Use this technique and finish drawing the oval.

Step 6.
Find the center of the left quarter...

...and divide this side into six equal sections.
How to draw a tattoo in the form of a skull
How to beautifully draw a full-length human female figure in step-by-step pencil for beginners and children? How to draw a human female body, arms, legs in clothing? How to draw a human female in sideways, motion in pencil?
When imagining a tattoo, images of flowers, skulls and interesting inscriptions most often come to mind. Of course, the variations are actually much more - the number of possible images for tattoos is limited only by the fantasy of the master and the customer.
But, admittedly, even imbued with all available facts, not everyone is ready to change their own body - for example, some people simply change their preferences almost every day, and are not sure that the image that was liked today, will seem nice tomorrow. But there is a great way out - just draw a tattoo yourself, even if not on your own skin, you can get by with a piece of paper.
So, in this lesson we will try to draw a simple tattoo with a skull and arrows - it looks concise, and to realize the conceived image is not too difficult. If you are interested in real tattoos more than just drawings, then you just need to read the most interesting and relevant information about tattoos - there you will find a lot of useful information.
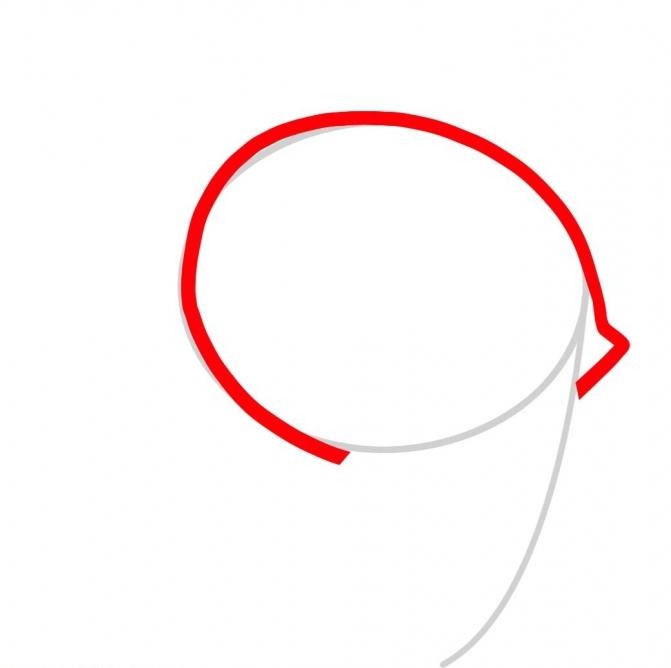
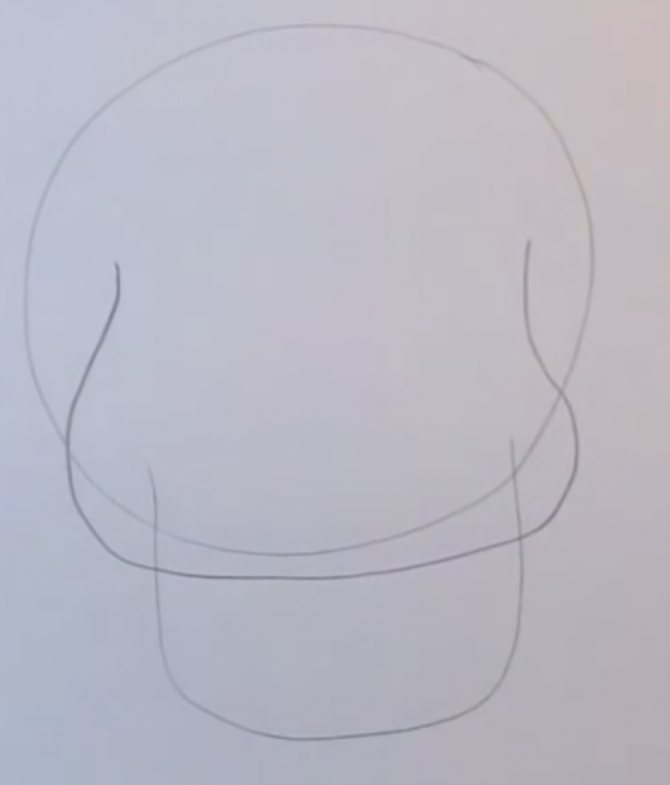
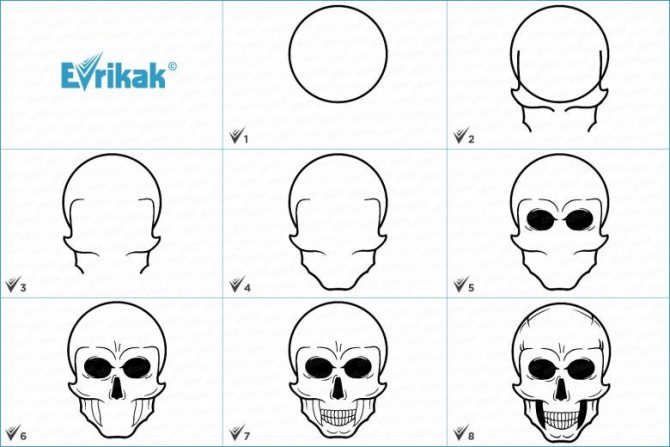
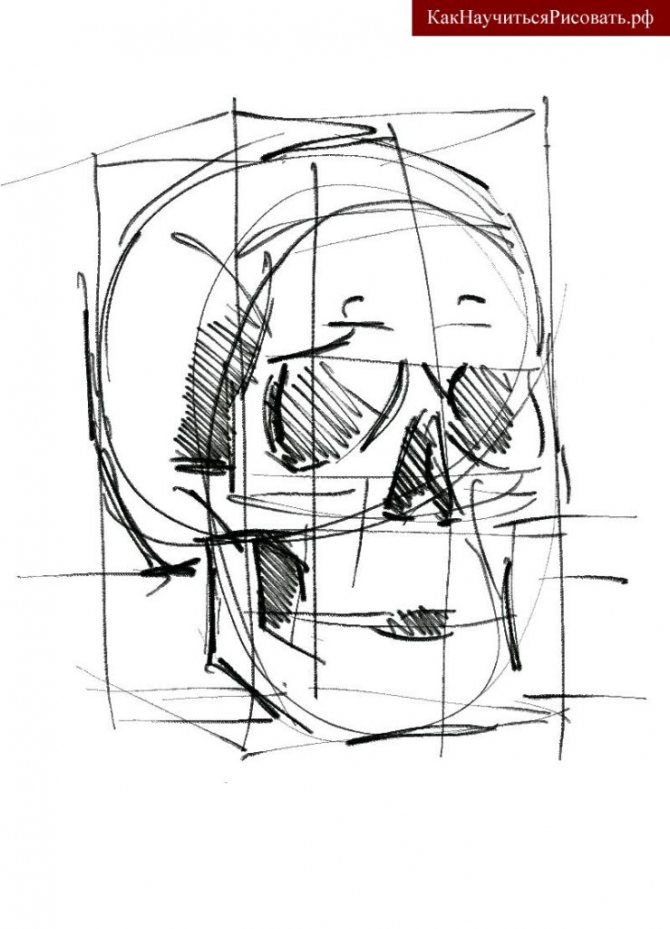
The very first step in drawing a skull tattoo is a simple circle base. It is not necessary to make it too neat - it will be enough that it just looks like a circle. We divide the sketch by a pair of guiding lines, which should be quite light and thin - later they will have to be erased.
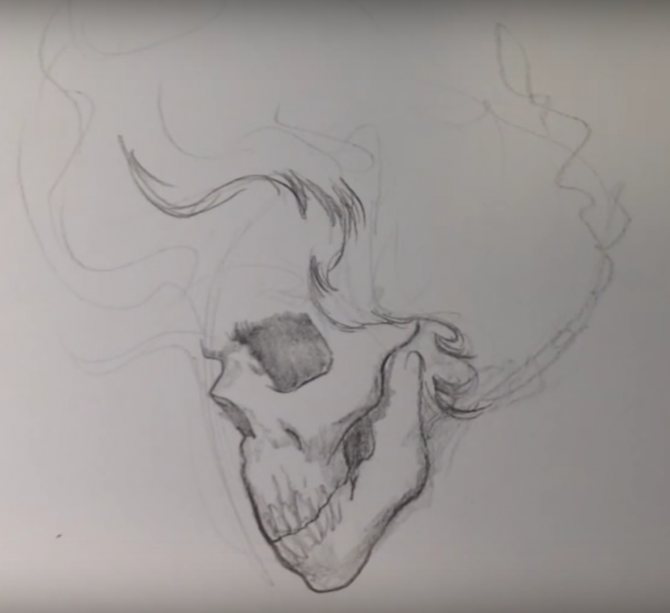
Next, we will need to sketch the shape of the skull. This tutorial has described the process of sketching the skull in detail, so you can easily handle it. The top part is rounded, followed by the cheekbones protruding on the sides and the outline of the jaw.
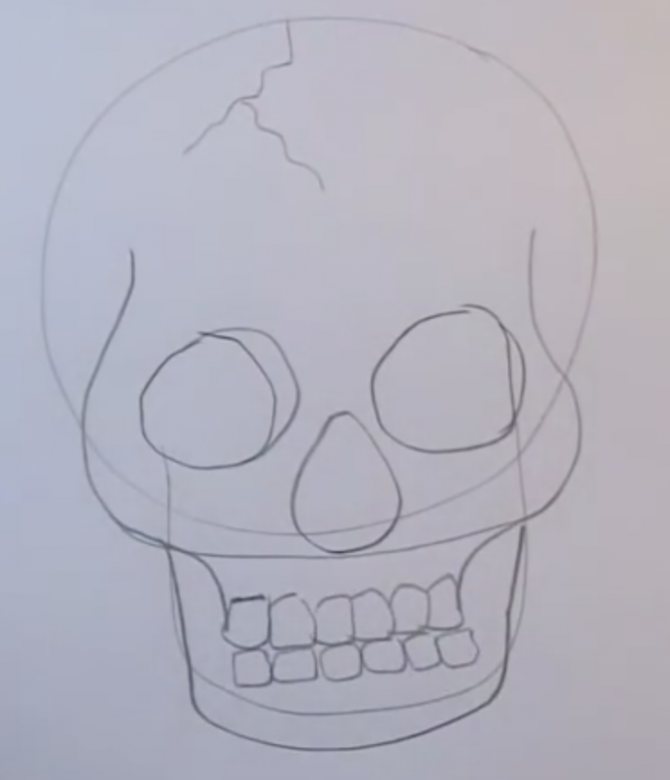
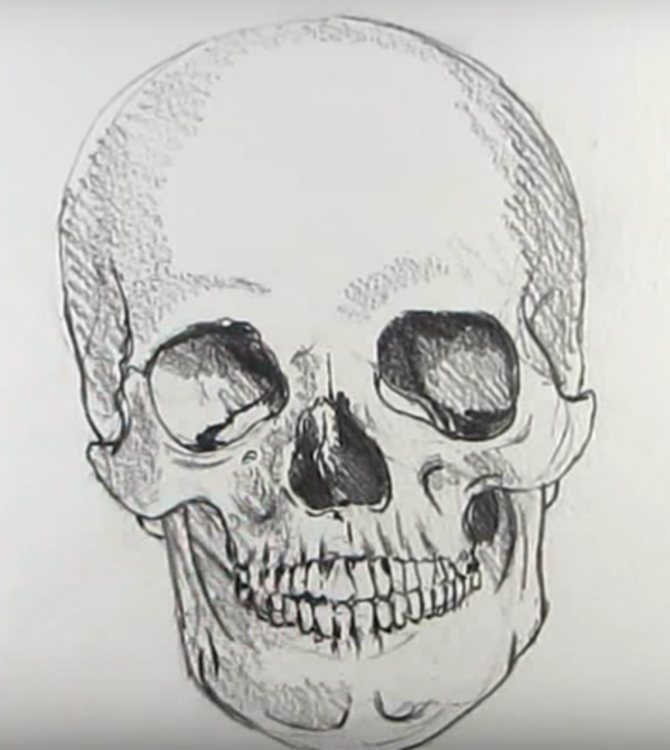
The next step is to draw the "facial features" of our skull. Despite the closeness to the principles of drawing an ordinary human face, it all looks very sinister. On the horizontal guide line we draw the eye sockets, just below - the hole where the nose is usually located.
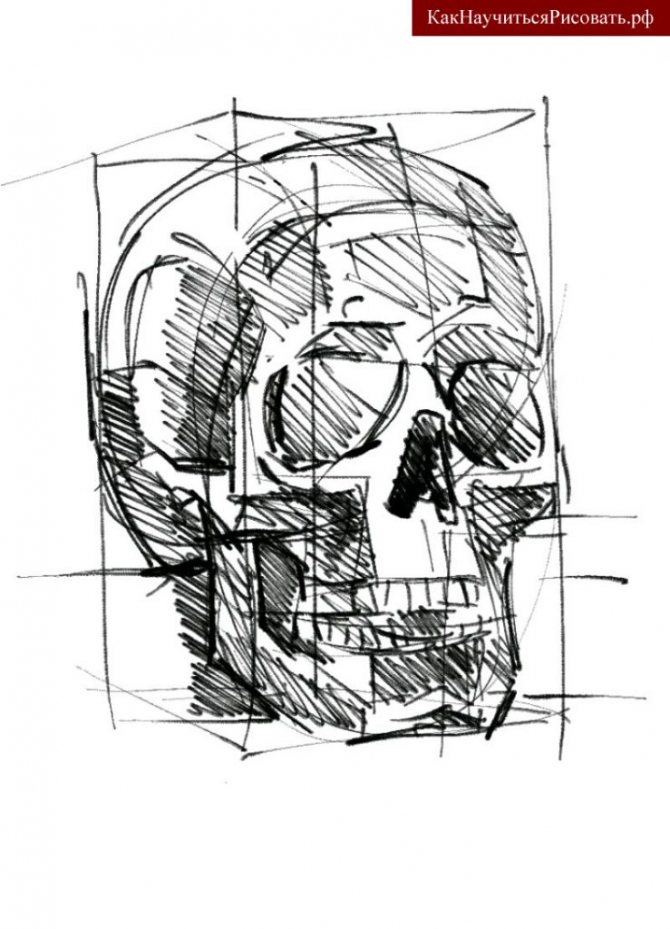
In this step we'll take care of the details - we'll add relief and extra lines that make the "look" of our skull expressive and intimidating, and we'll draw the teeth.
Behind our skull we draw a graphic pattern in the form of an arrow, consisting of several lines.
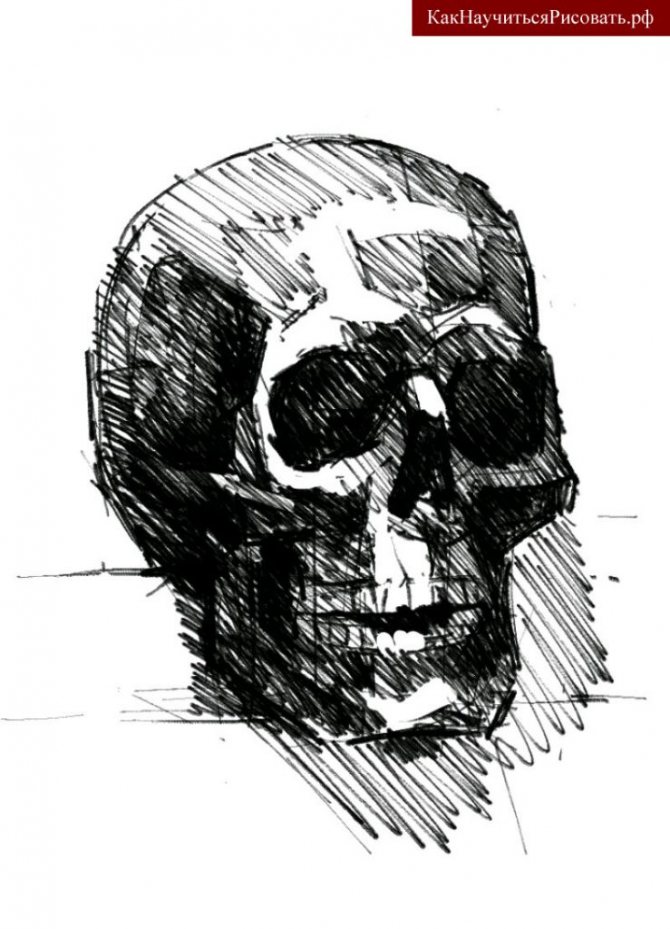
The last step is to fill in the holes in the skull.
If you want to add some color, you can use almost any shade, just make sure that the drawing looks voluminous.

Types of skull tattoo designs
- "Candy", Mexican style. El Dia de los Muertos(Spanish, day of the dead) is a popular festival in Mexico in which skulls play a central role. People gather as families to honor their deceased loved ones. During the celebration, skulls are made of candy. From here, the execution of the sketch with flowers and jewels is taken, which is often chosen by girls.
- Men's tattoo. The brutal sketch will show those around him that his master is not afraid of death, or recognizes that the outcome is inevitable.
- Women's tattoo. The skull tattoo is not just for brutal guys. Girls choose the tattoo for the same reasons. The sketch can be made more feminine by the colors, jewels and bright colors.
- Pirate tattoo. Do you consider yourself a pirate? Skull and crossed bones are great for people who live by their own rules, regardless of society's opinion.
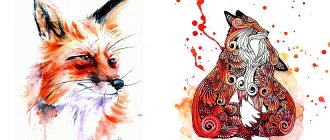
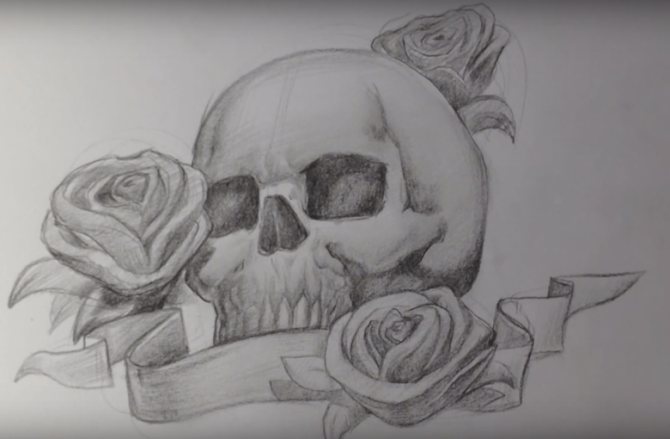
- Skull and Roses. Done in honor of a friend or loved one. Looks contrasting, bright and stylish.
- Animal skull tattoo. Means balance of life and death, the transition from the physical to the spiritual. Another meaning is longevity.
How to beautifully draw a full-length human girl figure in pencil step by step for beginners and children? How to draw the body, arms, legs of a human girl in clothes? How to draw a human girl in sideways, motion in pencil?
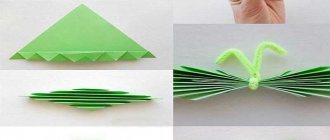
Graffiti on paper
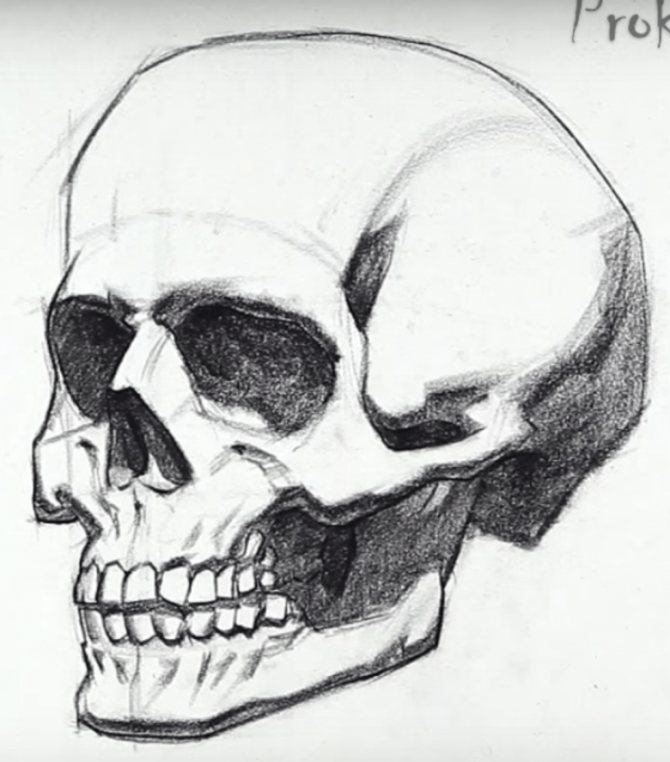
Skull pencil drawing three quarters. drawing a skull in profile, step by step
If coped with the previous options, let's complicate the task a little. Now let's draw a graffiti with the silhouette of a skull on it. If you are just learning to draw, you need to follow our instructions completely to get the desired result. For this work you will need a simple pencil and a black marker to color the drawing. Once we have these things ready, we can start the creative process.
How to easily draw graffiti in the form of a skull:
Skull graffiti is ready. Here's how you can draw a realistic skull step by step. The work, of course, for self-drawing is difficult, but, and according to our instructions, you may well be able to repeat this masterpiece in your scrapbook.

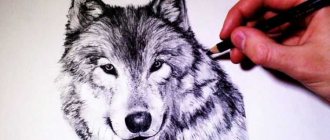
How to Draw a Tattoo with a Pen Step by Step
How to draw a skull?
The human skull became so popular that they began to draw it not only in pictures, but also draw different tattoos on the human body.
Many people have used the skull drawing not only in tattoos, but also in other accessories. Now learn how to draw a man's skull with a simple pencil and use step by step these drawings to draw the picture correctly.
Draw two stakes: one for the upper head, the second for the jaw, then draw the entire frame of the head.
Draw such a cheerful face to our skull, then redo it.
We remove the drawn lines and leave the ones we need for a better look, outline the skull with shadows.
We finish the drawing step with simple shadows.
How do I draw a person's skull?
This is pretty much the same thing we drew in the first lesson.
We draw two stakes and draw lines in them.
Also draw a funny face.
Circle the entire human skull.
We proceed to draw the dimples of the eyes, the nose and lastly the jaw with teeth.
Drawing with shadows for a better look.
tutatu.ru
Easy Example
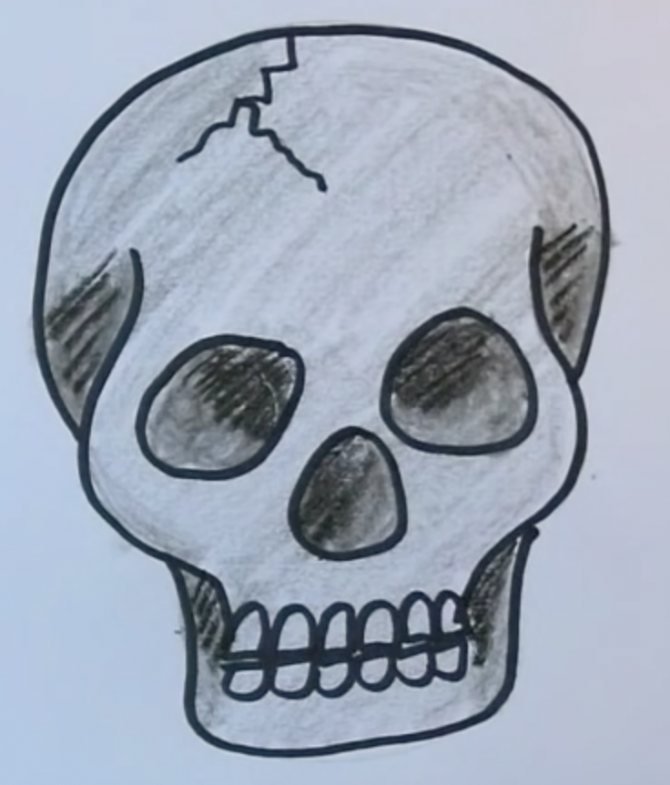
For beginner artists, we suggest drawing an easy way to draw a skull. It's not realistic, but it gets the point across.
Draw a circle, then finish it with a U-shaped line. Then draw a curved line something like a pot or a horseshoe (as your imagination will allow).
Draw eye sockets and an oval nose. From your "horseshoe" finish drawing the upper jaw and 2 rows of teeth. Draw a crack on the back of the head.
Erase the auxiliary lines and skirt the skull.
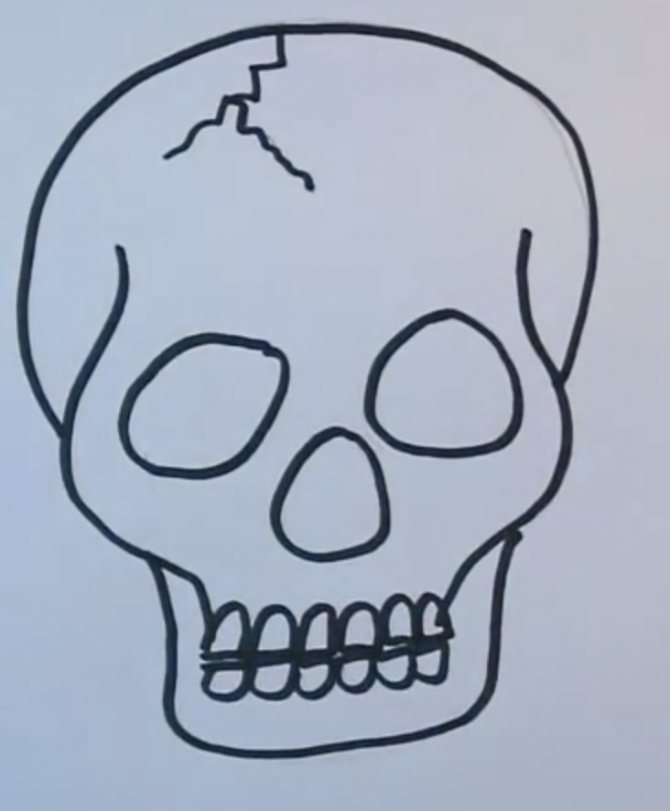
Shading the drawing, making blackouts in places.
History of the skull tattoo
- A centuries-old Spanish tradition of marking the entrance to the cemetery grounds with a skull and crossed bones.
- In the 17th and 18th centuries, pirates used skulls on their Jolly Roger flags. The flags inspired terror and urged victims to surrender quickly. Because of their life style, pirates remain a source of inspiration for many freedom-loving individuals today.
- Germany. The symbol of the Totenkopf (German: Head of Death) was a skull, sometimes on crossed bones. Frederick the Great's hussars wore black uniforms with the Totenkopf on their hats. The same uniform was worn by members of the Nazi SS during World War II.
- America. Since the 19th century, the skull on crossed bones marked the containers with poisonous substances. In today's world, it means poison and the danger of death in many countries.
Drawing a pirate skull
To depict the pirate flag is quite simple: the outline of the skeleton of the head and crossed knuckles, it is also called the Jolly Roger. But we offer you the Jack Rackham pirate flag with crossed swords.
Drawing of a skull in the hood
Of course, if you have been able to draw all the previous pictures, you can stop learning this material. But we suggest that you reinforce what you have learned and draw the silhouette of a skull in a hood. This drawing is suitable for both children and adults, the main thing is to stick to our instructions and follow all the requirements, especially if you are new to the visual arts.
We recreate the silhouette of the skull:
- Starting in the middle of the sheet, draw the shape of the skull's nose.
On the sides complete the drawing of the eye sockets. Sketch the borders of the head under the hood. - Highlight the cheekbones and mark the perimeter of the lower jaw. Step back from the bottom a little bit up and make a preliminary sketch of the mouth. Draw a lot of upper and lower teeth in the mouth. Sketch the borders of the hood.
- Detail this sketch with folds. Step back from the drawing of the skull a little bit down and show the bones and fingers of the hand. Continue to detail the hood and the rest of the cape.
- Then, finish drawing the border of the hood on the left side. Draw around the entire drawing with a black marker.
Highlight the folds on the cape on the left side. Show the line separated the hood from the cape. Lines specify the folds on top of the cape. Isolate the sleeve from the clothing. - Next, draw the silhouette of the limb. Detail the sleeve of the cape. Fill in the eyes and the hollow of the nose with marker. We bring out the dark places in the jaw and at the end under the head we finish drawing the spine, which supposedly holds the skull.
The drawing is ready. You see, to portray the skull on paper is not as difficult as it may seem at first glance. If you follow the instructions in detail, the work is quite manageable for a child.
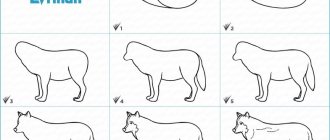
Another suggestion to read the material, the drawings of the wolf. These images are no less interesting than our today's material.
Skull with swords
The second option of skull drawing is a little more complicated than the previous one. First you need to draw in the left edge of the sheet a slanted segment. To it you need to add a vertical pencil sketch. To this part of the work it is necessary to add the outline of the sword handle.
Next, we complete the work with the lower part of the bone. Next you need to draw another part of the sword handle. It is necessary to draw a line up and deduce the line of the sword. The next step is detailing the drawing. In the middle area of the skull it is necessary to draw a line that will divide the facial bone into equal zones. The next step is to outline the handle of the weapon.
The final step in creating the drawing is to draw the teeth to the skull. Cracks can be outlined in the frontal and zygomatic area. The cracks will give the skull picture a natural appearance. The next step is to draw the eyes in the outlined circle. On the skull, you need to draw the hollow of the nose and detail the handles of the weapon behind the skull.
To give a more saturated shade to the drawing, it is necessary to trace the outline of the skull with a marker. Areas that require a more saturated drawing should be painted over with a black felt-tip marker.
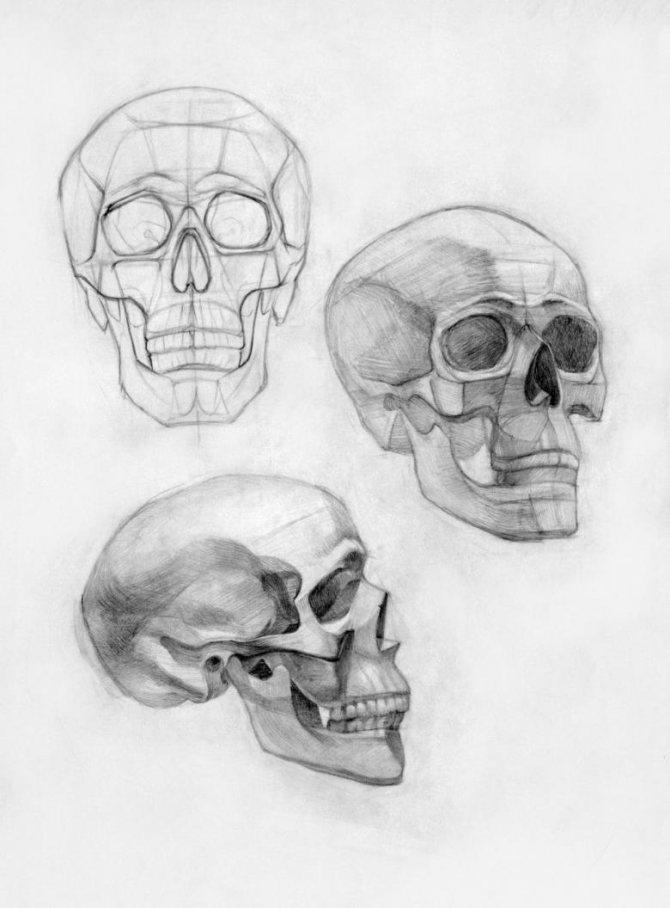


The process of drawing the human skull
Drawing the base of the skull
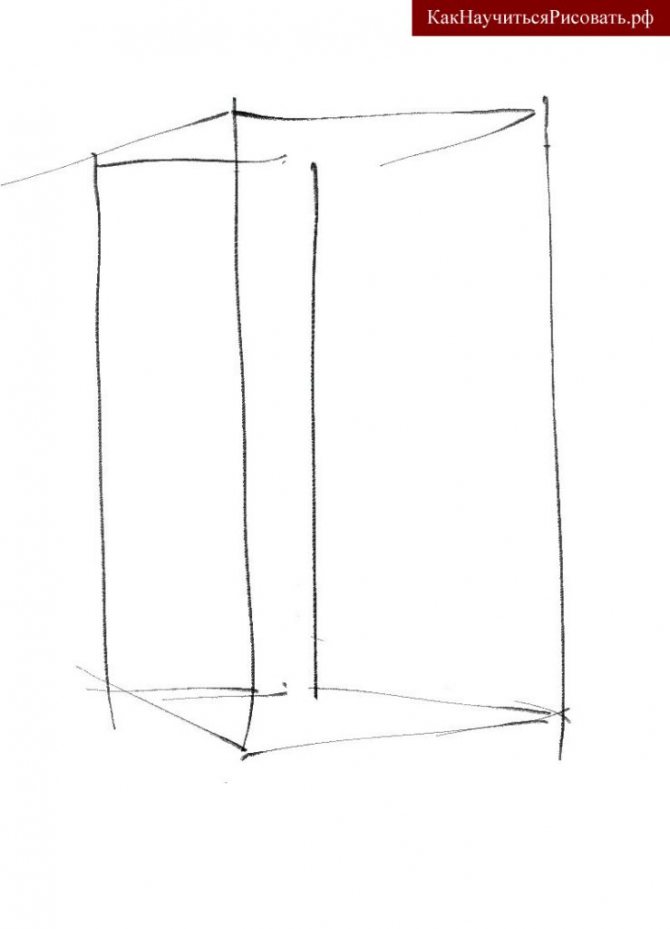
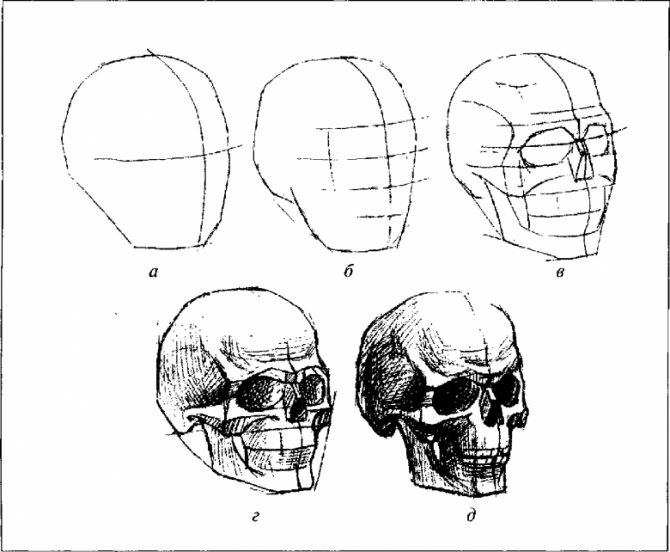
Composition and Drawing the Basis of the Human Skull
When drawing complex shapes, you must first break them down into simpler shapes. Then, the simplified shapes should be crushed until the detailing is as acceptable as possible. Any rounded shape can be inscribed in a cube or parallelepiped. Skull is a rounded shape, so first let's build its base - a vertical rectangular parallelepiped in perspective.
Composition of the brain and visceral skull
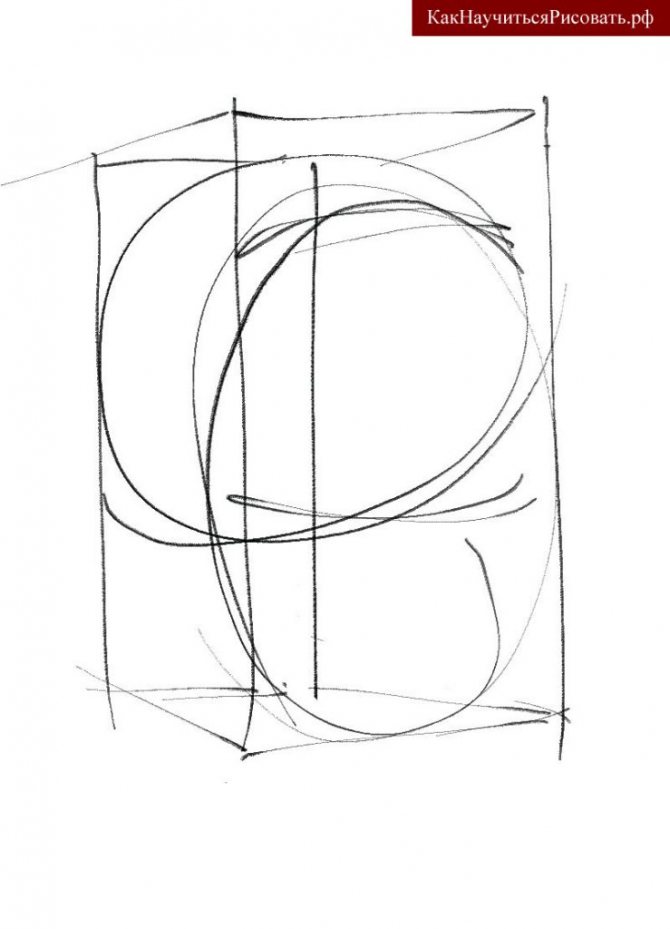
Composition of the cranial and visceral skull in the drawing
Into the previously drawn parallelepiped we inscribe the compositional arrangement and . We denote the location area of the skull by the horizontal oval at the top of the parallelepiped, and the visceral by the vertical oval at the front of the parallelepiped. At the same time, the oval of the cerebral skull overlaps the oval of the visceral skull with its front part. At the place of their intersection will be located , eye sockets and .
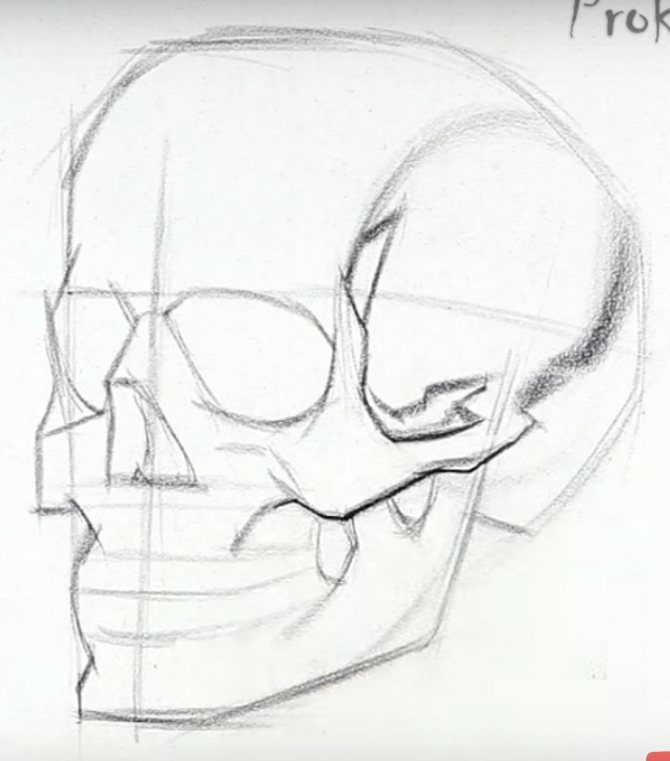
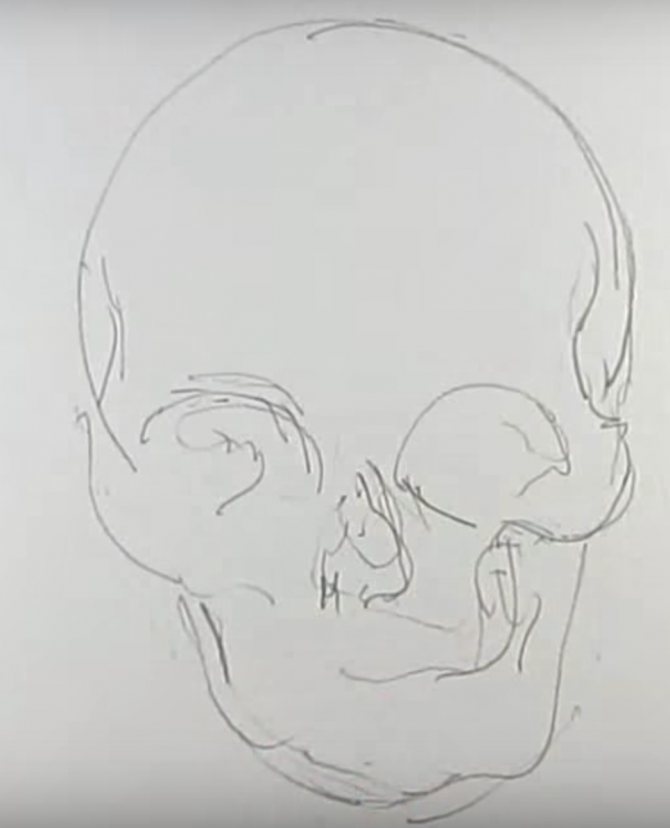
Drawing the main construction lines
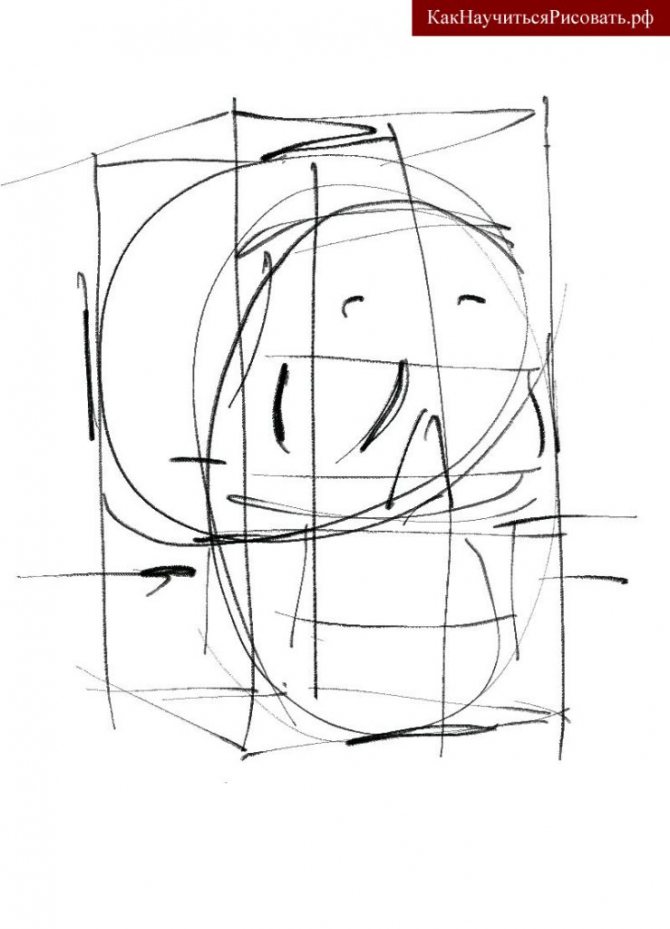
Drawing the main lines of the human skull
Find the midline of the front part of the skull. Determine the position of the largest areas of the skull: eye sockets, nose, cheekbones, boundaries of the lower jaw, visible outlines of the occipital part of the skull.
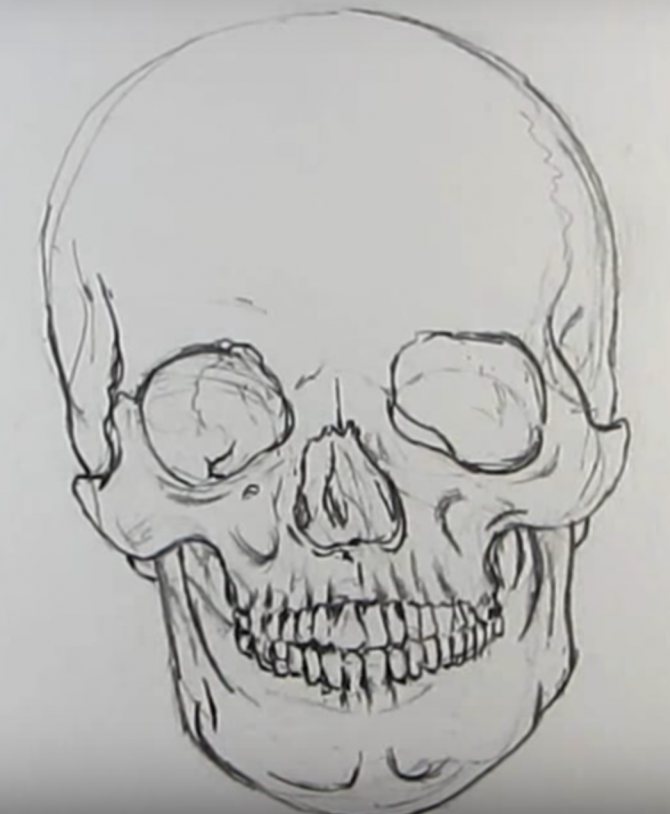
Clarification of large details
Clarification of large details.
Clarify the contours of the largest details. Try to keep the principle of planar construction of forms. Schematically applied minimal tone to indicate the darkest areas.
Fraction of large shapes into small ones.
Fraction of large shapes into small ones.
Previously outlined contours of the skull are crushed into separate smaller planar areas. Determine perspective directions of the crushed areas. We outline their degree of illumination. Strengthen shadows. Adhere to the principle of plane image.
Complication of shapes.

Complication of shapes
Even more break large shapes into small ones to get acceptable detail. Linearly and tonally combine small shapes into a single whole. Outline the surrounding space.
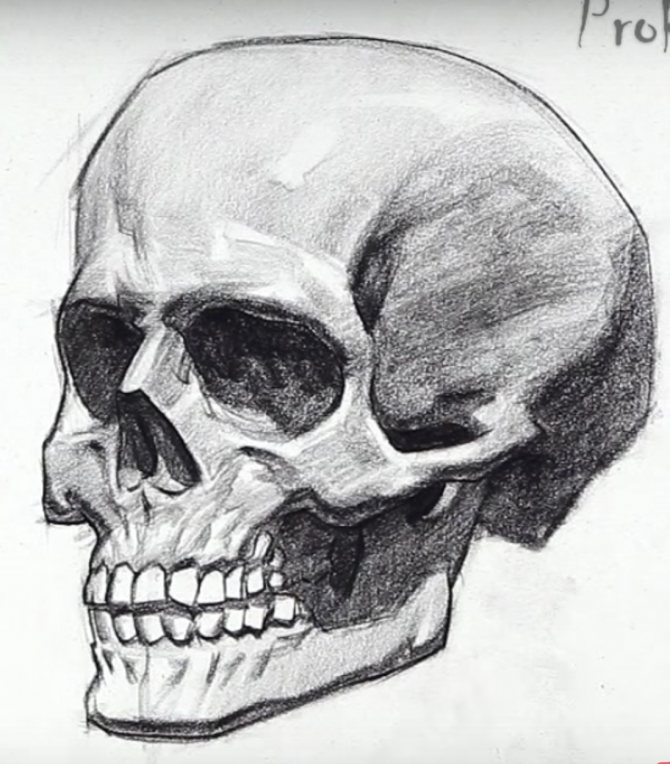
Drawing generalization
Drawing generalization
At the same time continue to detail and generalize the shape of the skull. Through even greater detailing, important and noticeable details are highlighted. By generalizing, less important details are made less noticeable.
Increasing the spatiality of the drawing
Increase the spatiality of the drawing
To give a feeling of space and airiness to the drawing, we emphasize the background
Draw attention to the places where the skull touches the background. Find the right contrasts for each area of contact of the skull with the background
With the help of light and shade contrasts strengthen the important and close to the viewer details. Soften the tone on the distant and less lit areas.
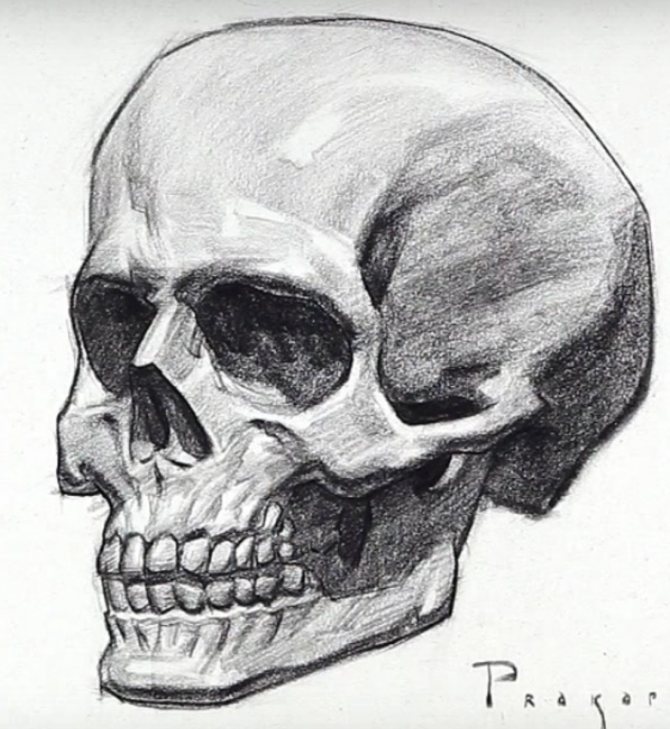
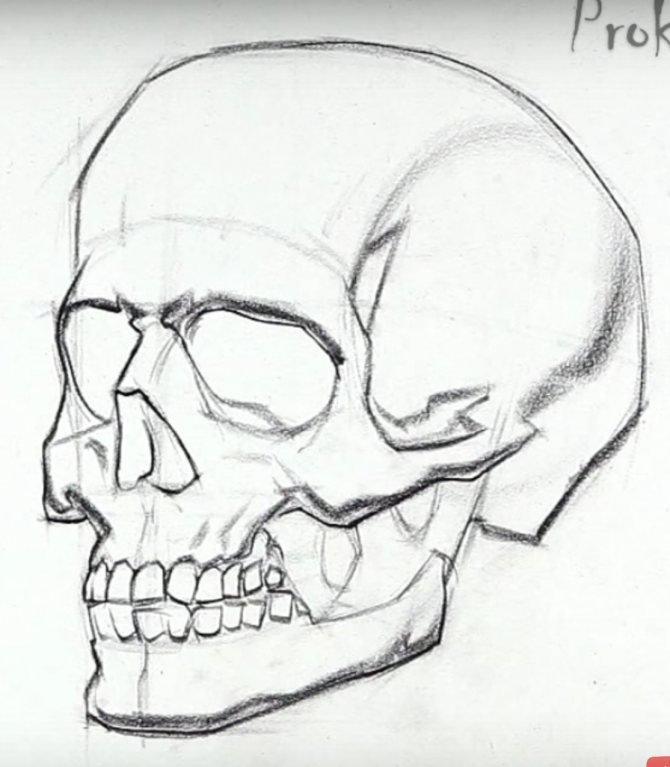
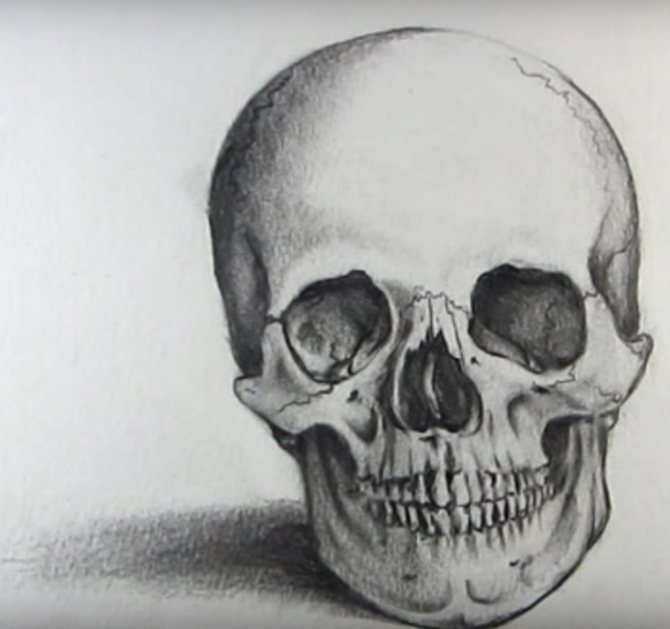
Completing the drawing
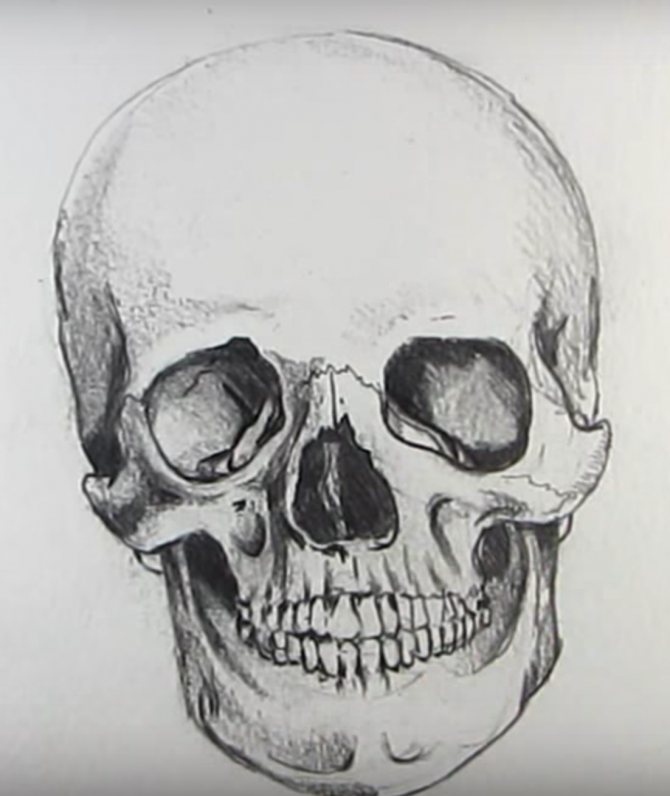
Drawing the skull of a man.
Reconcile the final proportions of the skull and make adjustments if needed. For a finished drawing, add more gradations of light shading and develop important details as much as possible.
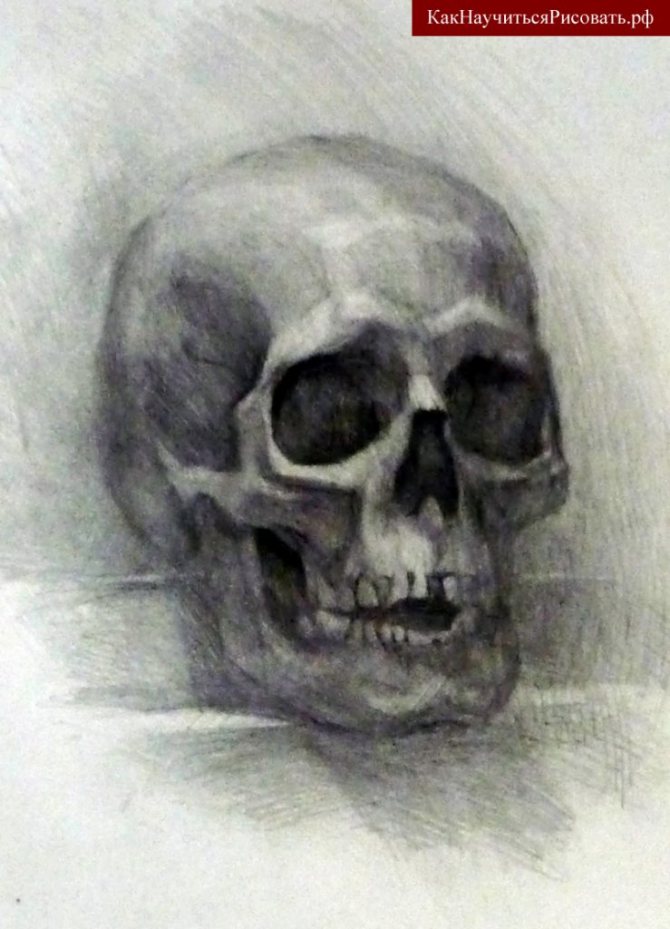
Drawing the skull in pencil
Images in plain pencil on a white background create contrast, they are saturated, immediately attracting the interest of viewers.
With a hard pencil, sketch the main features. Draw the frontal bone as a circle, then draw the zygomatic bones and the lower jaw. Roughly mark the eye sockets and nasal slit, and draw a line where the teeth will be. Do not put pressure on the pencil, because it is a sketch.
Draw the temporal lobes. To represent the eye lobes, draw quadrangles with rounded corners, and the nose can be likened to an inverted triangle. Draw the fine details.
With a dark pencil, draw all internal planes and start shading.
Add details, such as breaks in the bones. Armed with different pencils, apply highlights and shadows on the horizontal surface.

How to Draw an Army Skull Tattoo Step by Step
Remember the other day when I told you about my fight with the mole, friends? It made me think of our military defenders! These guys are never afraid of anything, unlike me, and are always looking for ways to just emphasize their awesomeness. They often have cool symbolism. We, for example, have already drawn a USMC bulldog. And today we are also going to practice drawing a battle skull with a beret and ammo! We have also drawn skulls more than once and that's putting it mildly, we draw them all the time as tattoos, death, butterflies, vampire or just skeletons in love. We've drawn the skull of the Punisher and the skull of the Pirates of the Caribbean! Now let's draw a military skull with minimal weaponry. The military is going through total hell and this symbol should convey at least part of their world. The face will be adorned with combat coloring, as one of the characters in Apocalypse Now had. It seemed to be Martin Sheen, but my memory may fail me on that fact. Although there was a scene where he kills off Marlon Brando's character, and it was so great, I wish I could watch that movie over and over again!
Anyway, the army skull will be wearing a green beret, holding a military badge in his teeth "flashing" with only one eye. The bullets and flames in the background will tell you that he managed to go through war and hell. I love how the author turned out with this drawing, and I hope you guys enjoy this great army skull drawing lesson.
How to draw an army skull tattoo in steps
Step 1.
Let's get to the beginning of our drawing. Let's do the skull first, and if you like drawing skulls, and especially in the form of tattoos, you'll love it. Start with a circle for the base of the skull shape, and then draw a helper line.
How to draw an army skull tattoo in steps
Step 2.
Slowly start drawing a military beret. Start with the letter V for the bottom of the border, which sits right on your forehead, and then continue to draw the beret as you see here in our drawing. You will need to add lines to detail the folds and shape. Add a more prominent trim line around the shape of the beret.
How to draw an army skull tattoo in steps
Step 3.
You will now begin to draw the shape and structure of the skull. Start with the rounded sides of the head and then add sharp raised cheekbones. Add lines for the nose part of the skull location. Moving on!
How to draw an army skull tattoo in steps
Step 4.
Then, using the face base line from the first step, start drawing the eyes, which will look as evil and crazy as possible. Cover one eye completely, and in the second one we add an eyeball. Eyebrows converge on the bridge of the nose, and under the eyes noticeable creases, to express and convey all the stress and tension of the tattoo. Draw a nose and also paint it completely black.
How to draw an army skull tattoo in steps
Step 5.
You will now draw the top of the jaw of our skull. The teeth should be long and narrow, and there we should also add dimples over the teeth.
How to draw an army skull tattoo in steps
Step 6.
Continue to carefully draw the lower jaw as well as the bottom row of teeth. Draw a token in our special forces man's mouth, which he should hold in a stiff manner
Draw the word "dead" in English on the badge itself. DEAD! "Dead or alive, the task must be accomplished!"
How to draw an army skull tattoo step by step
Step 7.
You're almost done, folks. Here you will be drawing a pair of bullets in the background of our army skull tattoo. The classic round-shaped AK-47 bullets will work best here, because I'm pretty sure they're the most popular.
How to draw an army skull tattoo step by step
Step 8.
All you need to draw here to finish our drawing is an indentation on the forehead and temples. This will shape the skull and add volume to it. Brush the drawing to perfection.
How to draw an army skull tattoo in steps
Step 9.
The drawing turned out gorgeous and I'd love to see how it turned out for you!
How to draw a military skull tattoo step by step
makusha.ru
Detail the skull
Step 1.
Now split the quarter circle on the jaw into two sections.

Step 2.
Between the point on the circle and the eye socket, draw an oval.

Step 3
Split the right side of the oval into two parts.

Step 4
From the point on the oval draw a line to the upper end of the jaw.

Step 5.
At the same point, from the bottom point of the oval to the end of the jaw, draw a straight line.

Step 6
Draw a small oval on the jaw joint.

Step 7
Next to the large oval on the cheek, draw a small circle.

Step 8
From this circle, draw two curves from which we will form the lower part of the jaw.

Step 9.
From the small circle, draw a curve to the eye hole.


Step 10
Next, we draw the outline of the brain.

Step 11
Under the brain outline, draw an oval and connect it in a straight line to the large circle on the jaw.

Step 12
At the bottom of the jaw, draw a larger circle so that the skull has a more realistic shape. The circle should be just above the horizontal auxiliary line.

Step 13
Finish drawing the nose by adding a few more auxiliary lines.


Step 14.
Continue drawing the teeth.


Drawing in cells
To draw a head bone on the cells, you need to have patience and a clean sheet of paper. A standing pencil needs to be sharpened sharply.
First you need to position the sheet of paper so that you can start drawing on the top side of the sheet.
In a horizontal position it is necessary to draw a long line.
Its size depends on how big the skull illustrator is going to do. If he is going to depict a small skull, it will be sufficient to draw a line of three cells.
On the sides of the sketch you need to put vertical dashes of the length that the entire skull should be.
Next, these dashes should be connected by an oval line.
The second step of sketching the skull is to draw the eyes inside the image of the head.
After these operations it is necessary to draw one straight line on the underside.
On this straight line we begin to draw the teeth.
When the silhouettes of the eyes are painted over and the teeth are drawn, the drawing can be considered finished.
How to draw a skull tattoo step by step
Let's draw a skull as a tattoo.
How to draw a skull tattoo in steps
Step 1.
Let's start by drawing a nice bold plus sign with a horizontal line a little smaller than the vertical line.
How to draw a skull tattoo in steps step 1
Step 2.
Once you've drawn a lovely cross in the drawing, add a nose hole in the skull next step. Start with the thick sides filled in completely black, with a notch in the middle, where we'll add a little touch.
How to draw a skull tattoo step by step step 2
Step 3.
Next, draw the top of our skull tattoo. Draw the rounded shape of the top, add indentations on the sides of the head as flame tongues for the temple part. Draw the shape of the eyes and paint them in an even color.
How to draw a skull tattoo step by step step 3
Step 4.
Let's take our time now to draw a nice tattoo pattern on the top of your head and forehead. You can change the design if you so desire or you can choose to repeat the pattern you see here and repeat it verbatim. Add in the brow arches and move on to step five.
How to draw a skull tattoo in step 4
Step 5.
Make a simple thick skull base line to form the cheekbones and the middle part of the mouth so you can add teeth a little later. small details on the cheekbones and you're ready for step six.
How to draw a skull tattoo in step 5
Step six.
Finally, fill in the top part of the mouth with teeth. And don't forget to make real fangs! Add some shading and shape to the top of the teeth and you can start erasing the mistakes you may have made along the way after all.
How to draw a skull tattoo step by step 6
Step 7.
When all is said and done, your skull tattoo should come out looking like ours. Be sure that someone is sure to like your drawing, so show it to your friends. Good luck to you!
How to draw a skull tattoo step by step 7
makusha.ru
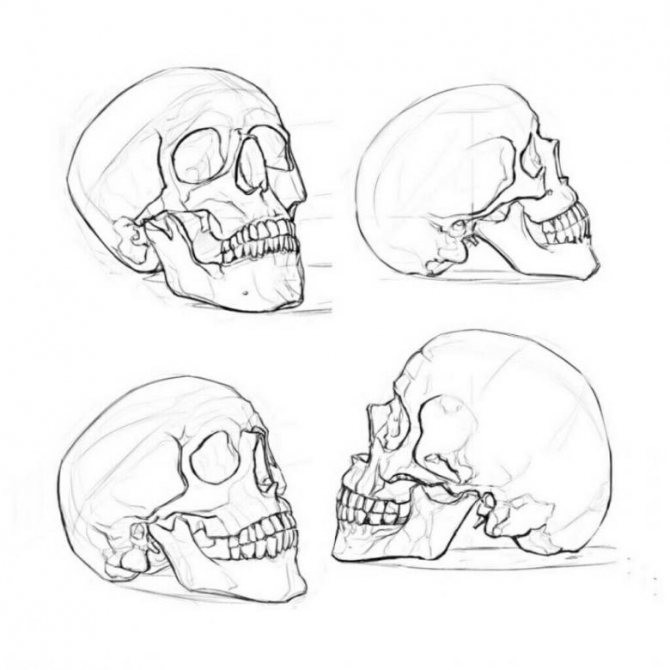
Side view
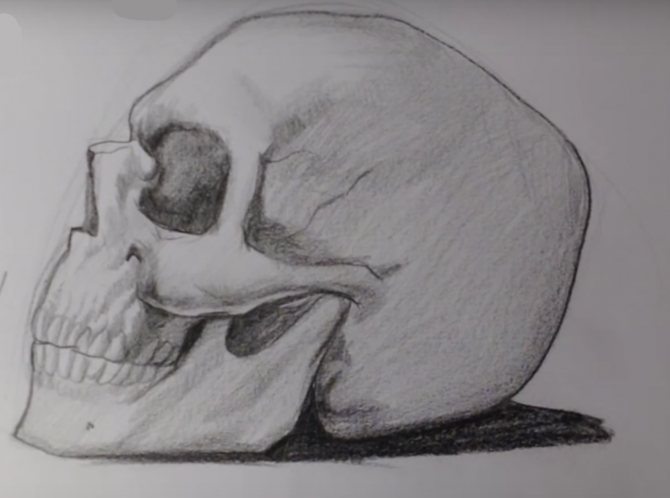
The famous lines come to mind: "To be or not to be? - that's the question." We say to you, "To be!" Follow the diagram below and you'll have a delightful image.
Sketch the main outlines - the head shape, the eye socket, the temporal bone and other details.
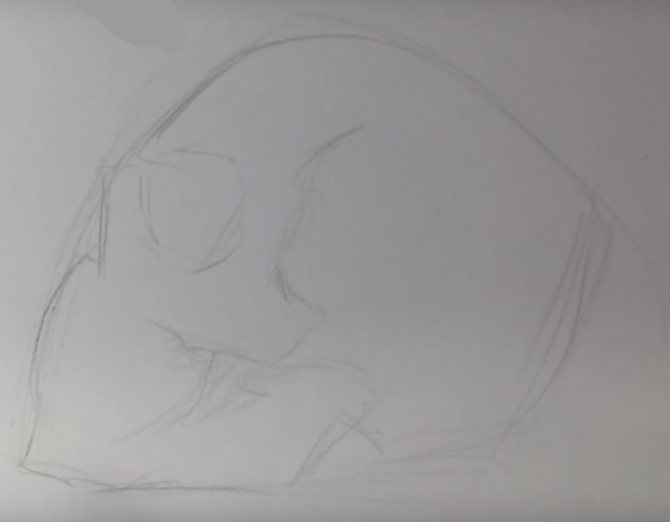
Outline the eye, cheekbone, mark the mouth slit. Draw the contours and begin hatching.
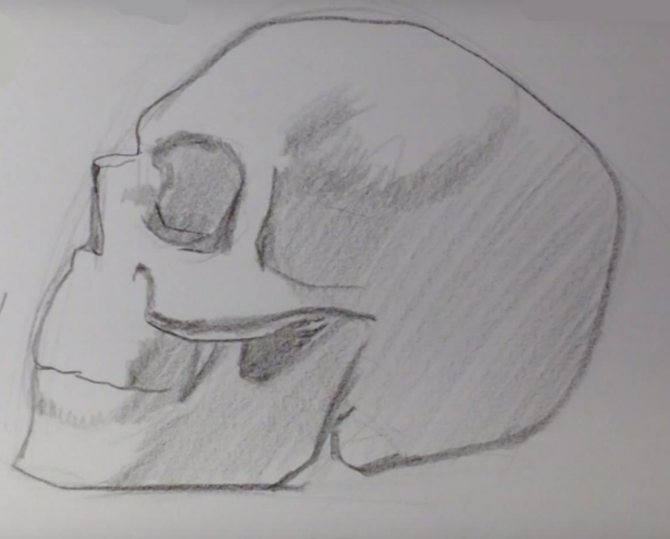
Draw the teeth and fine strokes sketch the skull, depict the notch in the temporal bone. Add shadows.