All kids enjoy "drawing" angels in the freshly fallen snow, but their joy will not end if you teach them to draw the same cute angels on paper! A Christmas angel is a drawing that will come in handy on Christmas Eve and the eve of someone's birthday. And just drawing angels can be fun for both child and you.
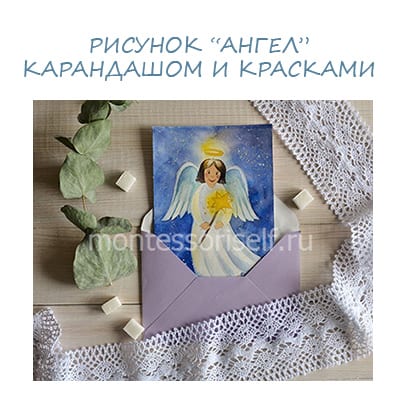
Christmas angel drawing for children: angel drawing in pencil and paint
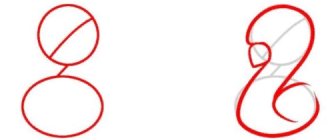
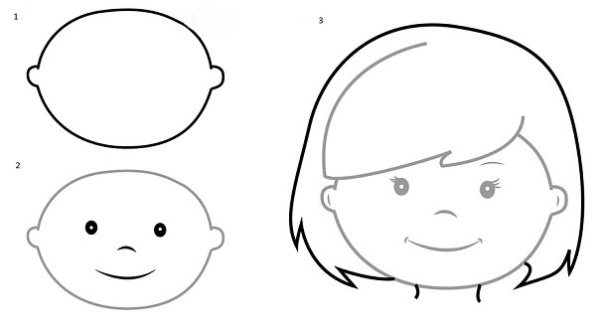
We begin to make a drawing of an angel with wings in pencil. In doing so, we line up the work in such a way that the child can cope with each of its tasks independently. The first thing we draw a circle or an oval in the center of the paper sheet. This will be the head.
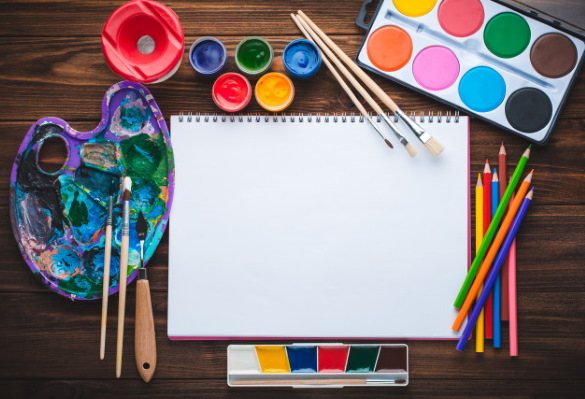
What you need to draw
You can create drawings using any technique, such as shading, shadows and highlights, color or black and white. Drawing will require only a few tools, which can be found in every home.
| Drawing tool | Features |
| Plain pencils. | It is best to use a pencil marked HB for sketching and a bolder one for tracing the finished image. |
| Sheets of paper | Children usually draw in special sketchbooks. Their paper is pretty thick, so you can easily erase unnecessary lines many times and do not worry that paper will fray until it has holes. Also suitable and ordinary sheets of A4, but it is better that they were also quite thick. |
| Eraser . | It is a good way to erase unnecessary lines or if you have made a mistake while drawing. |
| Black marker | You don't have to use it, but if you trace the finished image with a thin black line, the picture will be clearer and brighter. |
The finished image can be colored in any way that the child likes. felt-tip pens, colored pencils or paints are good for this. But also pictures without fillings look spectacular.
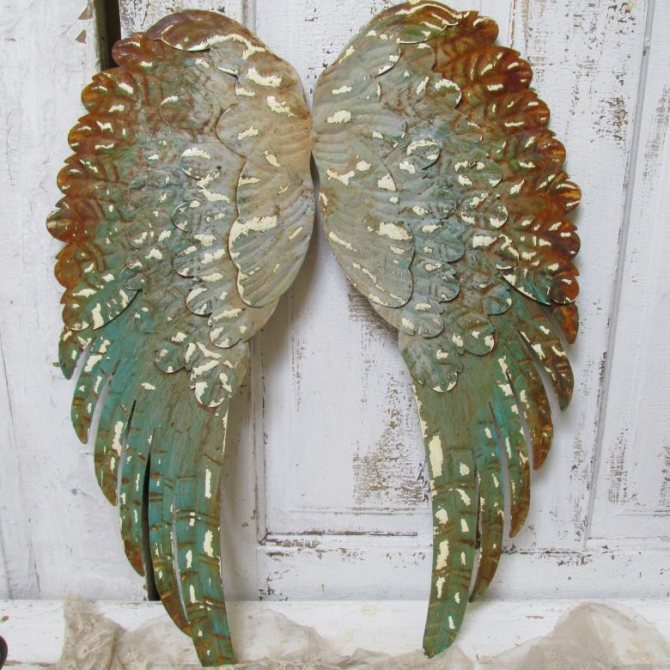
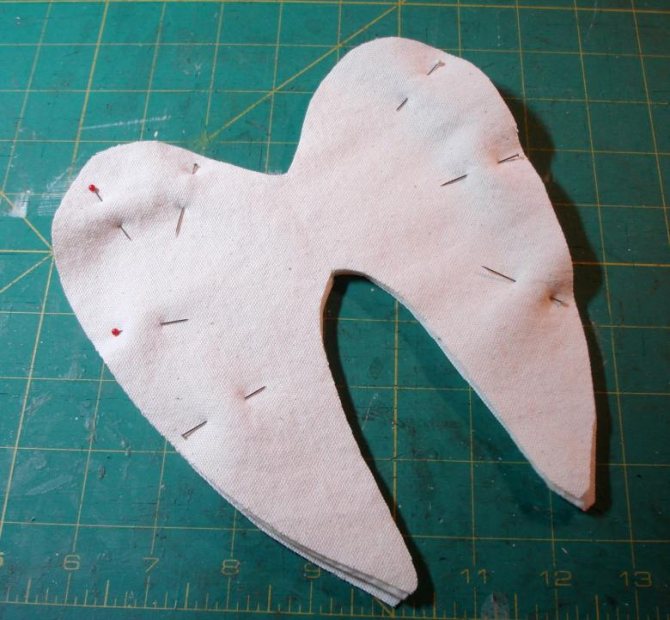
Items made of fabric
A product made of this material will last a long time and stand the test of time.
Materials and tools
- White paper or cardboard.
- Fabric.
- Rubber band with a fixer.
- Lace.
- Wire.
- Scissors.
- Duct tape.
- Satin ribbon.

Workflow
- On cardboard to draw the wings.
- Bend it with wire around the edge, connect the ends and wrap with duct tape.
- Wrap the entire work material, fix the cloth around the edge of the product.
- Attach a rubber band to the workpiece.
- Cut the fabric into strips of 10-15 cm.
- Sew on the feathers from underneath the workpiece. The feathers themselves are attached by the top, the bottom should remain free.
- To decorate the product suitable lace, pearls, rhinestones.
Miniature angel
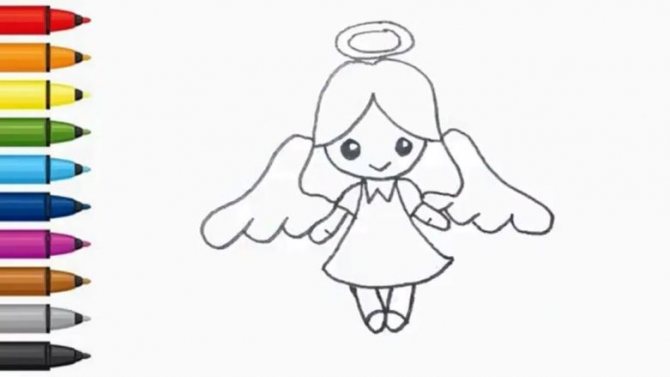
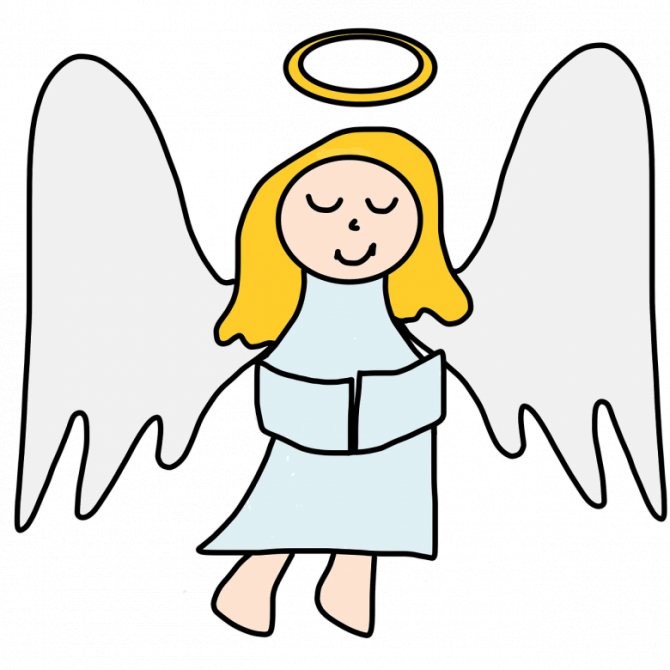
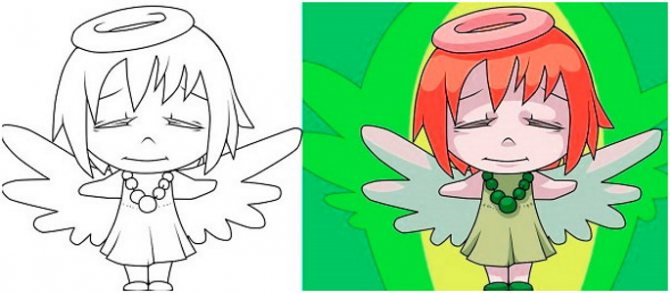
Drawings of angels with wings beautiful and bright can be a variety of styles. If the child has no experience in fine art yet, he will like the idea of a very simple and cute angel. This option will be suitable for younger schoolchildren.
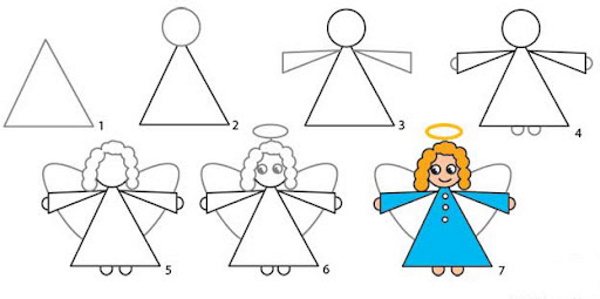
Drawings of angels with wings beautiful step by step
Drawings of angels with wings beautiful step by step
To create such an angel will be required:
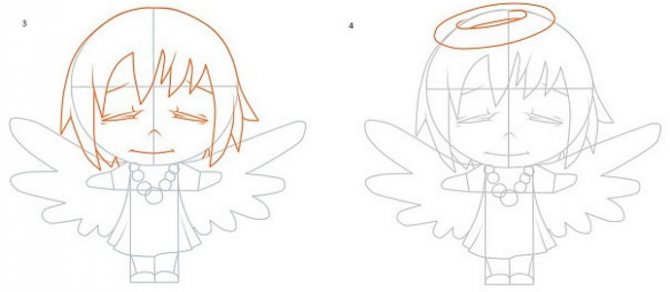
- First, draw a rounded head and add hair as shown in the image above.
- Now add a dress that extends at the bottom.
- In the next step, bring out the arms and legs. Use the semicircular lines to indicate the shoes of the angel.
- Next, draw the wings. Lines should be smooth enough, not angular. The drawing can be stylized, that is, it should not have sharp corners.
- Now it is possible to detail the face. It is enough to draw two circles as eyes. If you want, you can add pupils and then use highlights to make them realistic.
But small children may find this technique difficult. Then it is necessary to leave only the circles. As a mouth, it is enough to depict a semicircle, to get a smile.
It remains to detail the image, adding laces on the shoes and a bow on the dress. Of course, we can't forget about the halo. To do this, you need to draw a flat oval and inside it another one, only a little smaller.
A simple drawing of an angel-girl
This image is very similar to the previous one, but in this case more attention is paid to the eyes. The child may like this idea more.
To draw:
- First, draw 2 descending and slightly concave lines to create simple bangs that do not cover the angel's face. A little away from the edges of these lines, draw another semicircle. This will be the oval of the face.
- In the next step, draw two circles under the bangs and fill them in, but not completely. You need to leave two small circles to make a glare. If it works, you should also leave a few white dots just below. Then the eyes will look more touching.
- Above the bangs, draw a curved line and take it down and to the right. After that, bring it to the face.
- On the other side do the same to get the hair. When drawing the hair make curves under the shoulders, which will be added later. After that, draw the dress. It should be started from the central lower part of the face, gradually extending it.
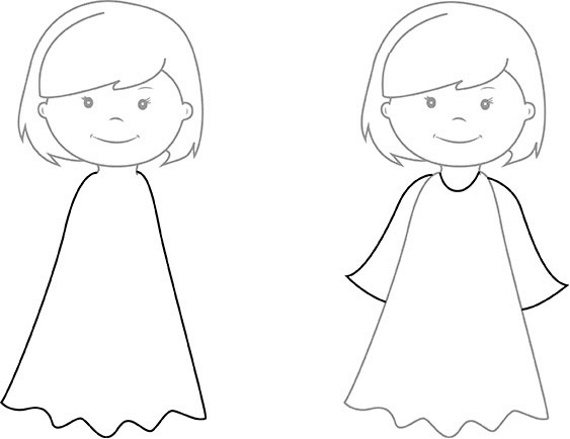
- The next step is to draw the sleeves of the dress and collar in the shape of the letter W.
- From the sleeves derive the arms, adding a few very small strokes to indicate the palm area. From the bottom line of the dress draw the legs. At the top they are at a distance from each other, and at the bottom they touch each other. With 2 extra strokes you need to add shoes.
- Now the most important thing is the wings. Where the bangs connect to the hair, start the first wing. It should go smoothly down and slightly to the right. Feathers are easier to depict wavy. In the same way 2nd wing is drawn.
It remains to add a soft smile and a halo over the head of the girl-angel.
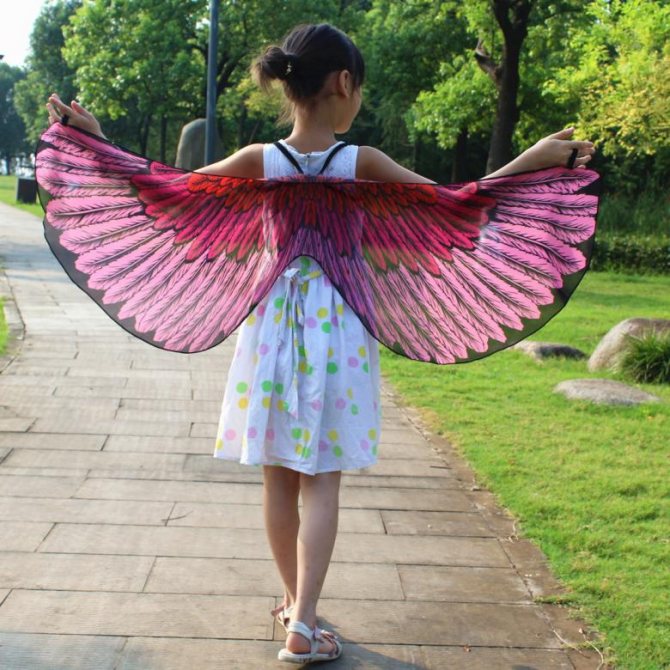
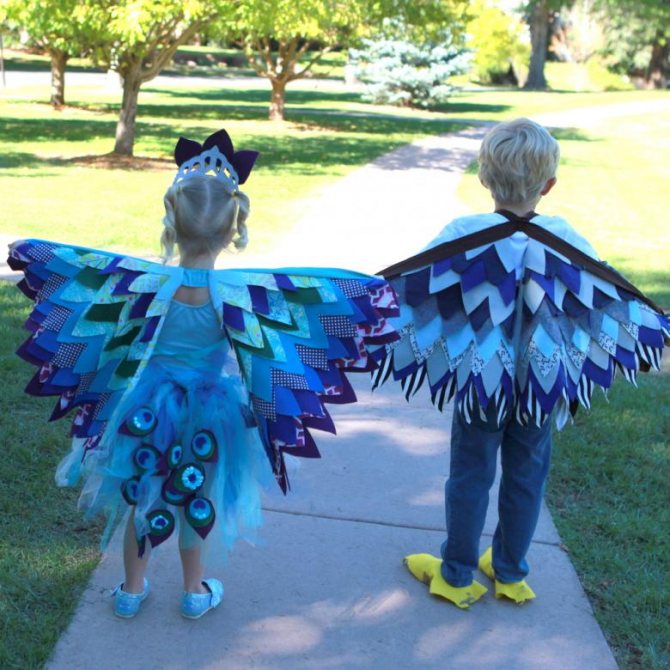
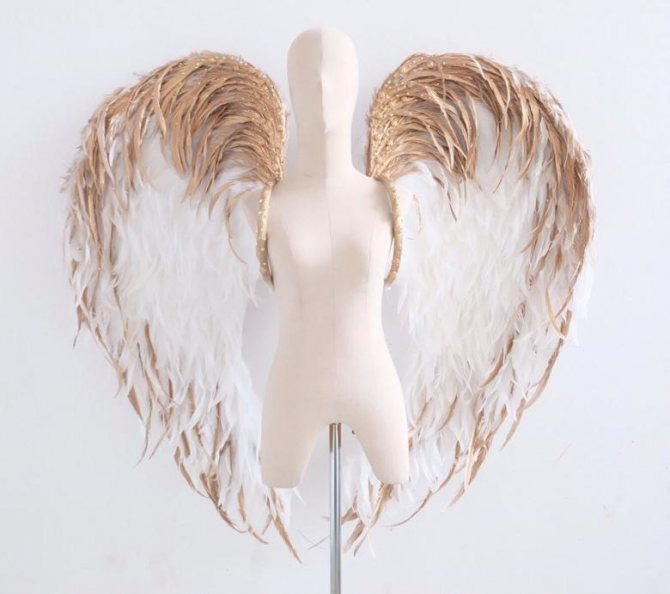
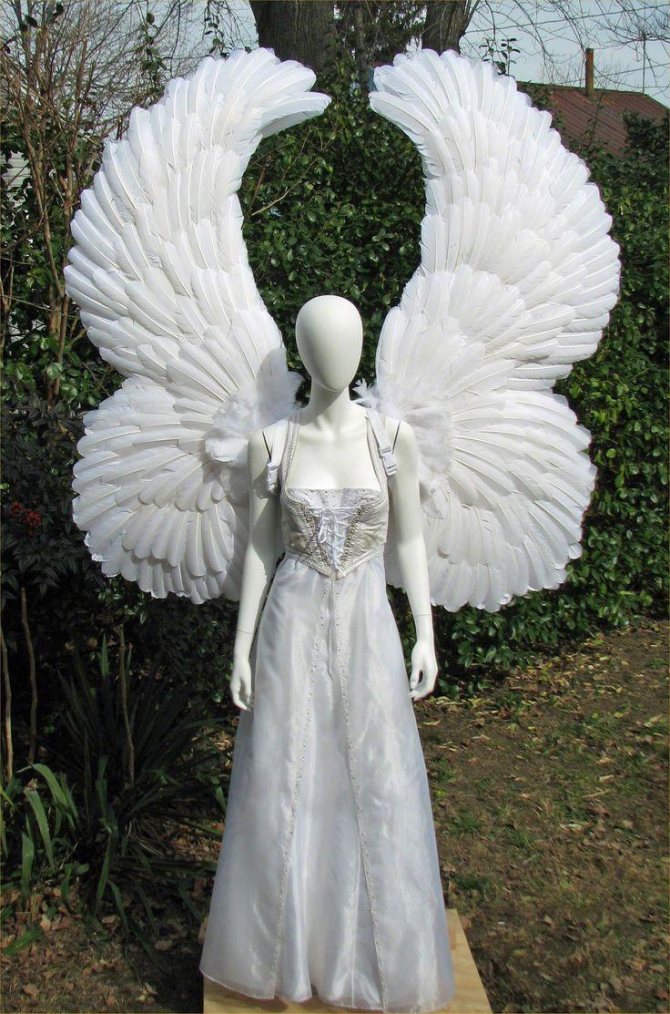
How to choose the size and shape of wings
The size and shape of the wings should be chosen, focusing on the height and body type of the person who will wear them. For photo shoots with children, it is better to make small, rounded wings. They will not embarrass the child's movements.
This is important, because with discomfort, the baby in the photo will look cramped. КLarge, voluminous wings with rounded corners will look good on a tall person of thin build. Light and fluffy materials from which the feathers will be made will help add volume.
People of strong and full build prefer narrow wings with sharp tips and long feathers. Such a shape will visually elongate the figure and photos will turn out the most successful. The size should be medium. Preferably, the bottom feathers should not touch the lower part of the buttocks.
For those who are not tall the shape of wings with massive tops that can be decorated with fur or fluff is suitable. The ends of the wings should be sharp. The optimal length is up to the knees, or just below the buttocks. Such wings will look harmonious in photos, not overloading the image.
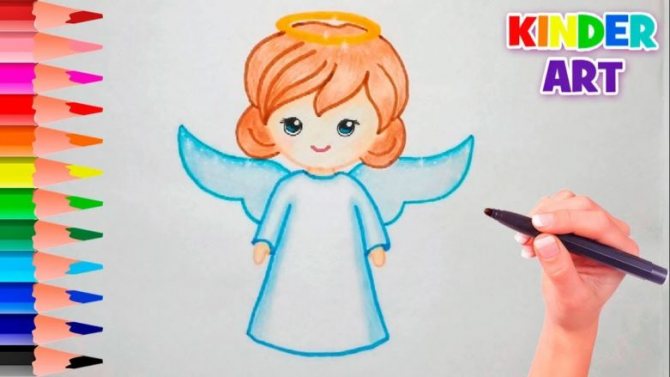
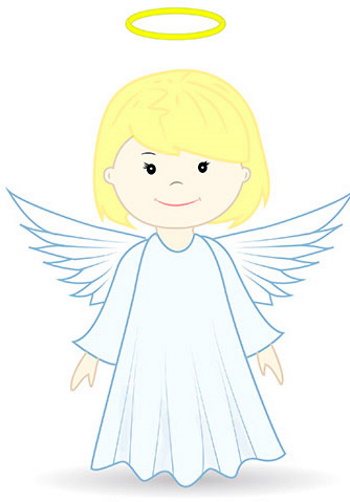
Drawing an angel with colored pencils
Drawings of angels with wings beautiful can be done immediately in color. It will be most convenient for a child to work with colored pencils. If they are not very hard, extra lines can also be erased if necessary.
The image turns out very unpretentious, but bright. This is a fairly simple option that will suit young children who are just starting to draw. It's okay if the lines are not as straight as in the picture. On the contrary, it will give the drawing more personality.
To create a colored drawing of an angel:
- First, draw the face oval and small ears. Using semicircular lines, you can depict the nose and mouth. For the eyes, draw 2 circles, paint them, but not completely, leaving 2 small white dots. After that, add eyelashes and a few small strokes to emphasize the smile.
- To complete the face, it remains to draw the hair. In this example, the angel has a short haircut.
- Now you can move on to the body. To do this, draw a short neck and then derive a dress that expands slightly downwards. Its lower part can be depicted with a wavy line. Also at this stage add long sleeves to the dress. They should also extend slightly at the bottom.
Drawings of angels with wings beautiful step by step
Drawing angels with wings beautiful step by step
- When the base is ready, it remains to add the wings behind the back. It is not necessary to draw them large. Also from the sleeves of the dress should look palms. The fingers do not need to be traced, as it will be difficult for the child.
- Also it is necessary to detail the folds on clothing and to finish drawing the halo. For this, it is only necessary to draw a neat flattened oval.
Afterwards, it is possible to trace the lines with colored pencils or markers. You can immediately start drawing in color. The dress can be depicted in blue, and the hair in yellow. If the child wants to, he can paint over the picture.
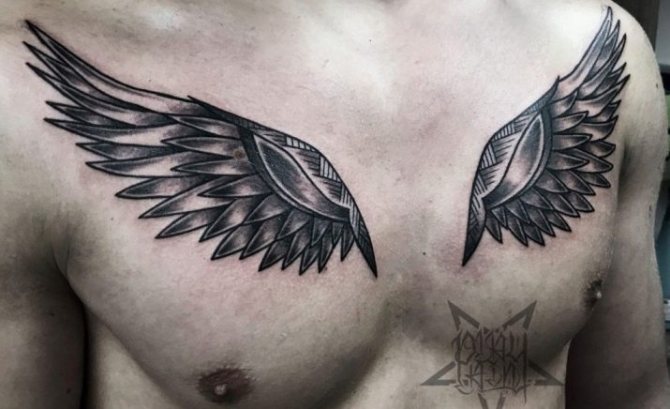
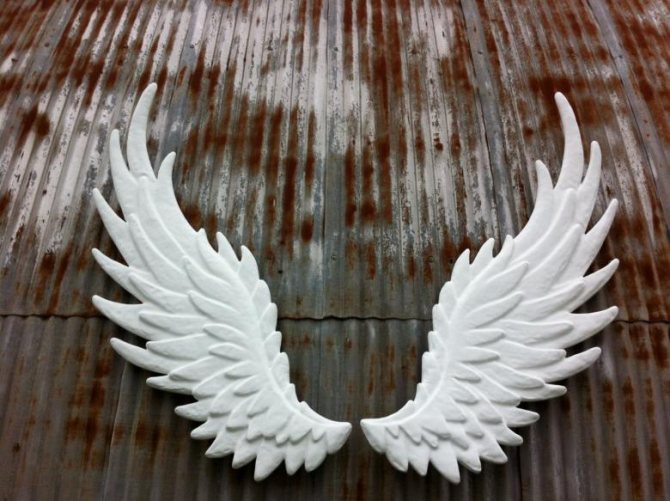
Accessorize with feathers.
This is the most widely encountered option. Such a product looks natural in any costume.
There are many materials on the Internet, how to make angel wings with their own hands. Working with feathers is a labor-intensive process, but the final work will look natural.
Materials for work
- Natural feathers.
- Fluff.
- Scissors.
- PVA glue.
- Cardboard.
- Paper napkins.
- Components for decoration.
- Pencil.
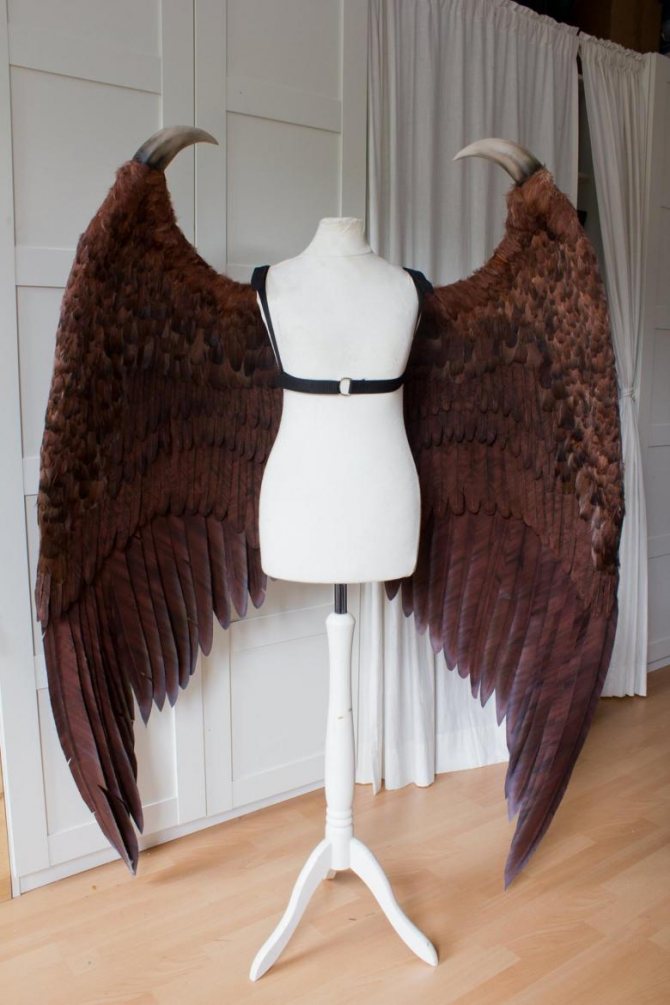
How to work
- Make a blank of heavy cardboard. The workpiece must remain intact, do not cut parts from each other.
- Attach a rubber band to the workpiece.
- Attach feathers, the work should begin at the bottom. Glue the longest elements to the bottom, the shortest parts to the top. All elements are attached on the principle of scales.
- The finished product can be decorated with rhinestones or lace.
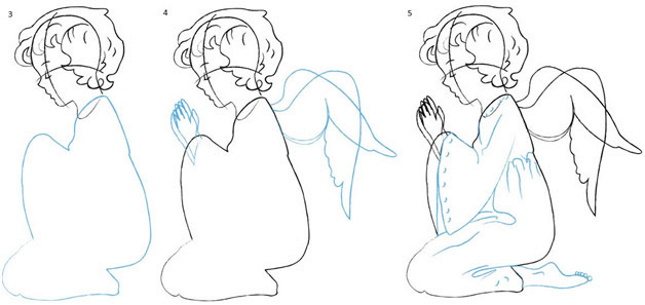
Angel for a prayer
The child's drawings can later be used as home decorations for various holidays, such as Christmas. The finished image is enough to cut out with scissors and mount it on a wall or window.
You can use the picture as a base to make toy decorations for the Christmas tree later on.
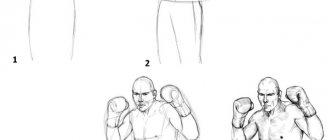
It is more complicated, but if you practice, it will work:
- You should start with the head. The angel will be depicted from the side, sitting on his knees. First draw basic guiding intersecting lines to determine where the nose, eyes, and other parts of the face will be. After that, details should be added.
- To complete the drawing of the head, hair should be added. Angels usually have short haircuts. Therefore, you need to draw some curls.
- Now you can move on to the body. First you have to draw the main outline, as shown in the picture below. After that, add the hands, folded in prayer. This step may seem more complicated to a child, so you may suggest that he or she first practice drawing the fingers of the hands on a separate sheet.
- Wings should also be added. One of them can be drawn a little more bent. To finish the garment, you need to detail the robe by adding pleats. At the bottom you need to add legs.

Drawing angels with wings beautiful step by step
Drawings of angels with wings beautiful step by step
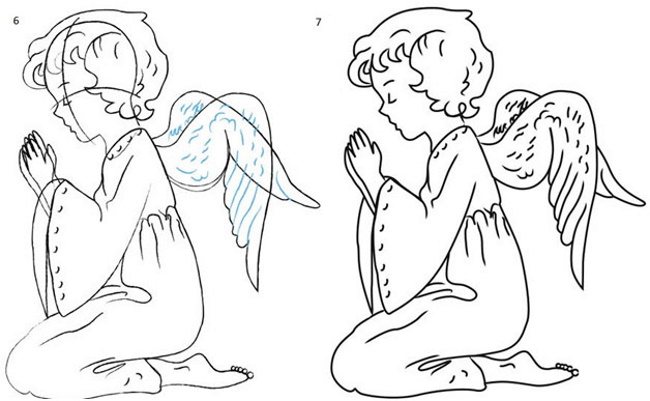
Drawings of angels with wings beautiful step by step
- The next step is to detail the created image. You need to remove all unnecessary guide lines. Also add more elements on the wings.
The finished image must be colored. If it is additionally circled with a thin black marker, it will be more convenient for a child not to go beyond the borders of the picture. The finished image can be cut out and glued to cardboard or think of other ways to use the decoration.
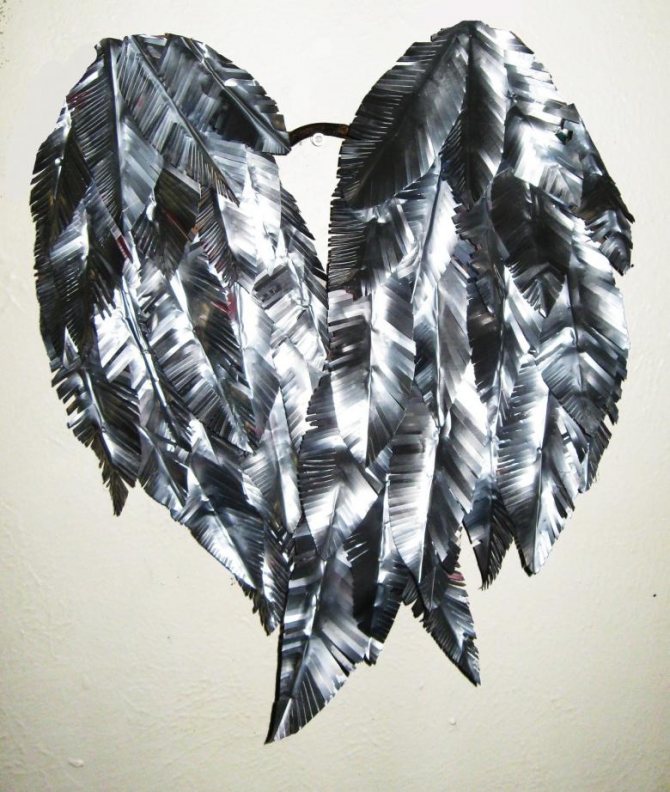
Isolon wings
Isolon is used in construction as an underlayment for laminate flooring. It is a relatively inexpensive translucent element. Wings made with it will be very lightweight.
Materials to work with
- Isolon.
- Wire.
- Isotape.
- PVA glue.
- Scissors.
- Various decorations.
How to proceed
- Make a frame of wire and pull it with isolon. Carefully fasten the edges.
- Attach rubber band to the base.
- From the material, cut feathers of various sizes so that the future wings look natural. Use a glue gun to start gluing the feathers, starting from the bottom of the design to the top. Larger feathers should be attached at the bottom, smaller elements at the top of the design.
- Decorative elements can be added to the top of the design.
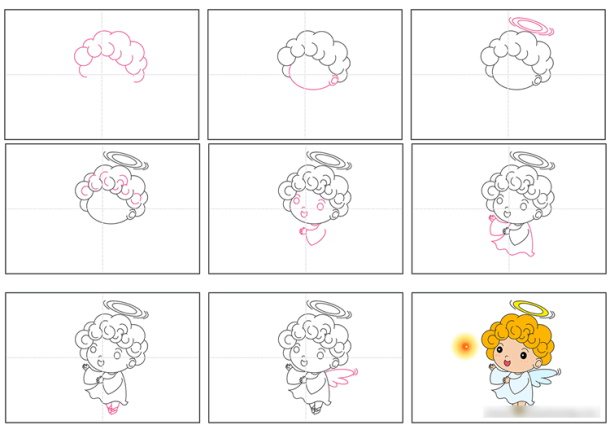
Cartoon angel
Drawings of angels with wings turn out very beautiful if you take a cartoon character as the basis. Every child loves to watch cartoons and he has his favorite characters.
Very interesting looking characters with a big head and a miniature body. To draw such an angel is simple, but to cope with such an image will succeed in older children.
To create an unusual character:
- First make a sketch and guide lines. Therefore, draw a circle, and inside it intersecting lines. They will help orient with the location of the eyes, mouth and nose. The body will consist of rectangles.
- Also depict the hands, using simple geometric shapes. After that, add wings, draw a dress, beads and give the legs a more interesting shape.
- In the next step, draw a face. For convenience, it is worth adding the hair first. The haircut, as in other cases, should be short. If you make the bangs torn, the character will look even more interesting. The angel's eyes are quite large, but covered. This simplifies the task.
- But also the smile is a simple slightly curved line. Complement the image with a halo. It does not have to be at a distance from the head. It is possible to make it as if it is lying on the hair.
Now you can remove all the guides with the eraser. Since the character is cartoonish, you should paint the image in bright and interesting colors. The child can decide which shades he likes best.
Handicrafts from disposable plates
For this accessory, you can use a variety of materials, even such as disposable paper plates.
Materials and tools
- Disposable paper plates.
- Rubber band or tape.
- Glue gun.
- Scissors.
- Cardboard.
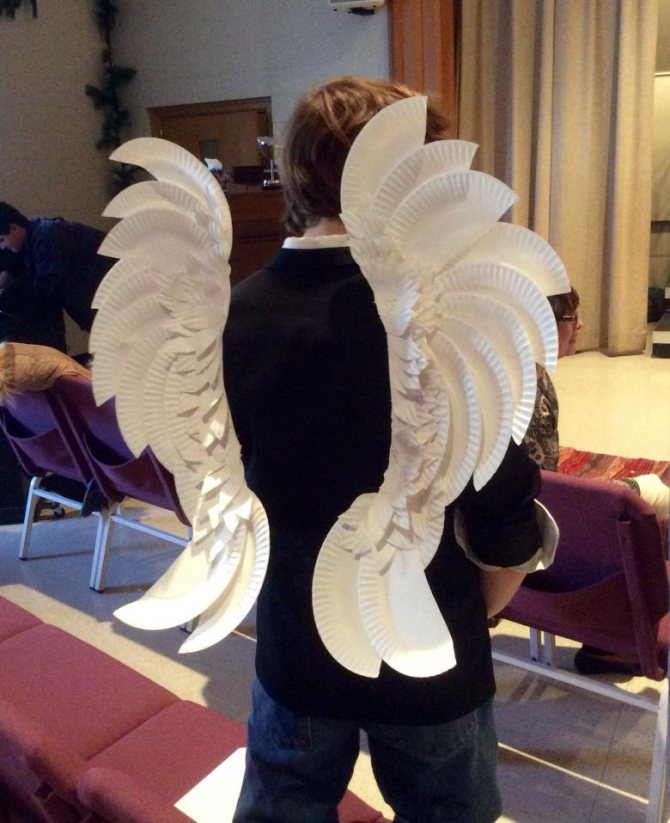
The workflow
On the basis of the cardboard glued plates cut into two parts. One row should go a little bit the previous row. The resulting product will not last long, so it is better to use it for a small production at a school holiday.
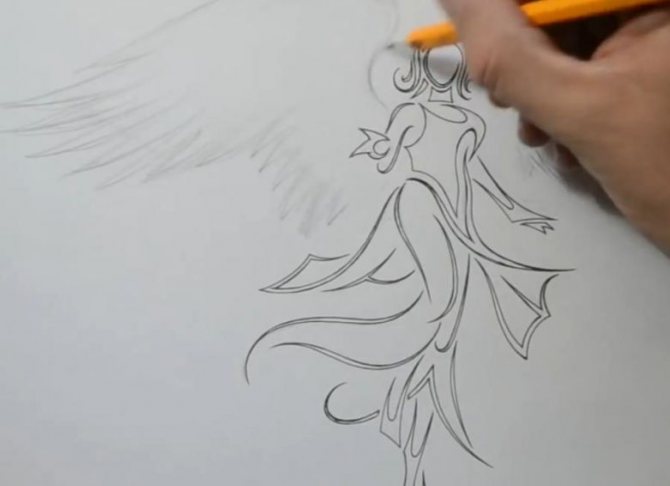
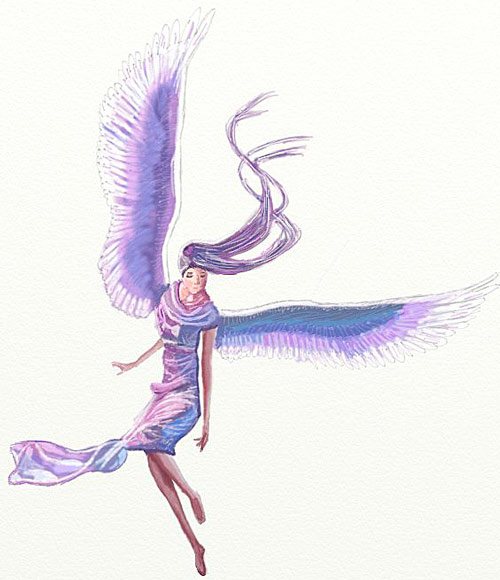
Drawing an angel for older children
If the child can easily quickly cope with simpler drawings, the task can be made more difficult by asking him to draw an angel, which is more like a real person, with more drawn details.
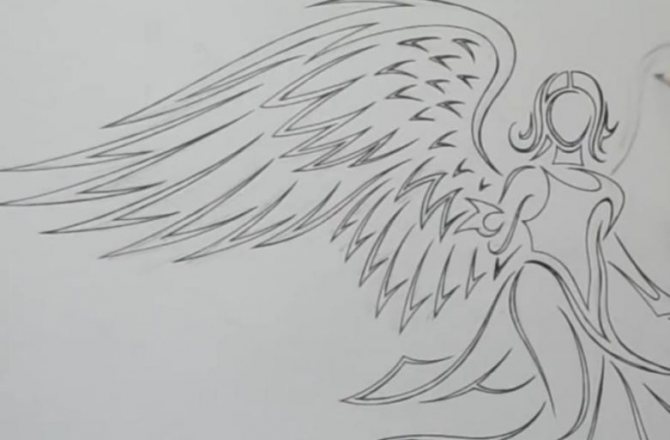
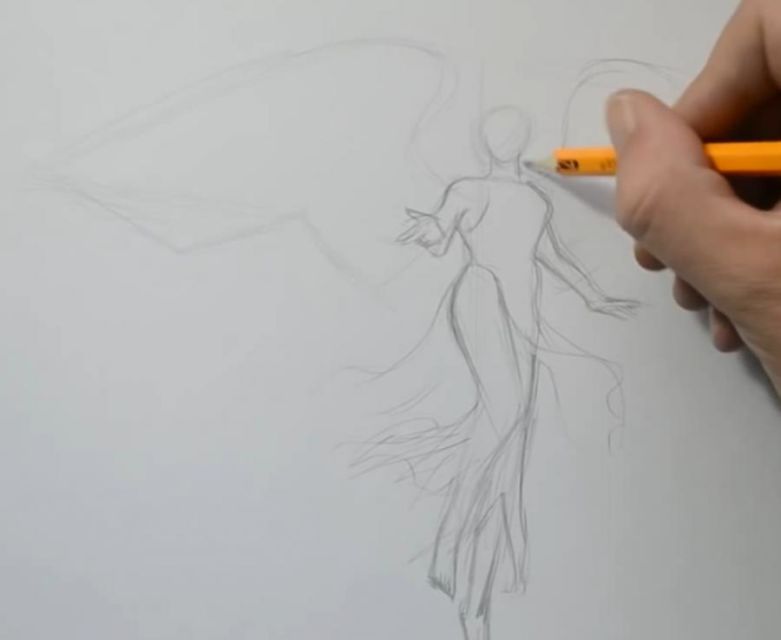
It is worth working through the drawing of people's poses beforehand, as in this case the image conveys movement. Below is an interesting illustration of an angel, which is depicted as a girl with long hair.
You can paint the image in purple tones, also explaining to the child the basic rules of light and shade. For coloring, you can use pencils or paints. The second option is a little easier, as then it will be easier to create different shades and transitions.
To get such an unusual image:
- First, create the basic outlines by deciding what pose the character will be in. At this stage, only simple lines should be used. Also outline the future wings using 2 simple lines.
- In the next step, start adding the dress, arms and legs, round off the lines in the shoulder area.
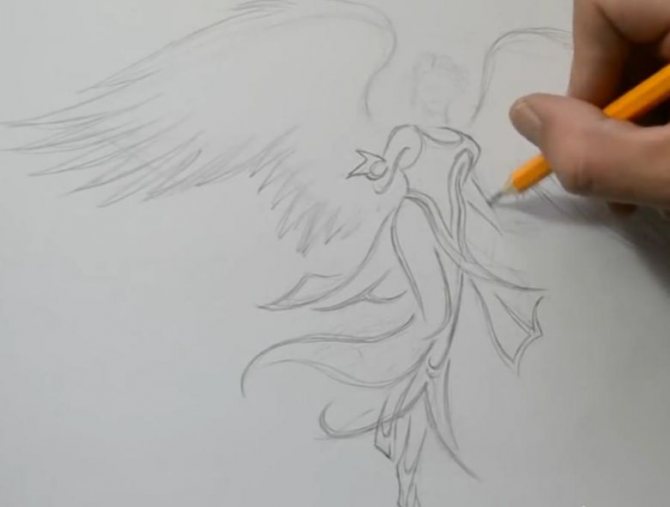
- Now add hair, hands and feet, and apply a few strokes to indicate eyes, mouth and nose. Try to make the hem of the dress as realistic as possible, as if it were developing in the wind. The same with the hair.
- Next, make the image more streamlined, remove all unnecessary sketch lines. Creases are added to the dress, and the wings take on a more realistic shape.
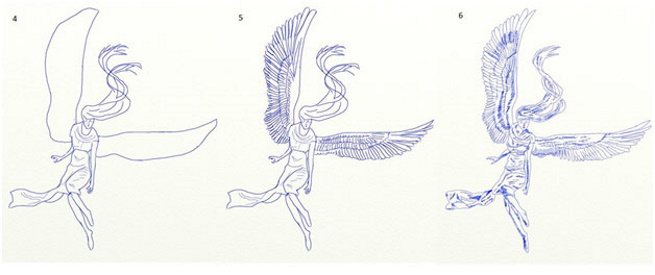
- In the next step, add volume to the hair, draw feathers on the wings. To understand where they should be more, and in what part, on the contrary, less, you can use images of birds. This can be a tricky step, so you can practice drawing the wings on a separate sheet of paper beforehand.
- It remains to add detail. It is also necessary to apply shadows, so it was easier to paint the picture later.
It remains to paint the finished image. If the child prefers to work with colored pencils, it is worth telling him a very useful technique.
If you want to combine two colors to make a soft transition between them, you can rub the image a little with your finger after coloring. Then you get a blurred effect.
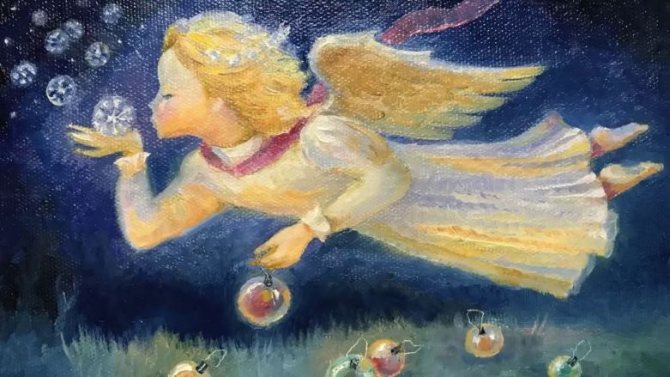
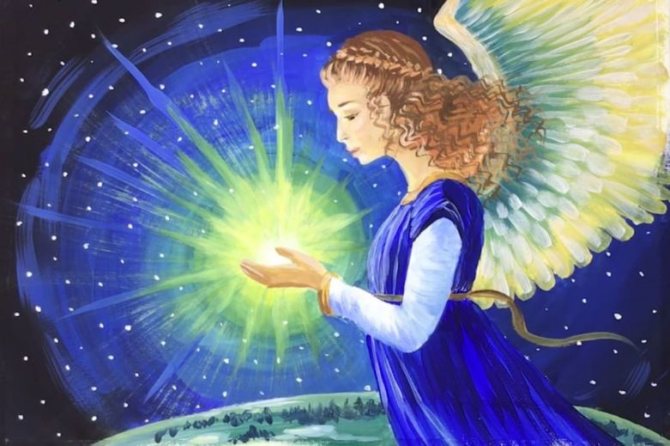
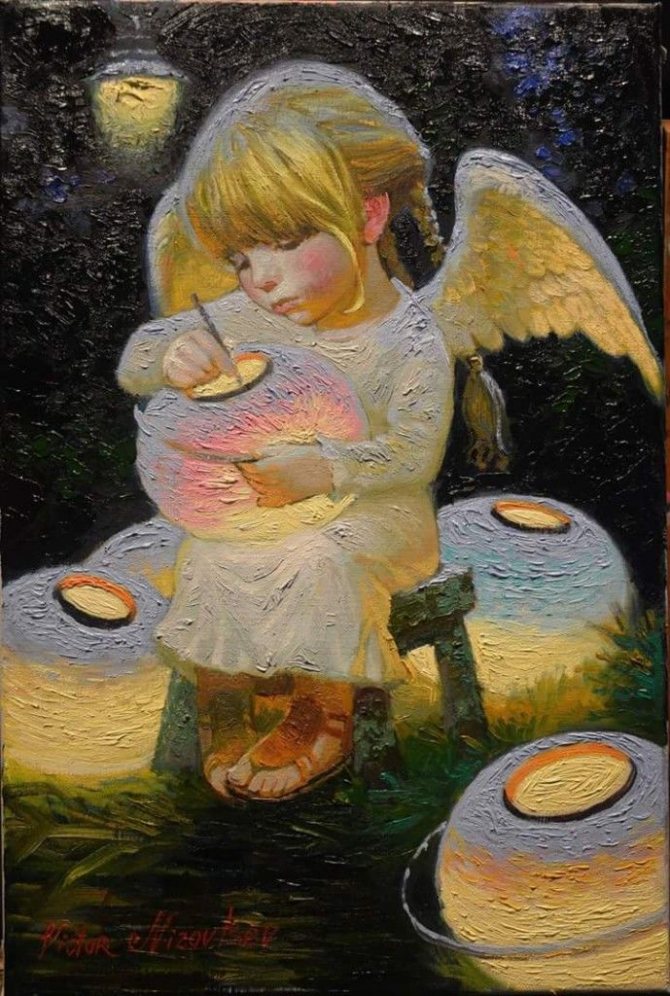
Heavenly messengers in bright colors
To create a real artistic masterpiece, you can draw an angel step by step using watercolor, acrylic or oil. The latter type of paint is most suitable for such paintings. They are sold in tubes, so in the process of work it is necessary to distribute the colors correctly on the palette - from white to a darker shade. If some color needs to be slightly lightened, you can use linseed oil. The following instructions tell you how to paint an angel with oil.
Step 1. Paint the sky (the background of the picture) with blue paint.
Step 2 For the angel on the canvas we choose gold, beige and white. With these colours we respectively paint hair and wings, face, dress.
Step 2. Refine the details of the drawing with other colors - green, blue, yellow. Using these colors, shade the wings and highlight the plumage, hair, and paint a halo in gold.
Step 3: The hem of the dress is painted in light blue with a touch of yellow. This will give the effect of "glowing".
Step 4: The sky is painted with stars - small dots. The picture is ready.
Now you know how to draw an angel and what it takes. Such a picture will be in force even for beginners young and adult artists, and the result will be a long time pleasing to the eye.
Already drawn +5 Want to draw +5 Thank you, great lesson +33
Angel with long hair and big eyes
Drawings of angels with wings beautiful and unusual can be created by mixing styles. For example, in anime, characters' eyes are usually very large, expressive. You can also move away from the standard image of an angel with short hair and draw him more like a girl.
To create such an illustration:
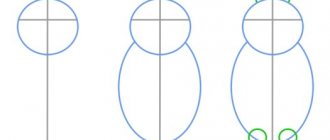
- First draw a circle, which will be the head.
- Under the circle draw a slightly curved incomplete line to represent the chin.
- On the sides of the head add ears. To do this, you need to draw flattened circles, and inside add a few short connected lines. This will detail the image and draw the ears.
- The oval of the face is ready, all that remains is to erase the extra guiding lines.
- Now you can move on to the body. First, from the center of the chin, draw a toned neck and add a curved line. This will be the collar of the dress.
- Below that, add 2 vertical lines, curved as shown below.
- Around the collar, add a wavy line. Connect the 2 vertical lines with a wave to get the hem of the dress that develops in the wind. Several vertical lines are drawn from the resulting curves. Then the folds on the dress will look more voluminous.
- The next step is to draw the sleeve. To do this, draw a line from the top of the collar to the right. From it a wavy line is drawn downward. Closer to the bottom it should be closer to the body. It remains to add one more stroke to complete the sleeve.
- Based on the angel's pose, one arm is moved to the right and slightly raised, and the other arm is extended along the body. Accordingly, the second sleeve should get a different shape. This requires a curved line down from the collar and also add a wave to indicate the folds.
- Now the most difficult thing is the open palm. The fingers are drawn with narrow U-shaped lines. Then you can add the thumb and draw the sides of the palm. From the first time you can rarely draw a hand. To avoid using the eraser unnecessarily, it's better to practice on a different sheet of paper.
- The left hand is folded differently, as shown in the picture below.
- Along the lines of the sleeves you need to draw additional wavy lines. This will show the cuffs. To indicate the depth of the sleeves, you need to add additional lines on the other side of each sleeve.
- It's time to detail the head. You should start with the hair. The bangs can be drawn in the same way as in the examples above. And the hair should be made long. It goes behind the ears and goes to the back. The lines should be a little wavy.
- After that, you can remove the guiding lines of the head to get a more harmonious image.
- It is time to move on to the eyes. They should be at ear level and be quite large. It is worth starting with the main lines. The top curved line should be bolder. Above the eyes, the eyebrows are needed. They are placed high enough to make the look very open.
- The nose and mouth can be drawn with simple curved lines. The chin can also be emphasized, adding a few small strokes. Pupils can be drawn as ovals.
They should be painted on the inside so as to leave a few light parts. This will add gloss and make the eyes more touching.
- You can move on to the wings. To do this, draw long curved lines from the hair on each side of the angel. After that, the lines are rounded off. This will form the uppermost parts of the wings. Under them to draw the same lines, only this time a little shorter. The procedure is repeated several more times.
- Inside the wings, add 1 more set of feathers. They should be smaller and run in the same direction as the main wings.
- The final element left is the halo above the head. To do this, draw a flat oval, and inside it the same one, only smaller.
The image is ready, you can move on to coloring. The dress can be shown in light pink. If you paint inside the sleeves with dark pink color, you will get more volume.
To indicate the color of the eyes, the bottom unpainted parts need to be painted in color, such as blue. The upper highlights should be left unchanged. If desired, you can add shadows or leave the picture as it is.
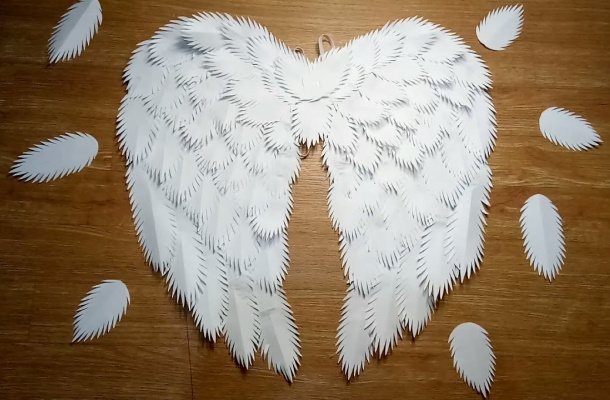
Wings from napkins and coffee filters
This luxurious accessory can be made from paper napkins. You need to get a large quantity of this material.
Materials you will need
- Napkins.
- Cardboard.
- A rubber band fixer.
- Scissors.
- Glue.
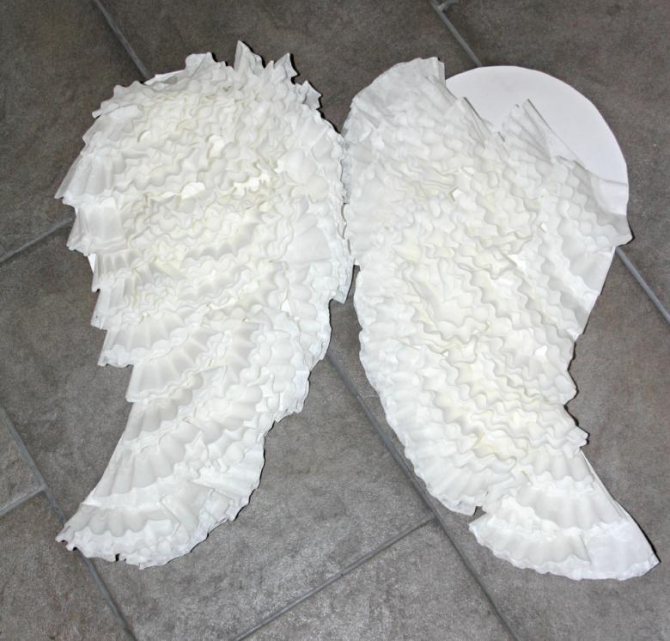
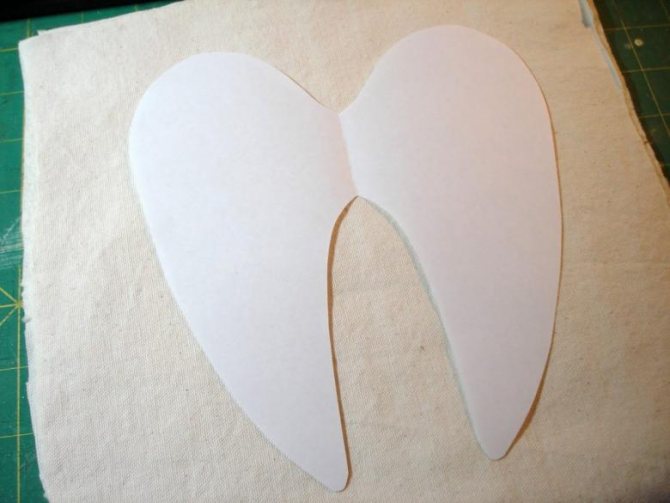
Workflow
- From cardboard to cut the template for the wings.
- Glue the cardboard with white paper.
- Attach a rubber band to the base.
- Cut the tissues into several pieces and fold into triangles.
- Start gluing triangles. They should be glued so that each successive row covers the previous one.
Fluff, satin ribbons or lace will work well for decorating the product.
Other ideas for drawing angels
Drawings of angels with wings beautiful and cute can be created both the simplest, consisting of only a few lines, and complex.
A few interesting examples can be taken as a basis:
- Below is an extremely simple image of an angel praying. The picture is more like a statue. For drawing, it is enough to use simple geometric shapes. For example, the body is an elongated rectangle, the head and hair are circles.
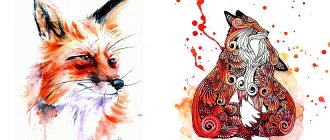
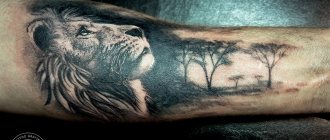
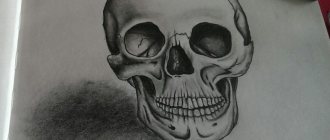
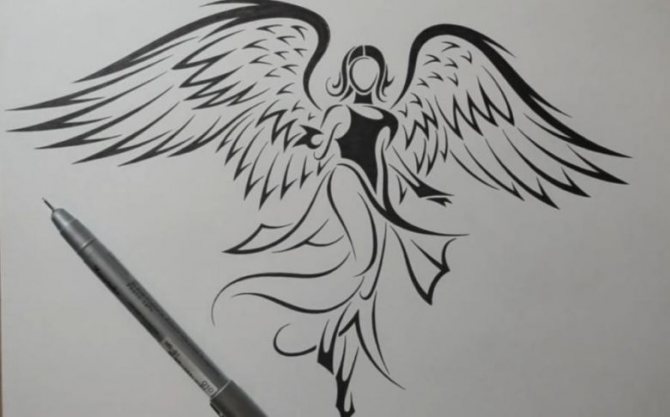
- If, on the contrary, the child has already mastered many drawing techniques and is great at it, you can show him or her how to detail the wings. Below is a very nice drawing in simple pencil, where you can see exactly how you can depict the feathers. You should also pay attention to the light and shadows.
- You can also use another simple drawing technique. For this, the image is done with short strokes. That is, there are almost no straight and evenly connected lines.
This will be especially convenient for a child who is still having trouble drawing without taking the pencil off the sheet of paper. Below is a simple drawing of a sitting angel with his head bent over his knees.
- The angel does not have to be a child. You can depict an adult girl. If you do not want to or difficult to draw the eyes, they can be depicted closed, adding only three-dimensional eyelashes. Below is shown as drawn arms and wings.
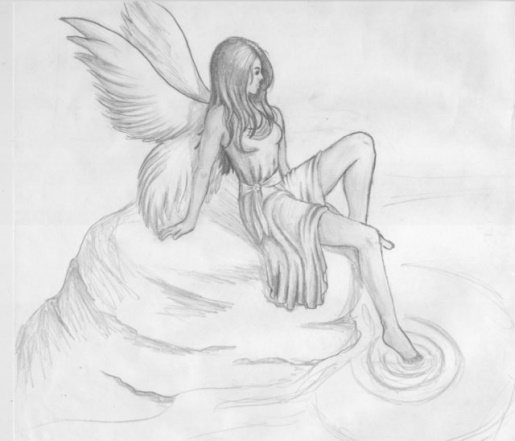
- Wings are sometimes given not very familiar shape. For example, you can take as the basis of the wings of a butterfly or fairy. In this case, they will be bifurcated. Angel-girl can be depicted sitting on a rock and put one foot in the water. In this example, the dress is depicted in more detail.
- More often angels are portrayed as more serious. But you can go another way. Below is a funny angel, with a funny face. Character's mouth is ajar in a smile, and his eyes are closed. It is necessary to draw quite long eyelashes.
The image can be supplemented with cute locks of hair, and the halo can be drawn directly on the head.
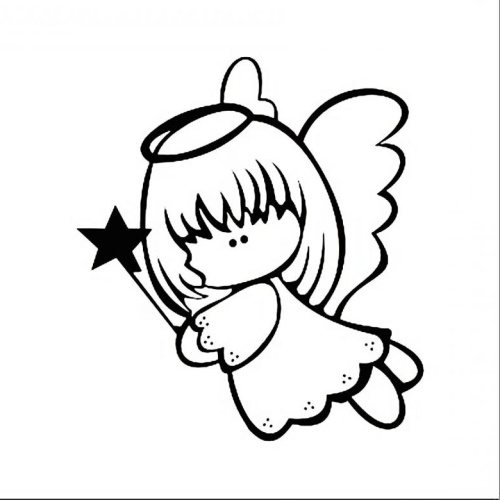
- Here is another example of a funny angel with beady eyes very close together. The picture is very easy to do and it will cope with younger and older children.
You can draw a magic wand in the hands of an angel. The wings should be very light and rounded. Also this example shows how else you can draw hair.
The resulting drawings of angels can be hung on the fridge, the wall or think of how else you can use them for decoration. Beautiful characters with wings are symbols of many holidays. In the process of drawing, you can tell who they are, give an example of several parables. Children love such pictures.