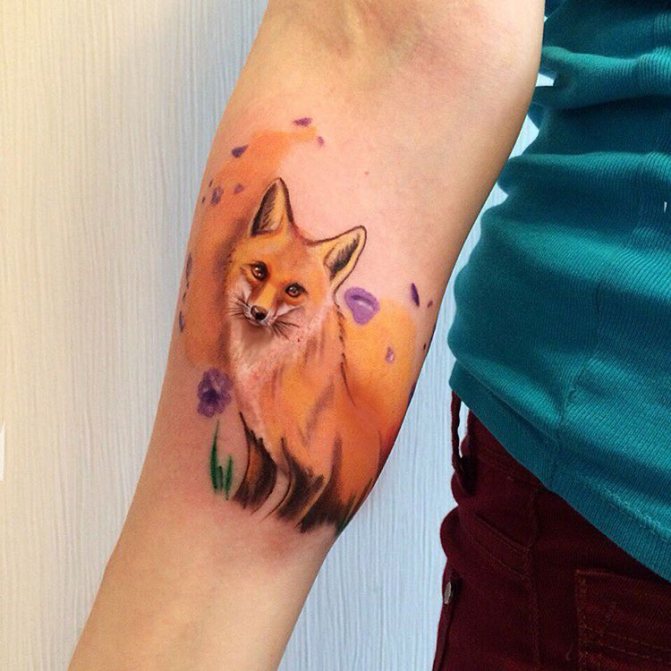
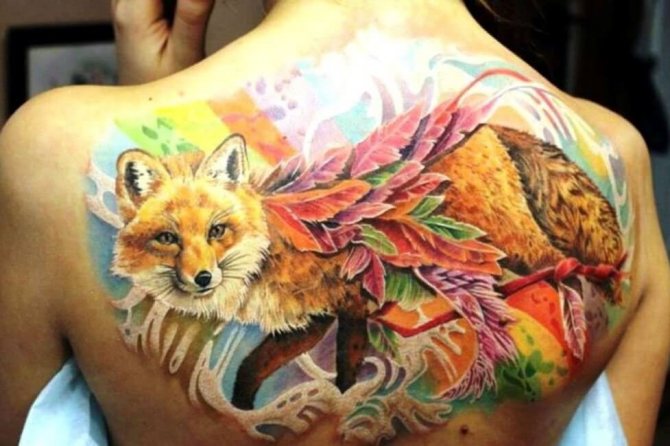
A tattoo is a way of self-expression, an attempt to make yourself more original and attractive. Most people limit themselves to the classic set of animalistic tattoos, using the image of a tiger, wolf or bear on their body. But a more original and interesting option will be a tattoo of a fox. Now such an image is rare, but girls are increasingly using this attractive and cunning animal to decorate their bodies.


Preparing for the drawing lesson
Parents should first learn for themselves how the drawing is created step by step, then they can explain the technique of drawing this animal to their child. Having mastered the sketching technique, it will be possible to create realistic and fantasy images of a fox and foxes.
The basis of drawing is the same for all methods of drawing. The basis of the sketch is to create a step-by-step outline of the elements of the body and head of the beast.
The outline of fox parts is created with the help of geometrical figures, visually resembling parts of its body:
- polygons;
- ovals;
- rectangles;
- circles;
- triangles;
- squares.
Tip! To make it clear which geometric shapes to use for the outline, you should put in front of you a sample image of a fox.
To create a drawing you will need:
- a white sketchbook sheet;
- a simple pencil to create a sketch;
- eraser;
- Watercolor paint or pencils.
Below will be presented several mater classes for drawing a fox.
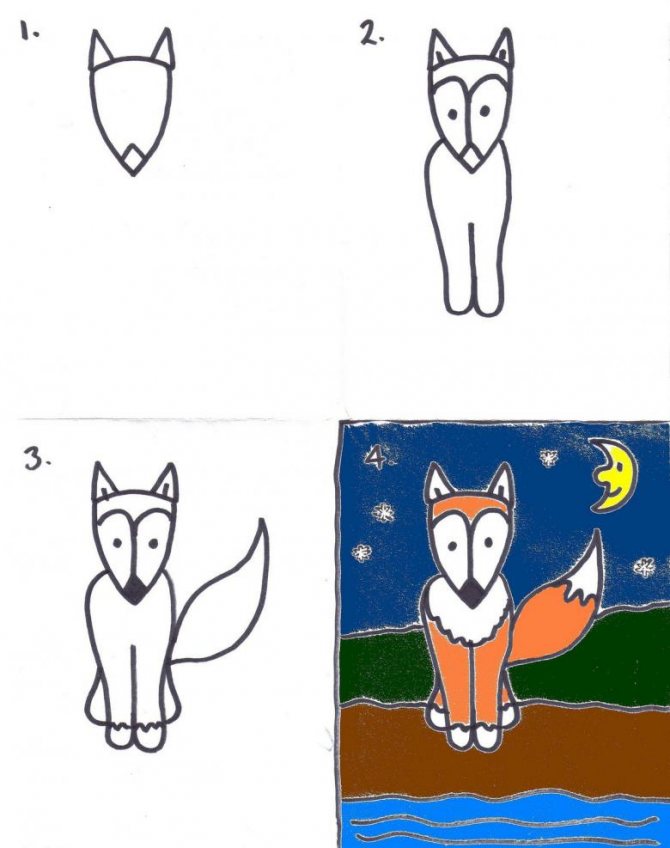
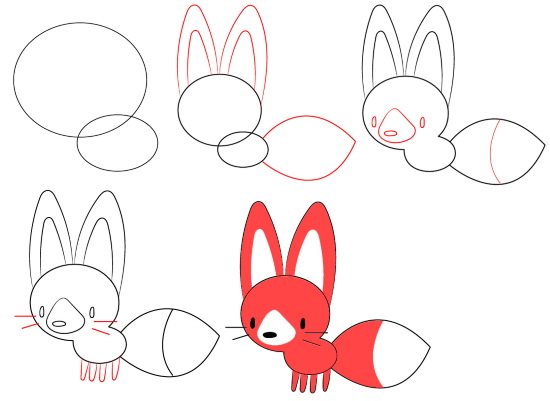
How to Draw a Realistic Picture of a Fox on the Hunt
A child will be able to learn step by step how to create a drawing of a fox according to a clear scheme, first with a simple pencil, and then with paints.
Drawing step by step should be according to the following scheme:
- Going to hunt the fox should begin to draw from the head, creating an irregular pentagon. Its triangular side will be the base of the muzzle, and slightly curved top - the back of the head;
- Then draw a horizontal irregular oval, part of which should overlap with the pentagon. The lower part of the oval must be convex and the upper part straight;
- From the back of the oval, a horizontal narrow rectangle with rounded corners is drawn. This will be the tail;
- At the bottom of the large oval near the head two straight lines, running parallel. These will be the front legs. For the front hind leg, draw a square with rounded corners in the tail area. Next to it you need to draw two parallel straight lines. And next to the tail one parallel line. From her to make two parallel short lines at an angle of about 90 degrees;
- On the head, draw two triangles, marking the contour of the ears;
- Draw all the elements with one common contour, drawing details, as in the diagram;
- draw the animal's face in the sketching technique;
- draw paws, tail and back;
- erase unnecessary parts inside the outline with a rubber band;
- Color red, white and black colors in the resulting drawing.
In addition to this technique, there are several other ways to draw a red-tailed fox.
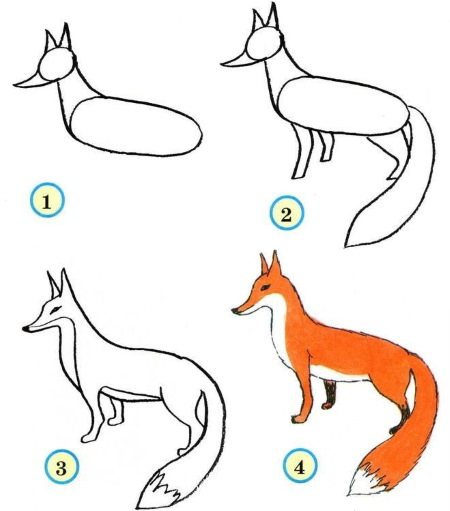
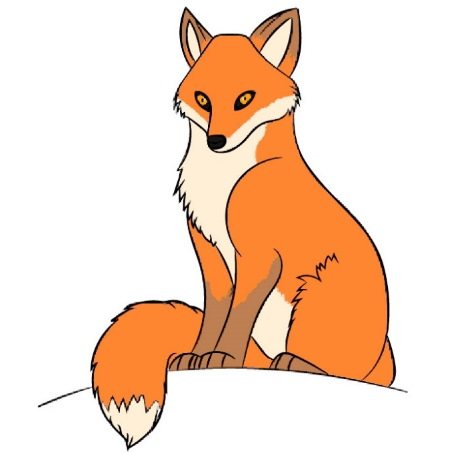
Realistic image of a fox, drawn on the basis of circles
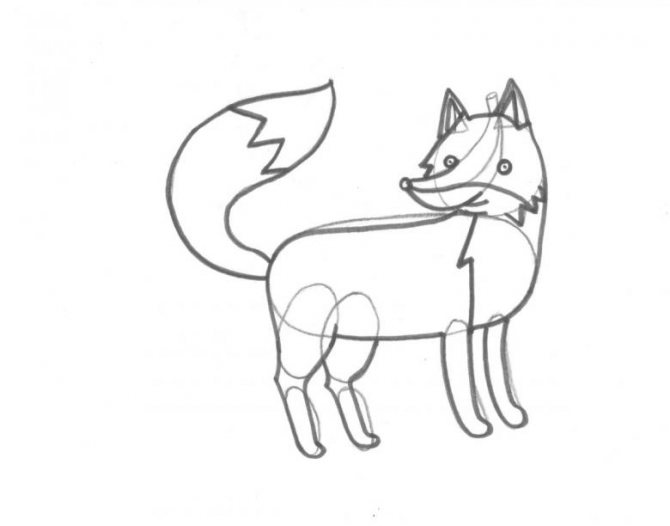
In the same technique, a realistic drawing of a fox with a large fluffy tail is created. Only for the basis of the body of the animal are taken circles and lines. A sheet of paper is attached to a board placed vertically. This is how real artists usually draw, positioning the canvas or sheet vertically.
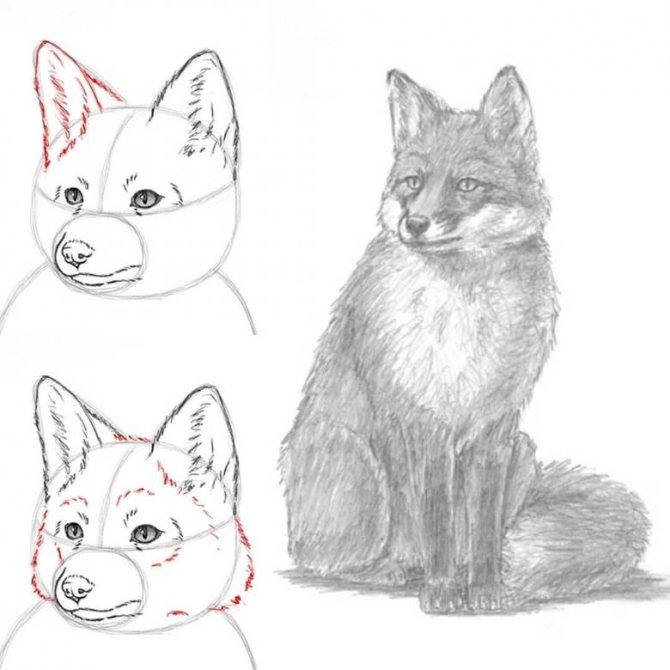
Important! The fox in a standing position is quite difficult to paint, so you can first create a sketch, which will then be painted with paints.
The step-by-step execution of the drawing consists of the following steps:
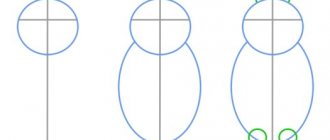
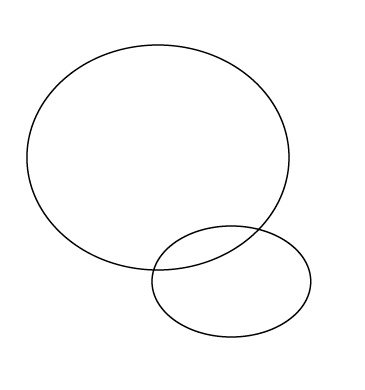
- Start with three circles, as in the photo, which should be of different sizes. The smallest circle is the head. It should be at the top. A big circle will be the front part of the body. A medium-sized circle will be the back part of the body of the red beast.
- Connect the small circle to the big one with a straight line, which should be the base of the neck.
- Draw lines depicting the paws of the fox in the technique of drawing from the original picture.
- Created contours are connected by strokes, fluffy tail is drawn.
- Traced muzzle, eyes and ears of the animal, the body traced paws.
- The drawing can be colored with paint if desired.
The photo shows a step-by-step sketch of a drawing of a red beast.

Drawing a fox with paints
When the sketch is ready, wet the paper with water using a clean brush and let it dry a little. So gouache or watercolor will not spread beyond the outline of the drawing.
To draw a fox on the sketch, you need to use the original photo of the animal, according to which will be superimposed on the sketch different shades of paint.
For the work you need to prepare:
- drawing board;
- paints (gouache or watercolor);
- brushes;
- A container for water.

First, a sketch is created with a simple pencil on paper attached to the pin board with paper tape, then gouache or watercolor is drawn on it.
Drawing with paints includes the following steps:
- They start by applying light red shades, taking into account how the shadows on the animal are laid down in the photo and how the light falls.
- Then a thin brush with dark paint is used to trace the darkened areas on the body and muzzle of the animal. A squeeze-brush is used to create the texture of a drawing that imitates the fox's fur.
- Tones from bright red to dark brown are used to create color transitions on the body.
- The tips of the ears, eyes, nose, and paws are drawn in black paint.
- Using a gray shade, shadows are superimposed in the necessary places of the drawing.
- The squirrels, the breast of the animal and the tip of the tail are drawn in white.
- The white paint can create a walking snow effect by making small dots all over the picture of the animal.
The drawing should dry on the board, after which it can be framed and hung in the room.
Drawing a fox is quite easy if you use the rules of sketching. The image created with a simple pencil can then be colored in different techniques, using the skills learned in the workshops.
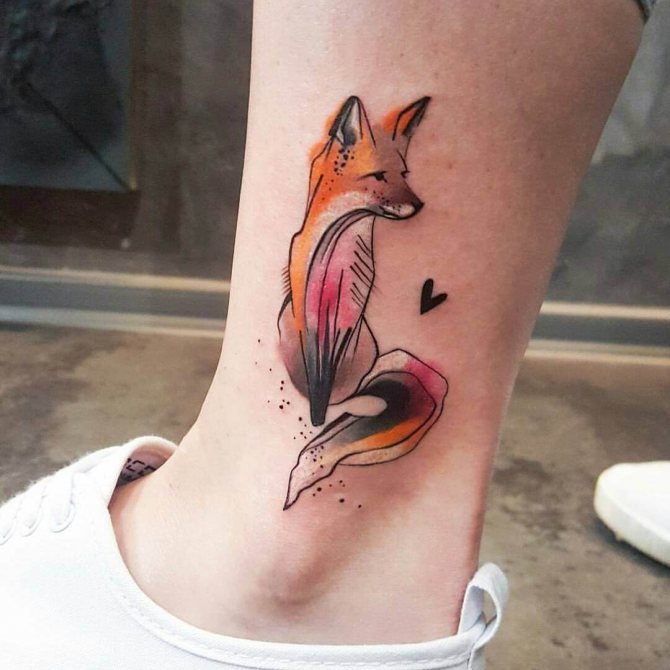
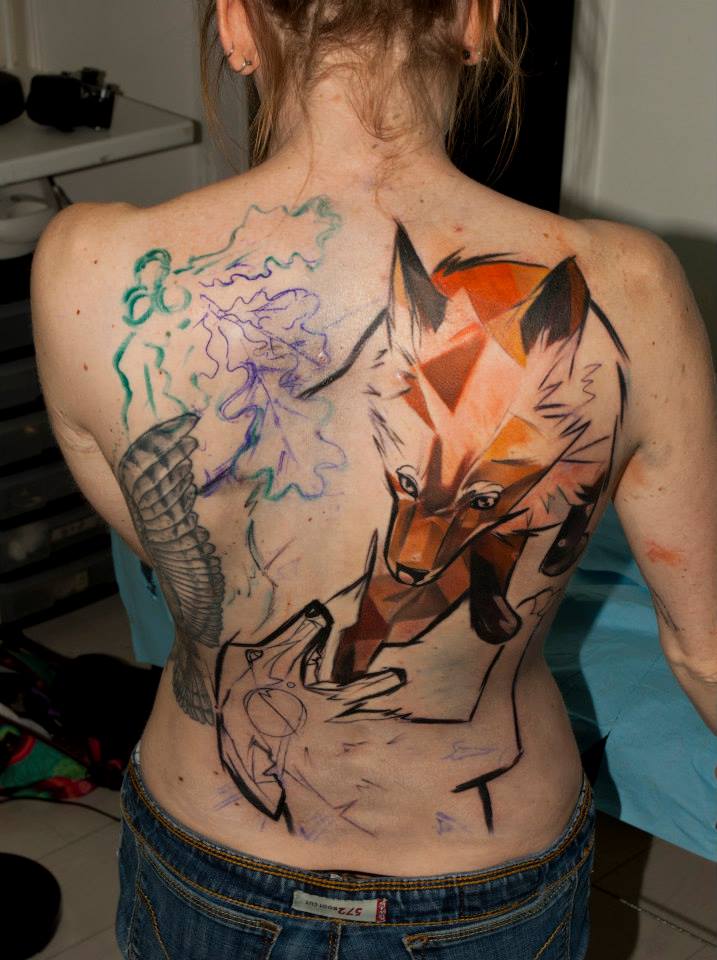
Sketches of fox tattoos
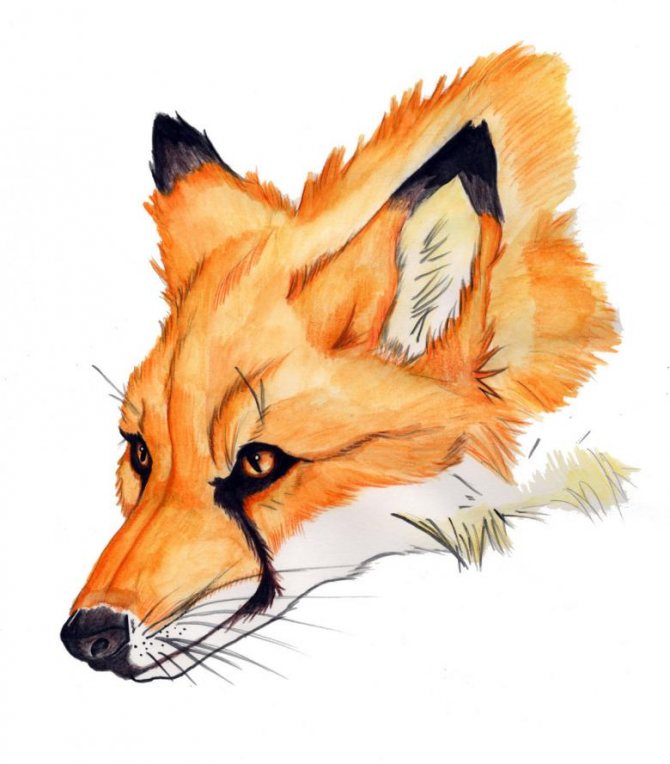
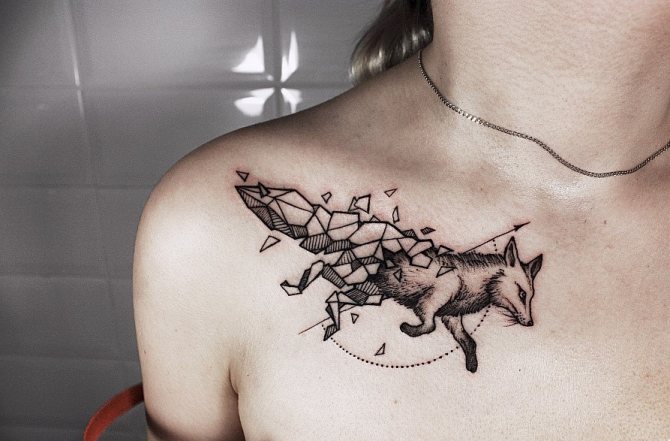
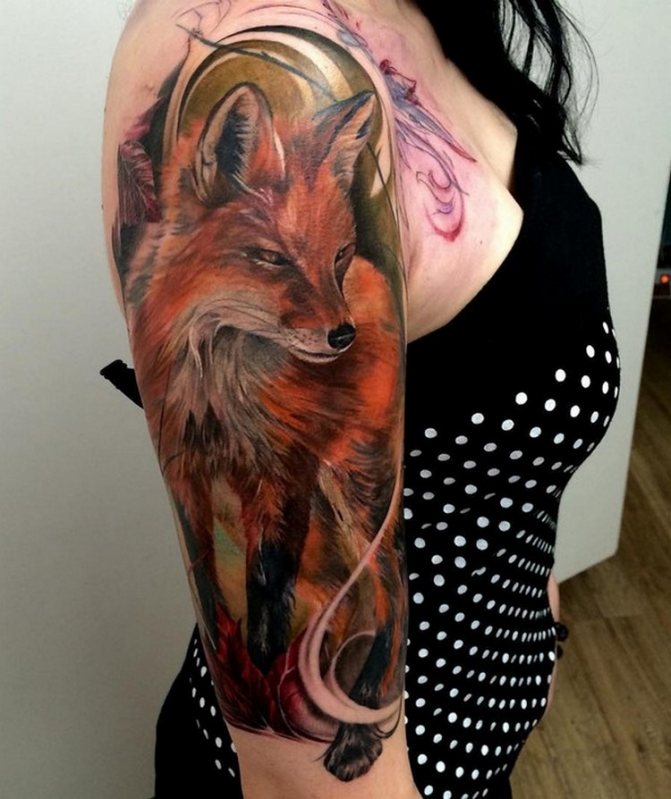
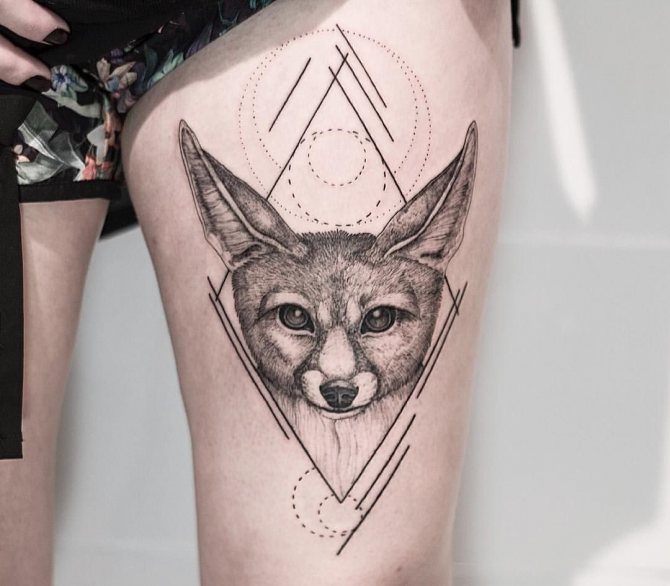
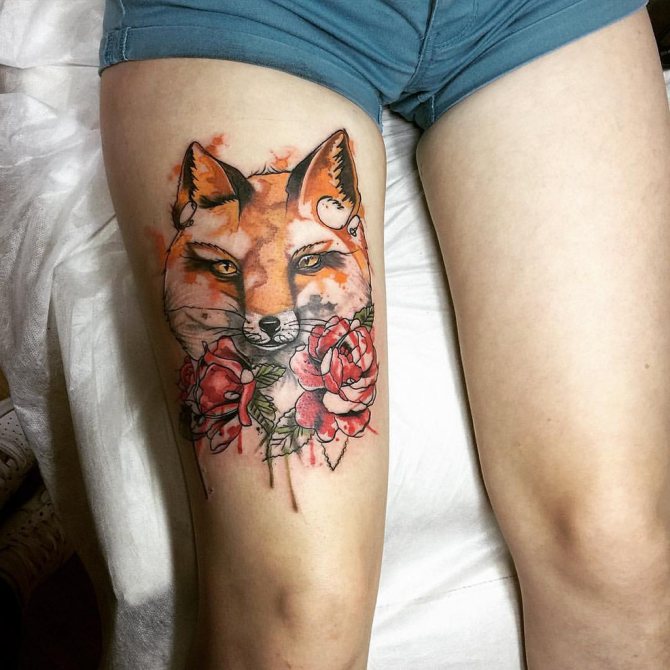
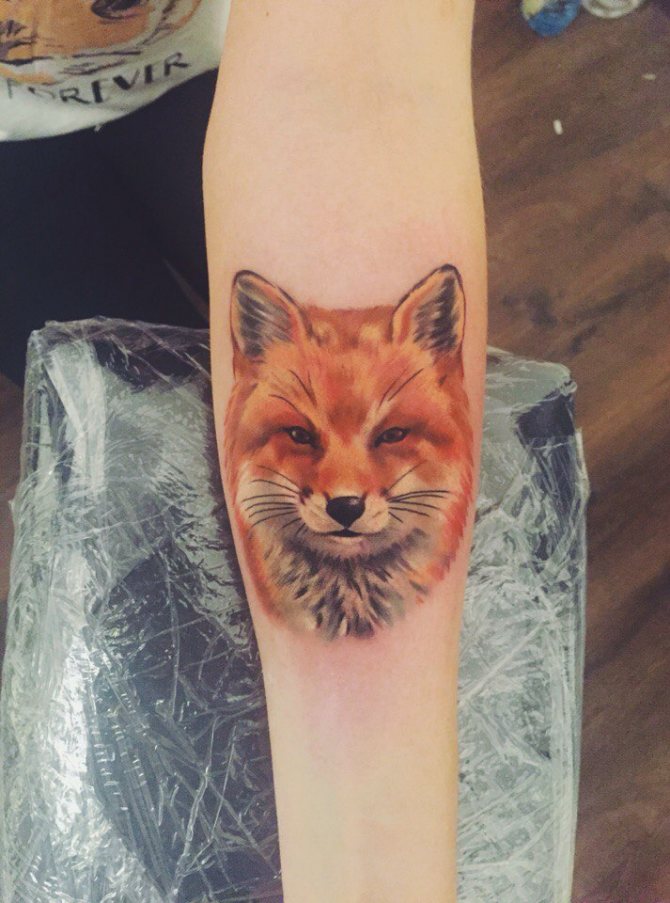
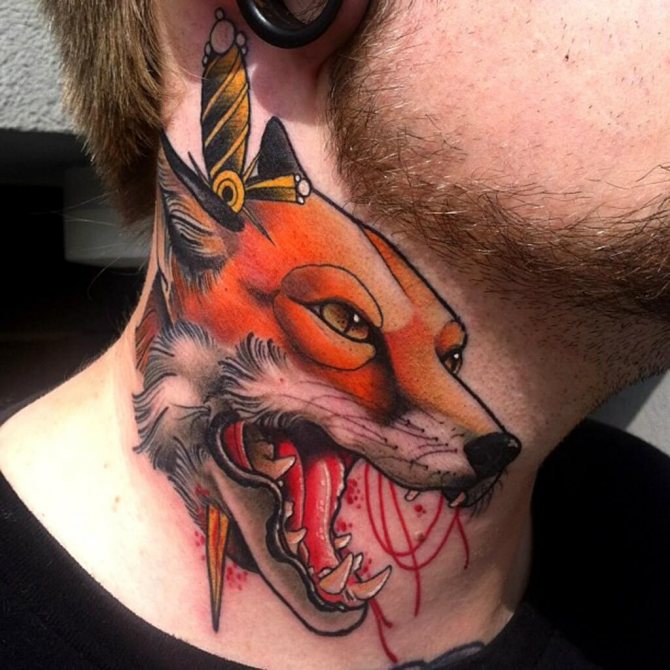
If you go to a salon to choose a sketch, the master will be able to offer dozens or even hundreds of beautiful and original sketches. When choosing the best image, you need to take into account the type of animal (whether it is completely depicted or just its face). When choosing a drawing, you need to pay attention to the details, the presence of additional elements and the color scheme that will be used.
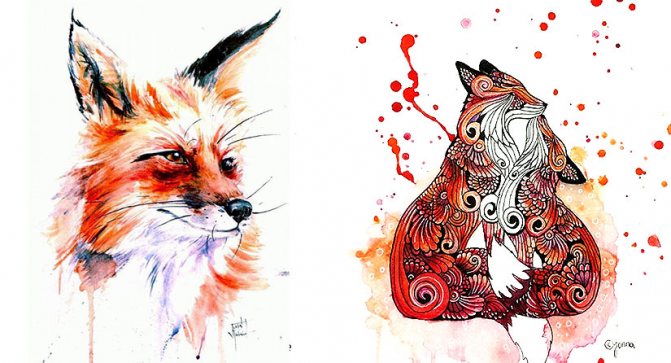
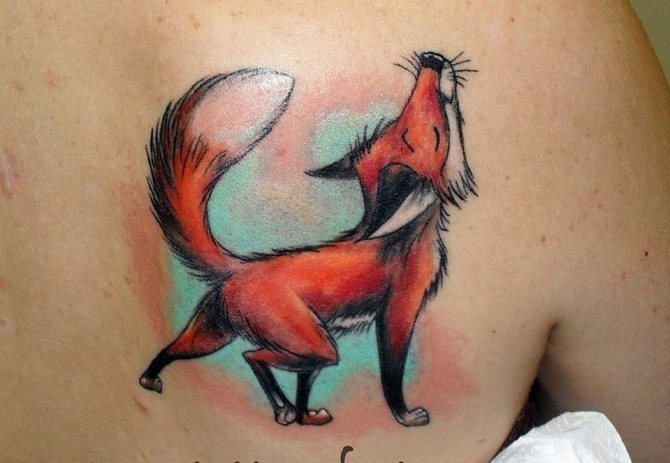
Depending on the accented area changes the meaning of the tattoo, for example, depicting the head, the main aspect is put on the curiosity of the owner, if the tail - the fox agility. Also will allow to express emotions the expression of the muzzle, if the fox squinted, it will be a symbol of guile and cunning, and if it has a grin, it is aggression, readiness for a duel.
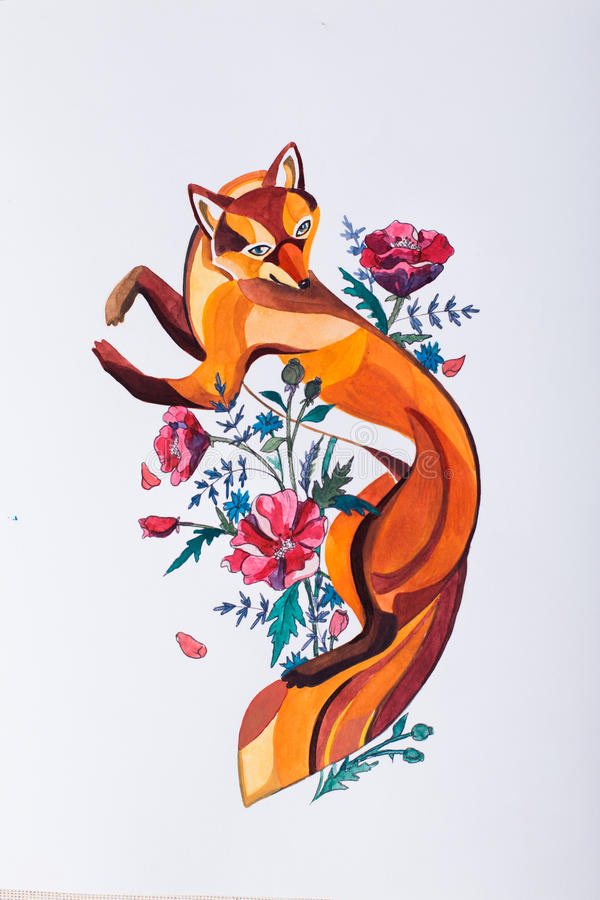
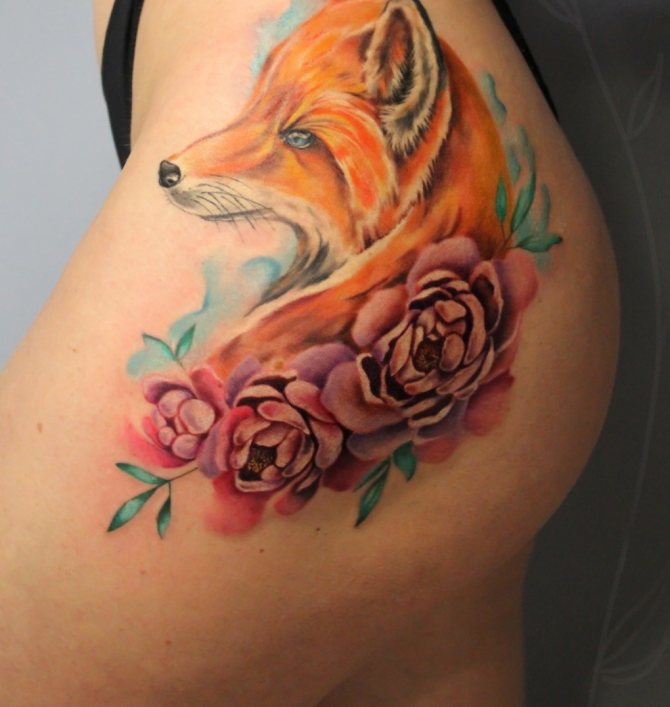
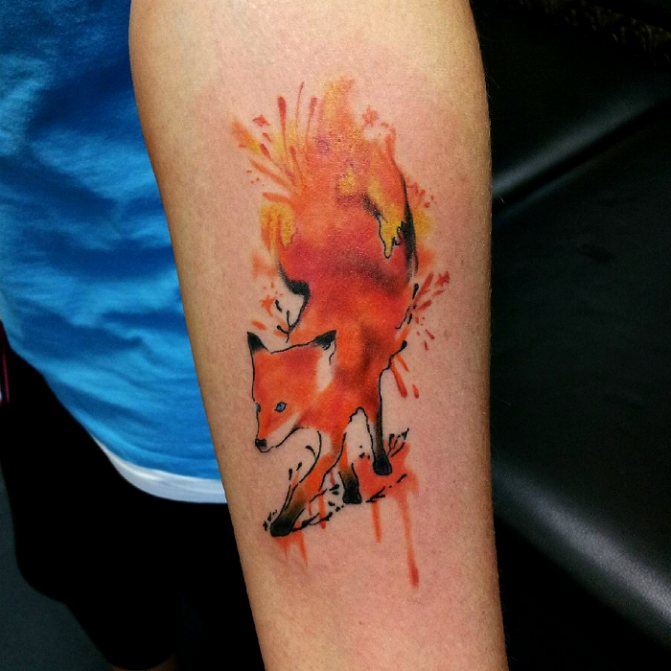
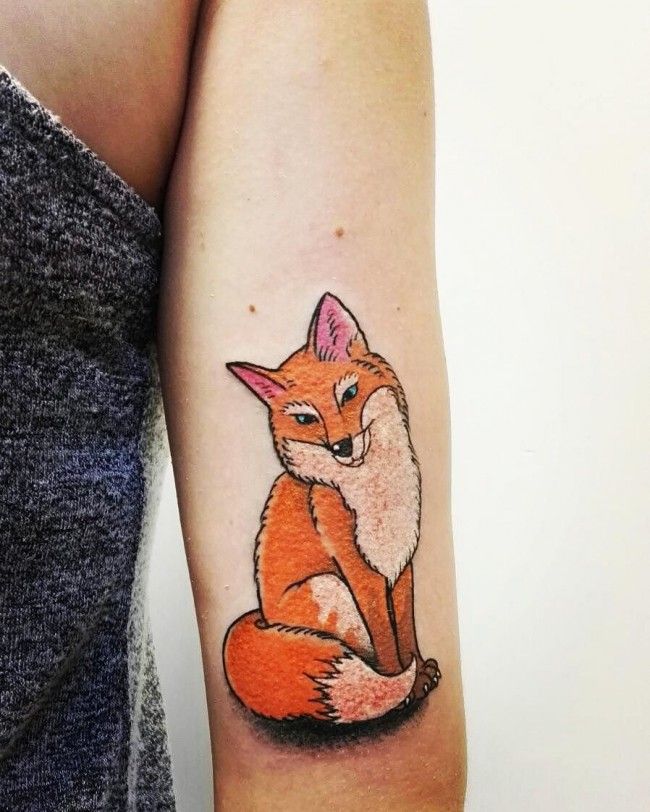
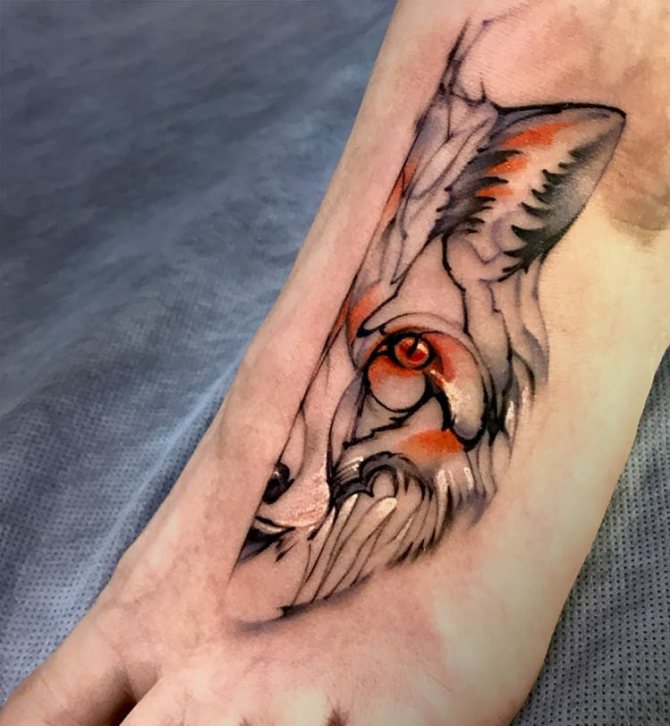
Also on the Internet you can find many sketches in which the animal bends and demonstrates its flexibility. This symbol would be ideal for a girl seeking to demonstrate her sexuality. A fox curled up in a ball - a woman needs warmth and affection, shows weakness and vulnerability.
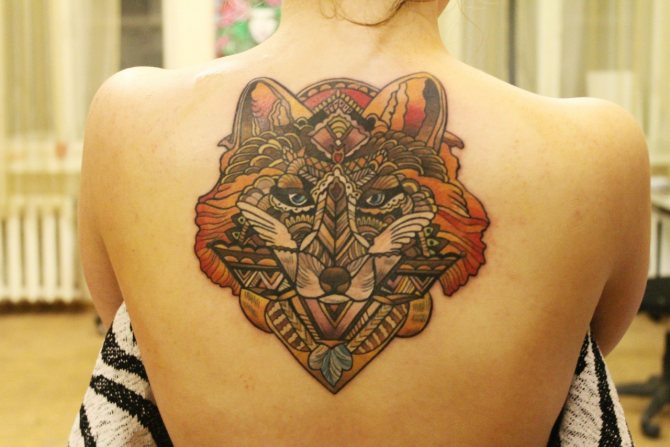
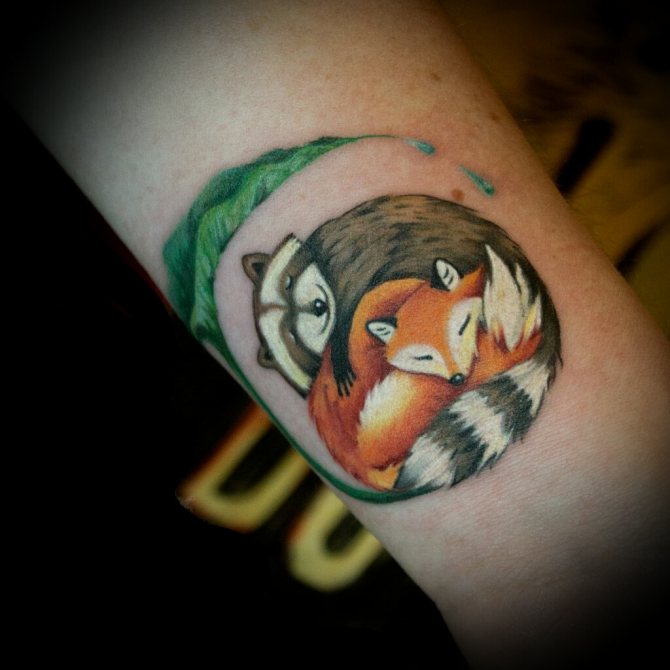
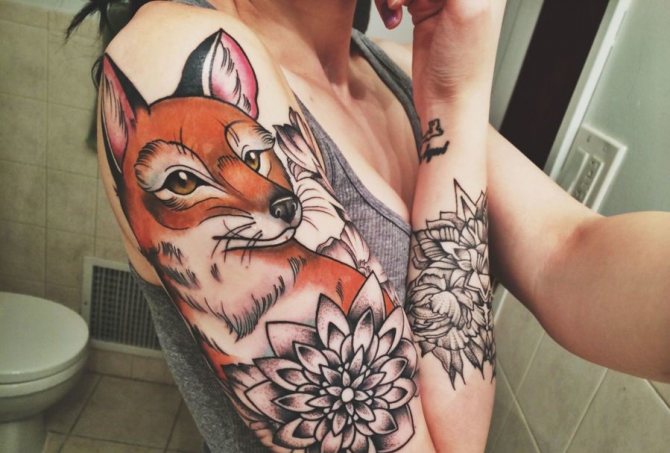
The animal can be depicted not only on its own, but also in addition to other elements, often other animals or birds. An original option will be the image of a raven and a fox, and the real masterpiece will be a tattoo of a wolf and a fox - a symbol of gray ice and red flame.
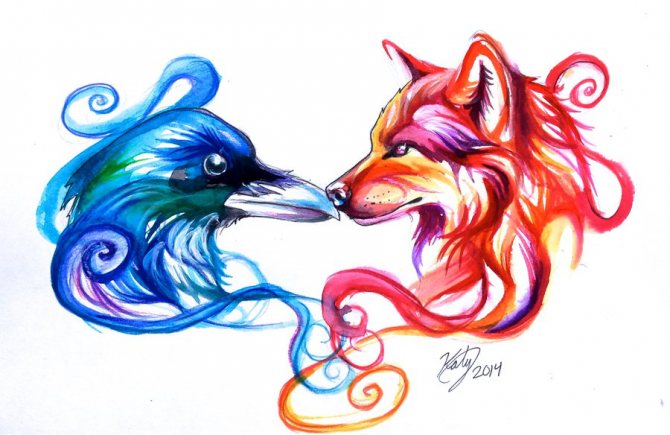
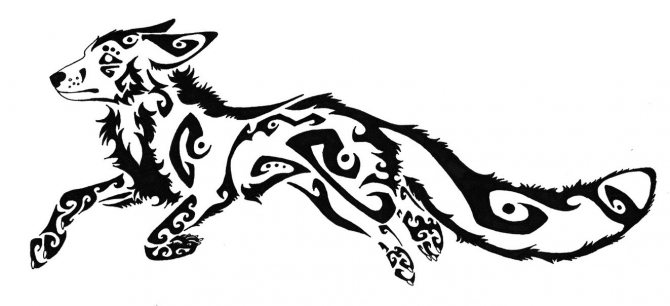
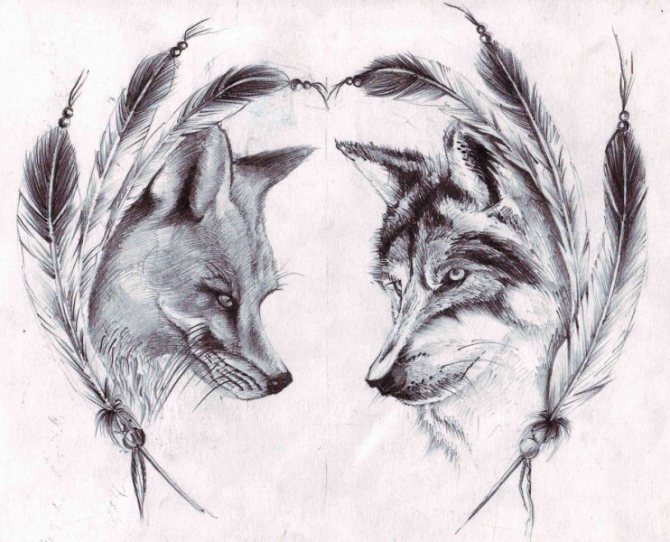
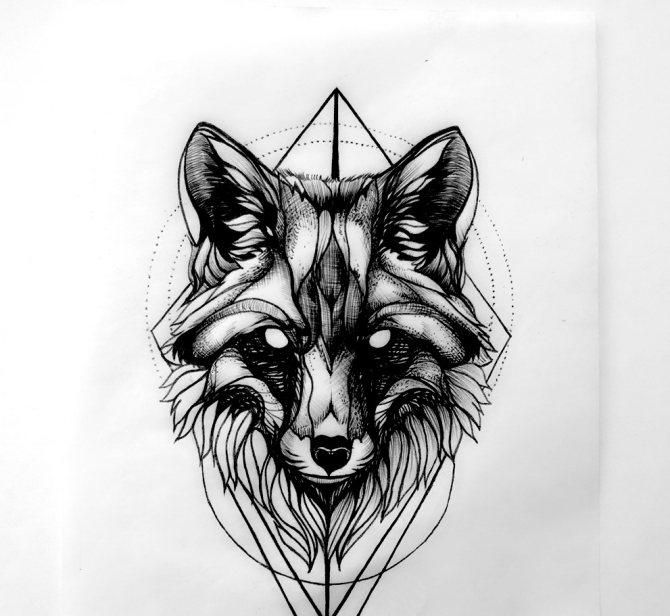

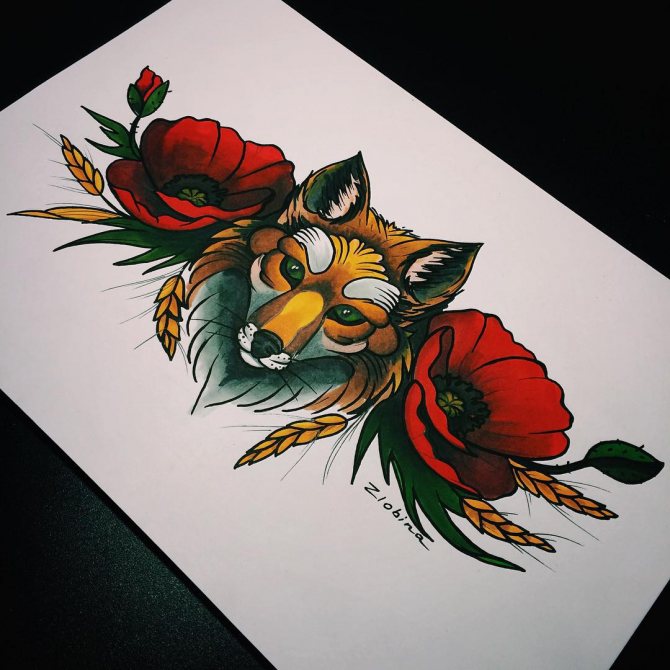
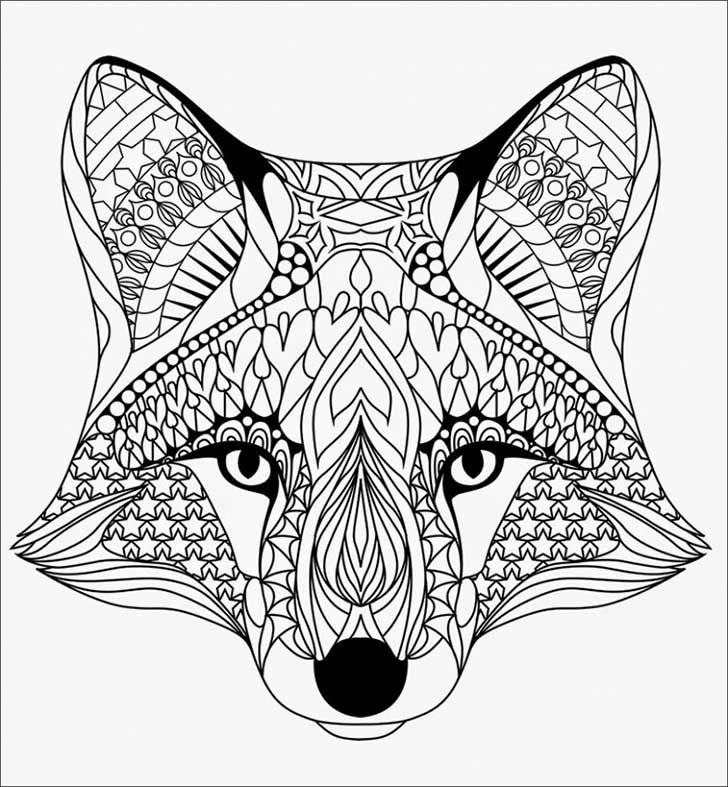
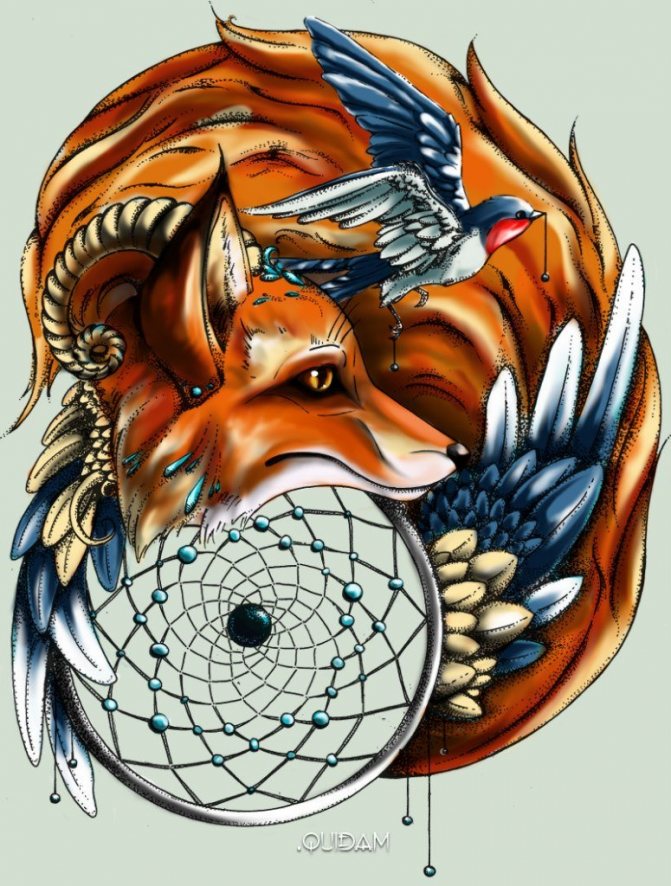

Photo ideas and examples for drawing a fox


Step-by-step drawings of a fox for children
Want to teach your child how to draw a fox or want to surprise your little one with fox drawing skills? Check out these step-by-step examples, I'm sure you'll find your own version
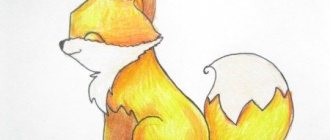
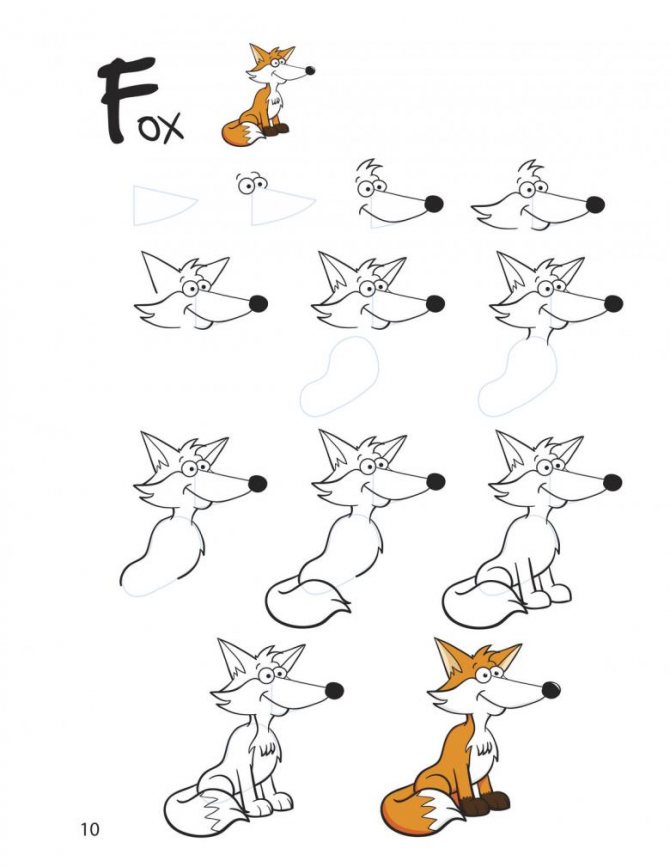
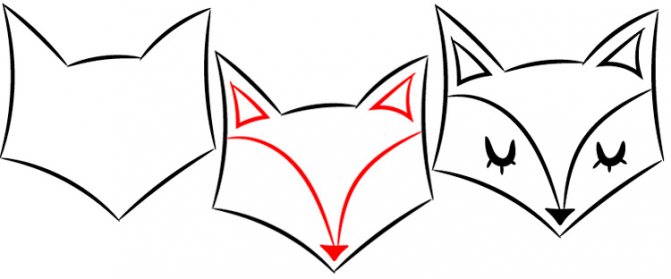
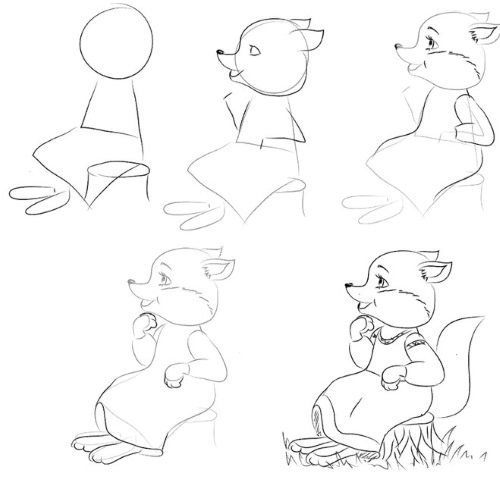
Drawing a sitting fox
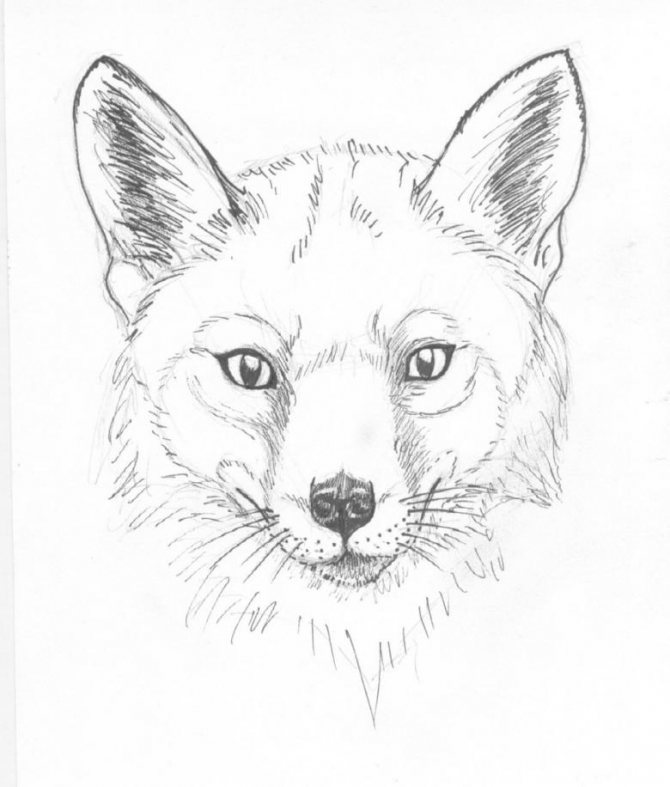
Draw a simple head shape, by the way, you can round the corners. Draw the ears, eyes, nose. Another sleeping fox, but we have a task to learn the basic shapes in drawing a fox, so the details and little things can change at your discretion
The body of the fox is drawn with two curved lines, like a barrel. You draw the tail and lightly detail the drawing.
Give your child bright colors and let him paint his fox however he wants. This decorative option provides plenty of room for imagination!
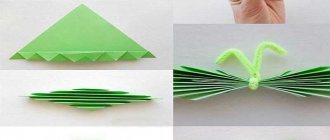
Drawing and appliquéing a fox from simple shapes
This drawing of a fox does not contain flowing lines - it is all built from elementary figures, which children draw back in kindergarten. By the way, this fox can also be made in the form of applique for an autumn card, finishing all the fine details on the finished craft. Details for printing the applique at the very end of the lesson
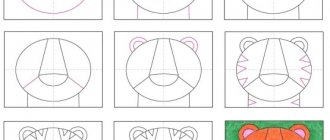
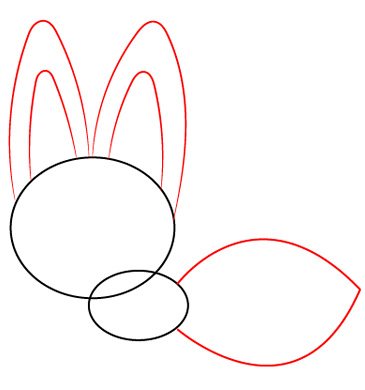
So, two elipses. Oddly enough, the head is bigger than the body.
The ears and tail are in the form of elongated elipses. So far it faintly resembles a fox, more like an ant with ears, but a little patience.
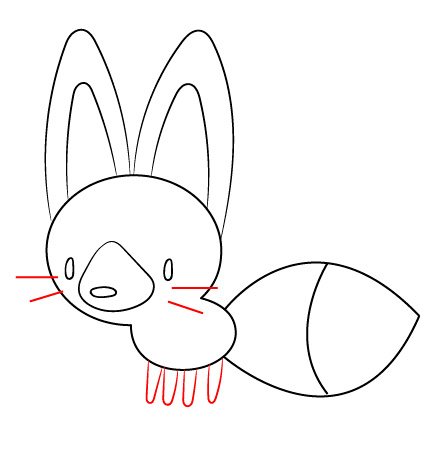
Still not a fox, but we are trying, drawing a muzzle with eyes and a spout.
Cockroach! - said my little daughter to me. It's a shame, but let's not stop and draw a fox mustache and work with the tail. Let's complete the four paws. Simple figures - elongated ovals.
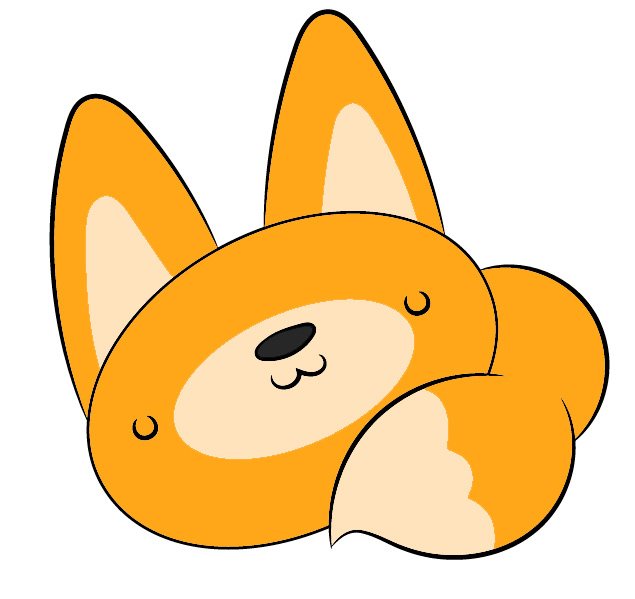
My page is all orange from foxes, so this vixen I made more red. The black outline lines are not really appropriate here, you can do them in red or orange tones, it will look better. Not even a cockroach. )
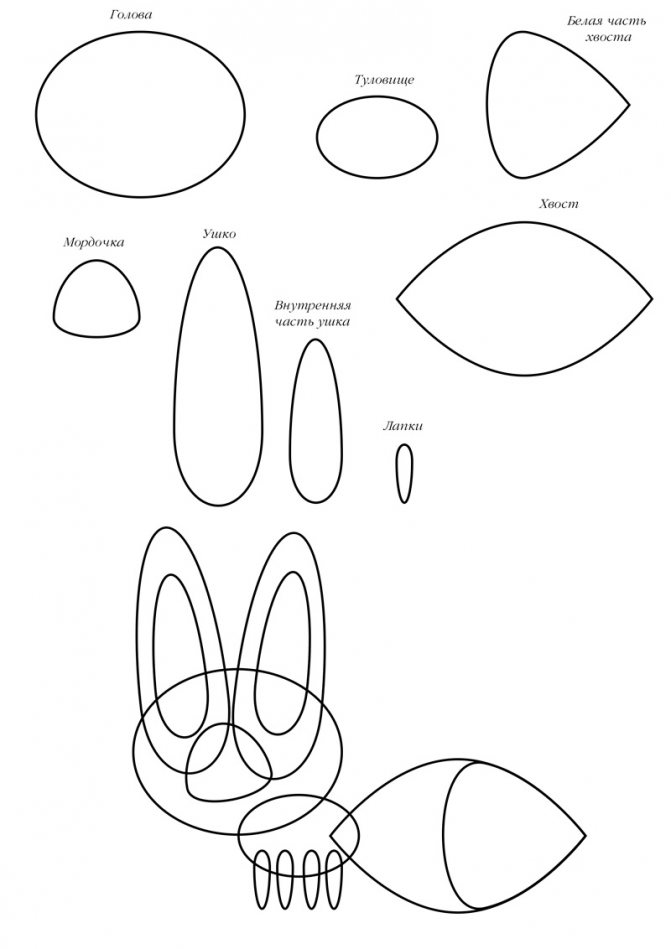
Fox applique template.
The fox will be 12*14 cm in size.
Open the picture in a new tab, save to your device and print. The size of the template is adjusted to A4 size.
Template (click)
Little fox.
Another simple little fox drawing for children and again of simple shapes. Despite its unpretentiousness, it's pretty cute. Draw a snout with two ellipses, double ears, draw the back
Time for the tail and its white tip. Gentle movements, give the tail dynamism and outline the tip. Remove unnecessary lines with an eraser. Perfect!
That's how cute we got. Again about the dark outlines - it would be better if they were the color of the picture itself - dark orange, for example. But all this you understand when you see the finished picture.
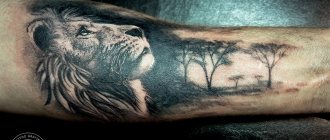
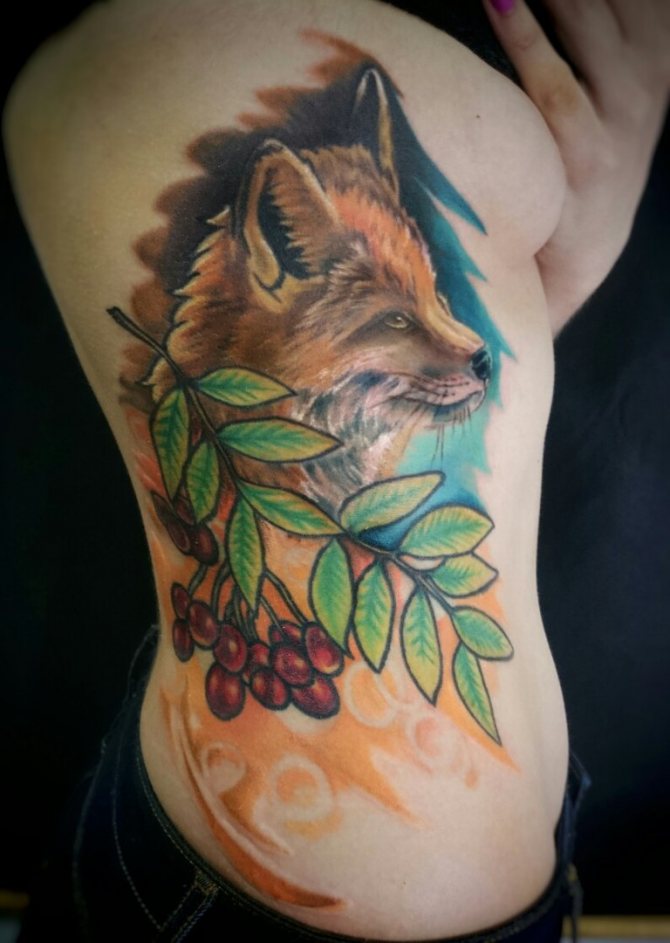
Tattoo foxes for girls and men
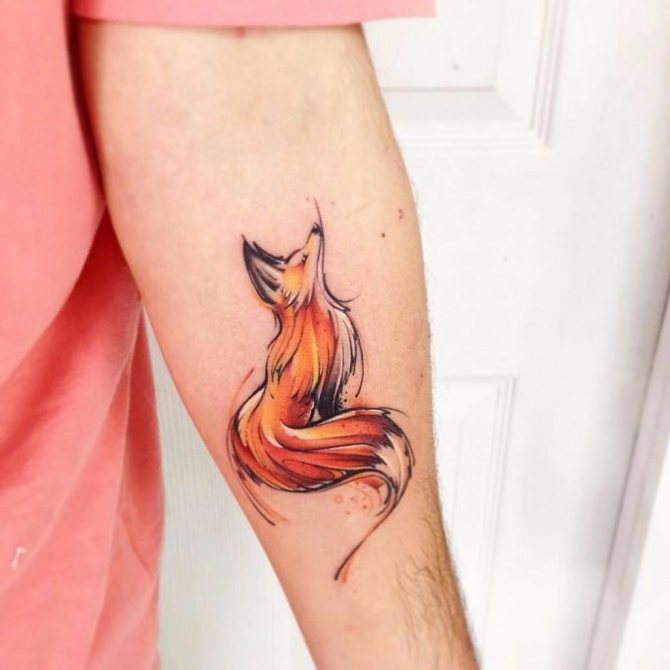
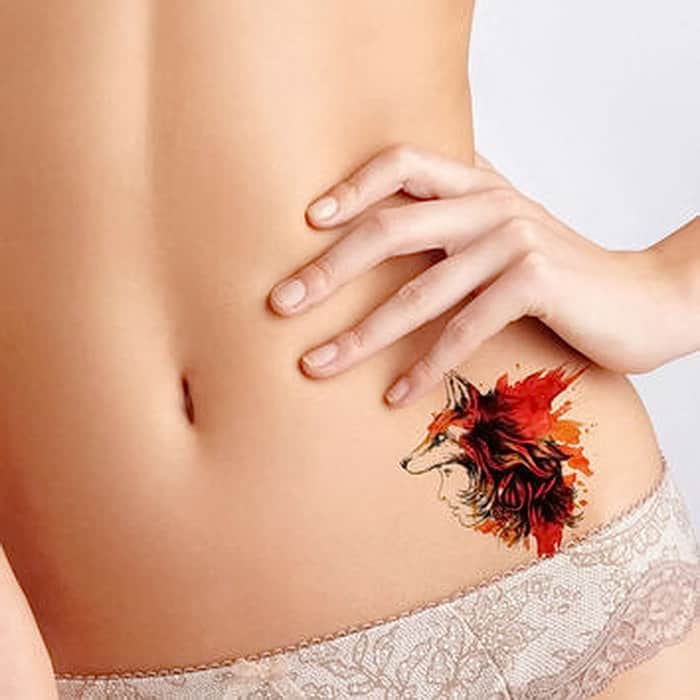
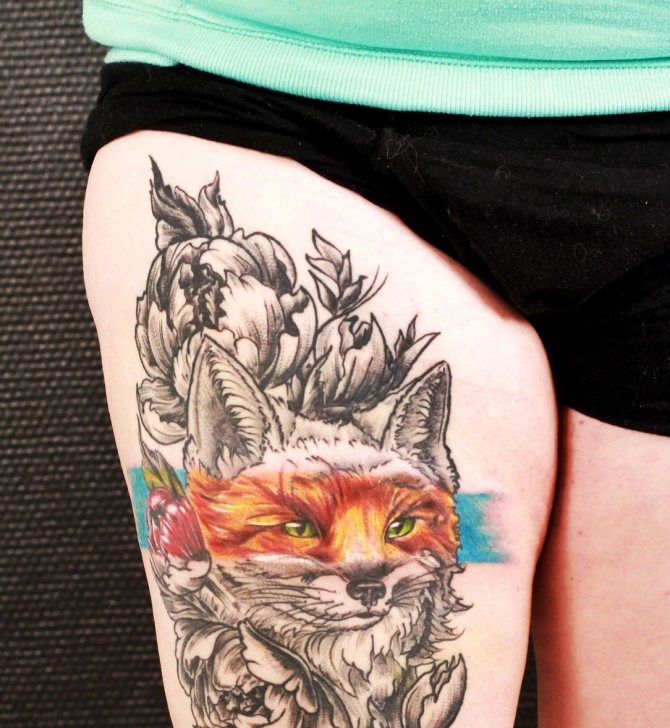
Immediately it should be noted that men such tattoos on their bodies do not welcome and practically do not use, because the fox is a female symbol and on the body of girls he is found much more often. With this image girls are trying to show everyone his secrecy and mystique, agility, cunning and resourcefulness of mind. In general, this is quite justified and corresponds to reality. The fox is not too aggressive, but nevertheless a predatory animal that can fight to the death. Girls often use such an image, confirming their love for their children, because the fox stands to the death, shielding its offspring from danger or death.
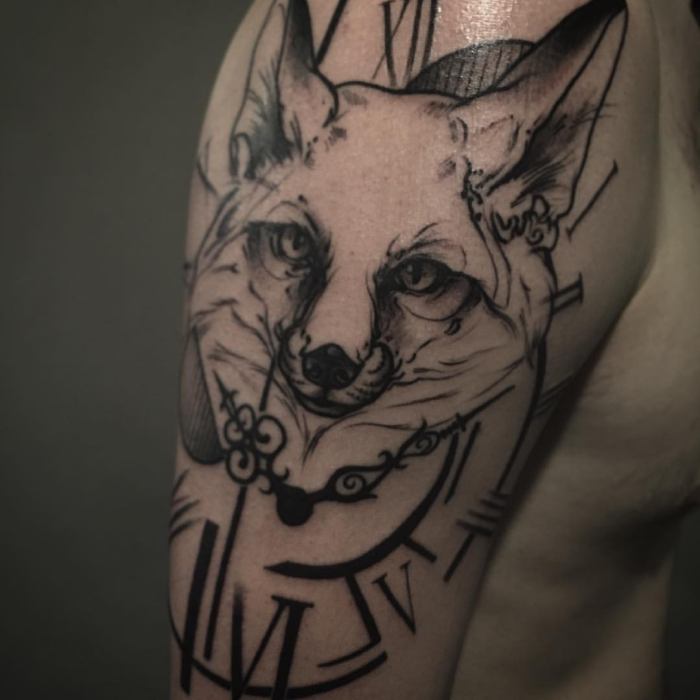
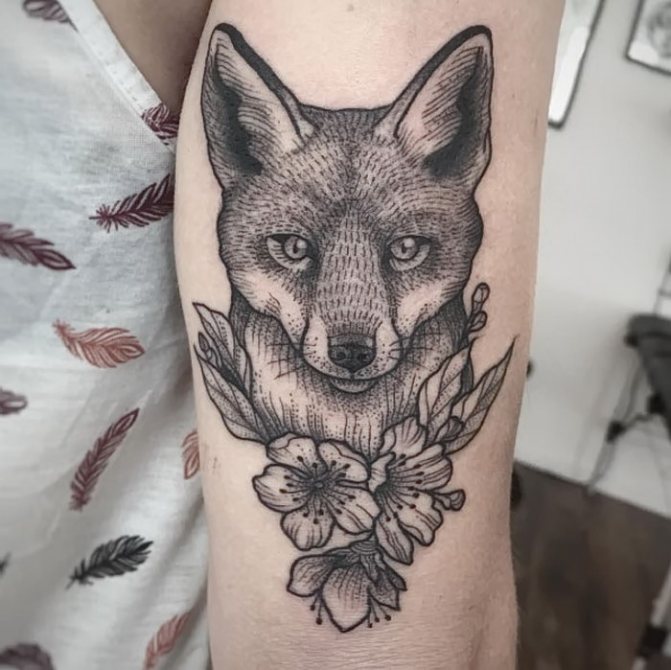
The muzzle of a fox on a woman's body symbolizes cunning and guile of the girl, can be both abstract and cautionary in nature. Also, such an image can be used as a defensive reaction, remaining in full view of passersby, whom it may scare away from the owner of the tattoo. Most girls with this tattoo hint at their originality, the ability to wrap their abuser around the finger, giving him an unpleasant surprise.
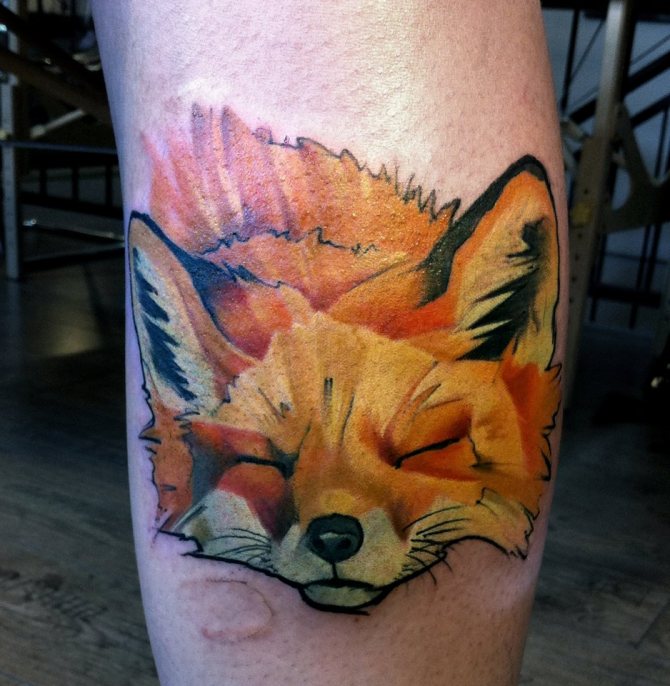
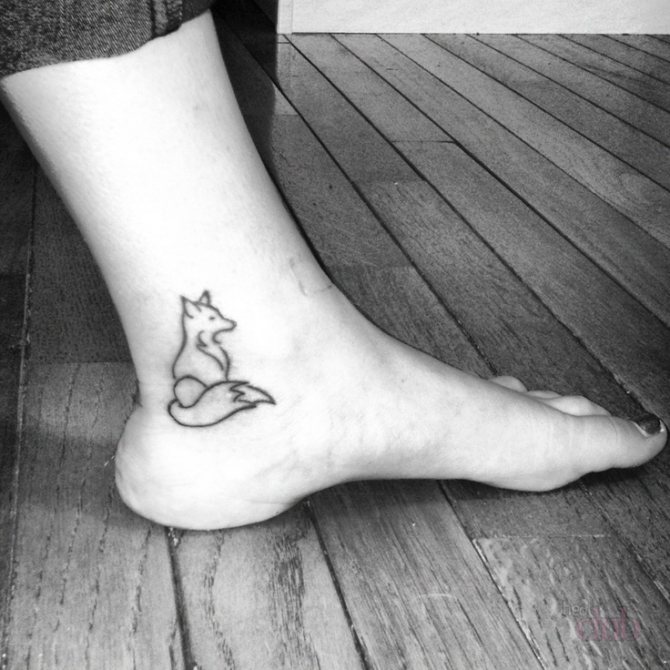
Previously, this tattoo was used by older and experienced women who symbolized the fox difficulties, which they passed with their heads held high. Nowadays, the image of the fox is more often found on the body of young girls, because they just like it. Younger, naive and playful girls use the tattoo depicting not an adult, but a small fox, demonstrating that the owner of the tattoo is only being formed as a woman.
As for the fox on the body of men, it has a completely different meaning, symbolizing good luck and the success of financial affairs. Another meaning of the tattoo for the stronger sex is freedom, because the fox would rather chew off his paw than be caught in a trap.

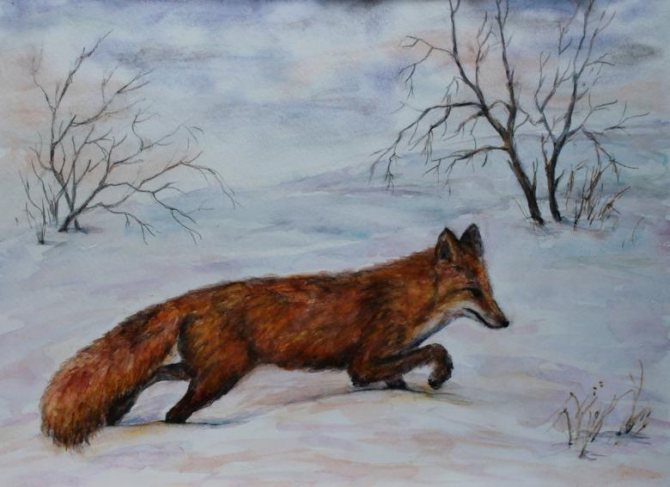
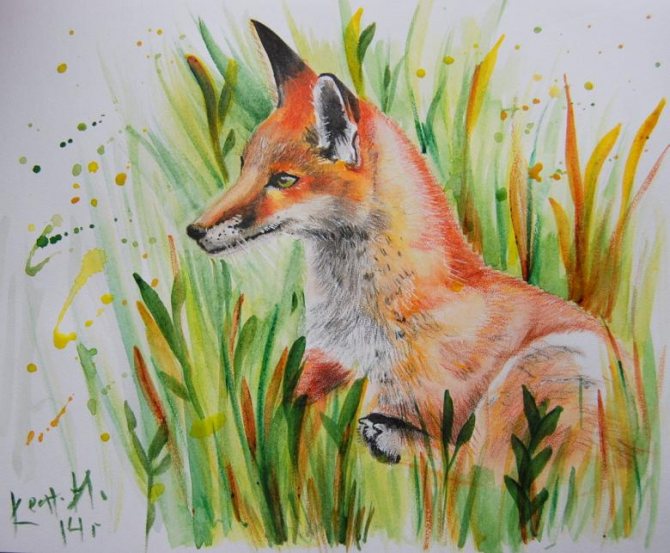
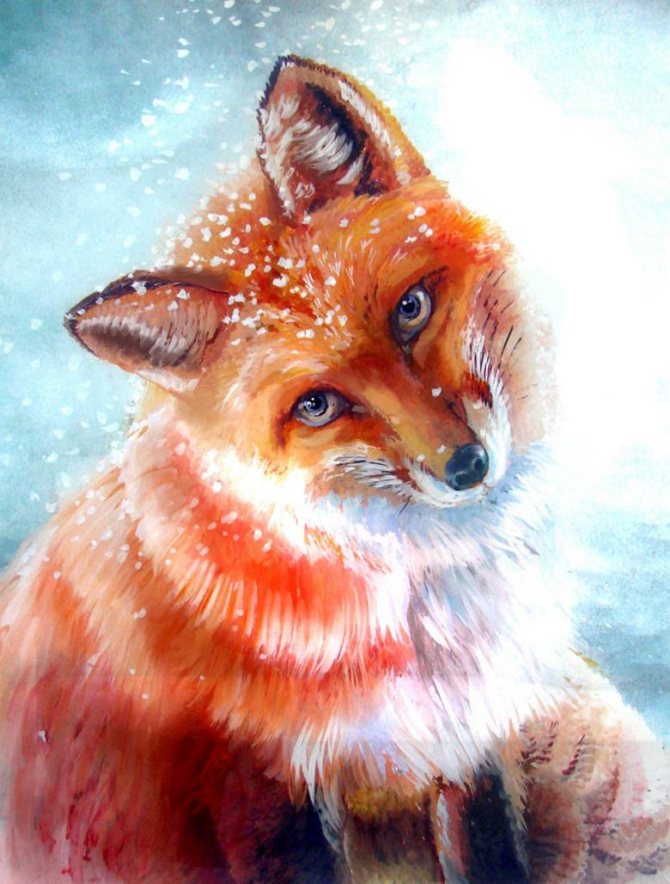
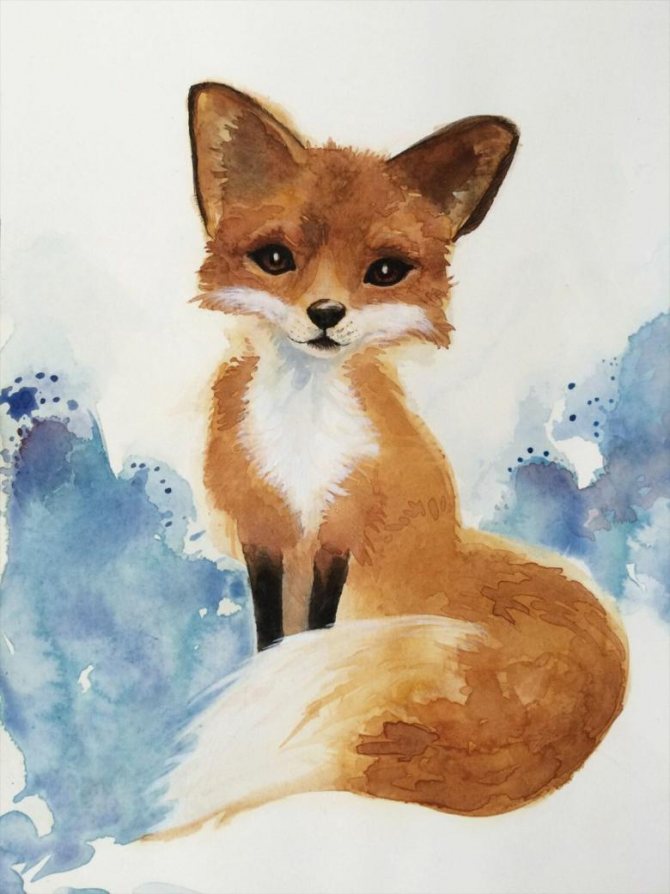
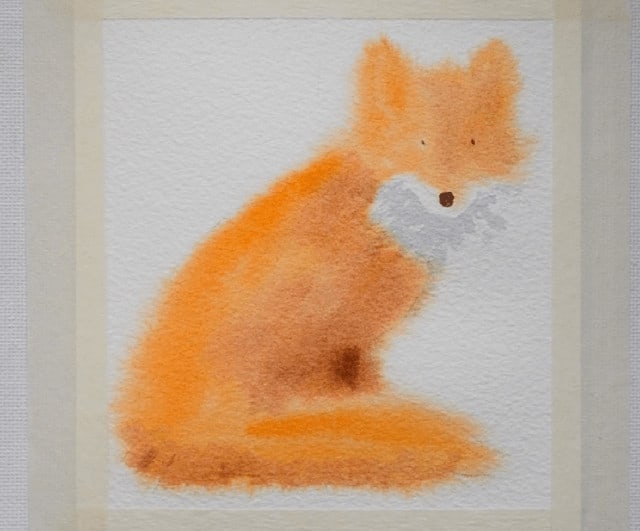
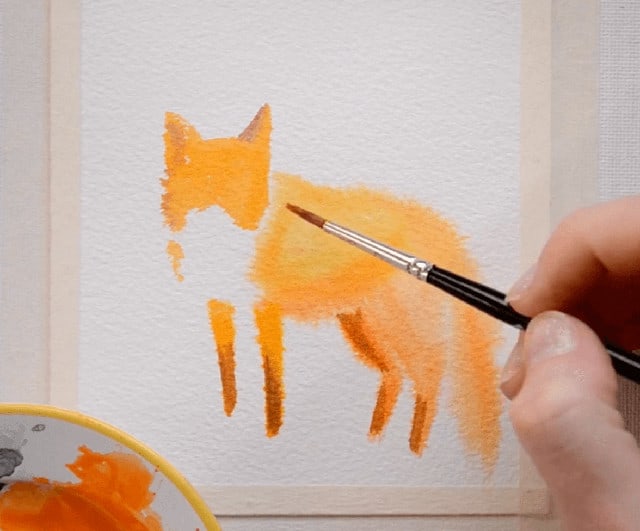
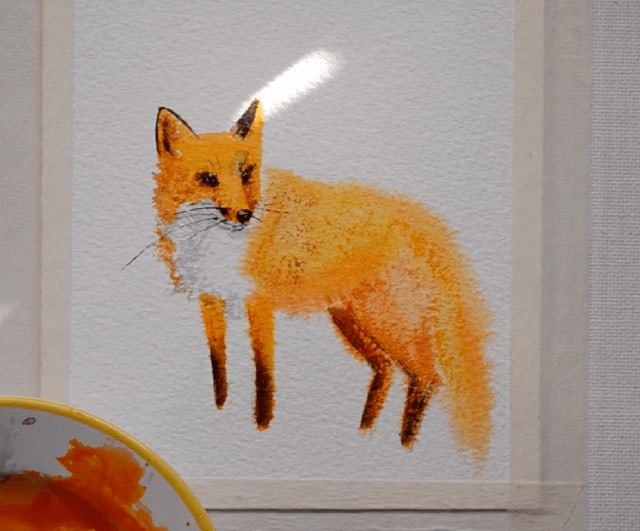
How to draw a fox that sits in the snow
The picture we are going to use as a reference:
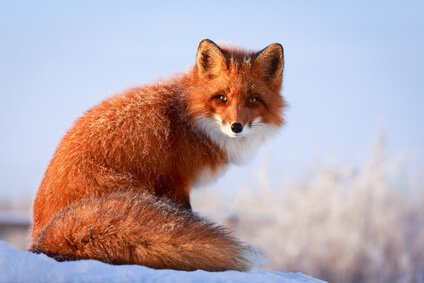
Look at the image of the fox carefully: to make it easy to do a sketch or outline of the fox, we visually divide the shape of the fox into two halves.
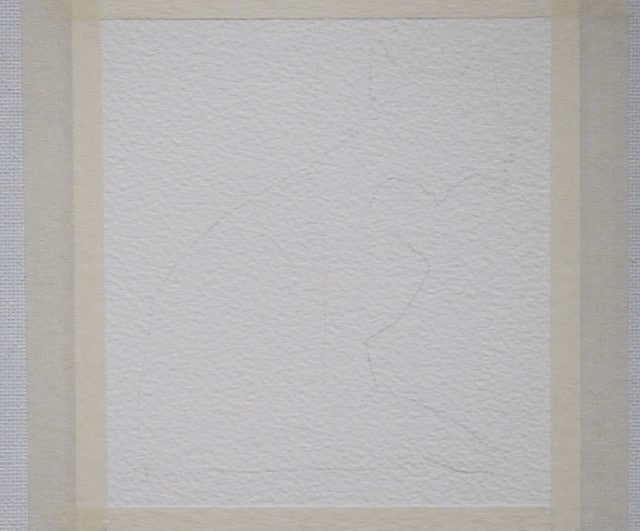
The pencil lines should be barely visible.
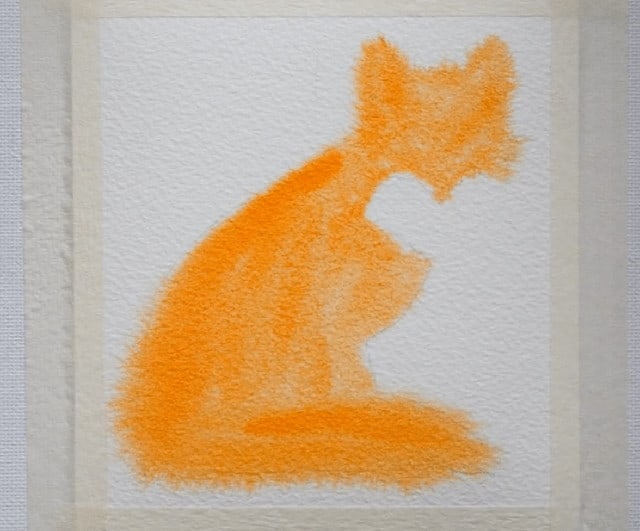
We wet the entire surface of the paper with clean water. And we apply orange to the entire shape, avoiding the collar area, which we will draw later.
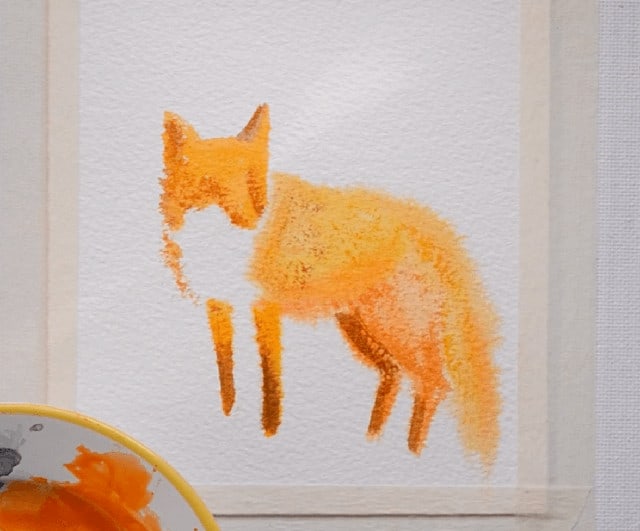
While the paper is still wet, we apply the shadows on the fox with brown.
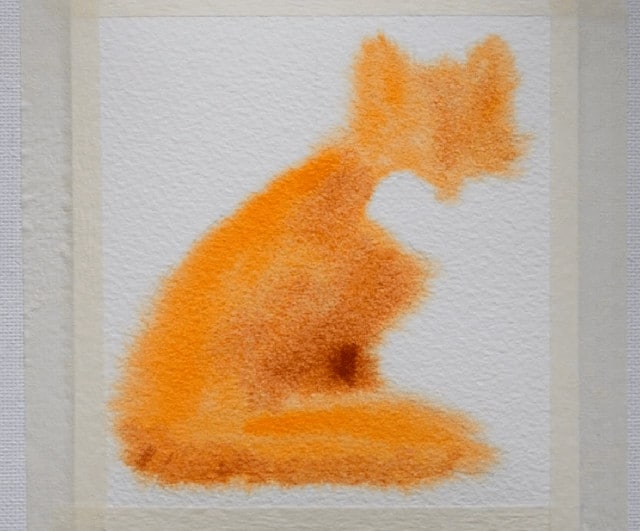
We leave it to dry.
When the paper is completely dry, draw the nose and eyes.

With a light gray squeeze brush, very carefully draw the fox's collar.
Take the orange color with a brush and draw the brighter areas in orange according to the photo.
Note that the right side of the muzzle is darker than the left.
Add brown in the darker areas.
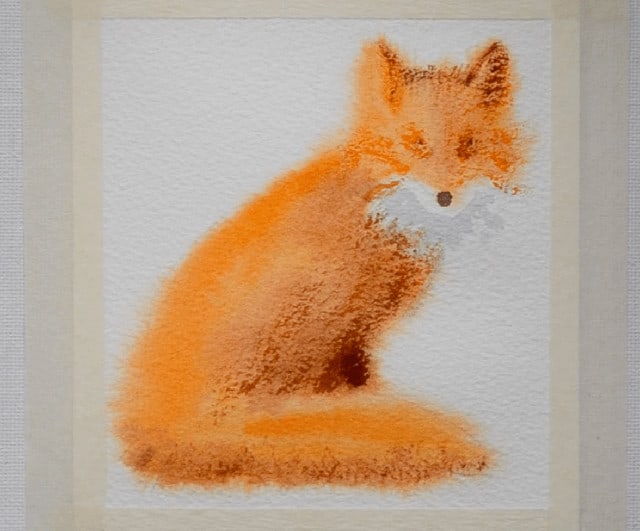
Yellow color add texture in the light areas.

Draw details, nose and eyes, in black with a thin brush. Around the eyes add a little more dark color.
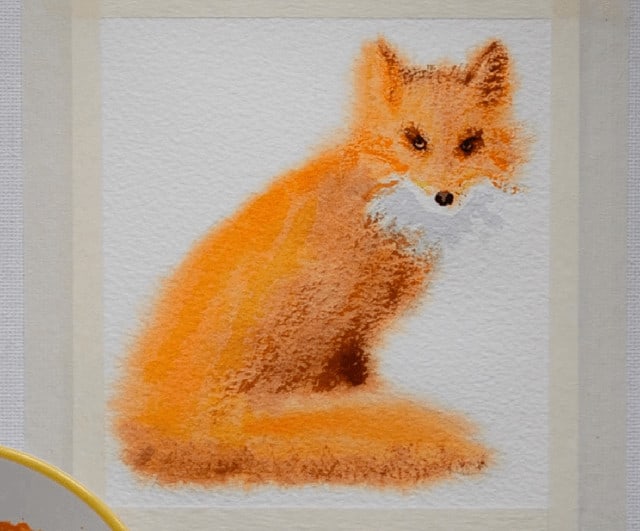
Add a mustache, shade the ears and draw the mouth. At your discretion you can add more shadows.
Use white gouache to draw highlights on the nose and eyes.
That's all! Here we have the second fox! Simple, isn't it?
The meaning of the fox tattoo
Probably the symbolism of this interesting and attractive animal in Russian mythology is known to everyone. The fox is a predatory animal, the hallmark of which is cunning and cunning. It is capable of fooling anyone who would have anything to do with it. Moreover, different peoples associate this fluffy beast with Hell and its lord - the Prince of Darkness.

Many believe that Russian stories and beliefs about the sly fox takes its origins in Scandinavian legends. The main meaning of the fox tattoo for girls is a symbol of guile, seductiveness and temptress. A girl with a similar image on his body is a forbidden fruit in the Garden of Eden, warning those around her that she must behave with extreme caution. The bearer of the tattoo shows that she is not only cunning and dangerous, but also very smart, if necessary, will be able to leave people who contacted her in the wrong place.
In many countries, the meaning of this symbol changes, for example, the Chinese from ancient times believe that the fox is a symbol of success, good luck and longevity. This image is attributed mystical power, the ability of the fox to reincarnate into a person. Japan also believes that this animal can reincarnate, and the fox symbol itself denotes wealth and can attract profit and improve the business skills of its owner.

In ancient Egypt, the fox was considered a sign of viciousness and windiness, it was often compared to the fairer sex, controlling men by its attractiveness and sexuality. The Celts considered the image of the fox a symbol of success and victory, they believed that it would make them invincible, agile, cunning and improve their intuition. The fox could also protect against fire, criminals, and other problems, if beliefs of the time were to be believed.
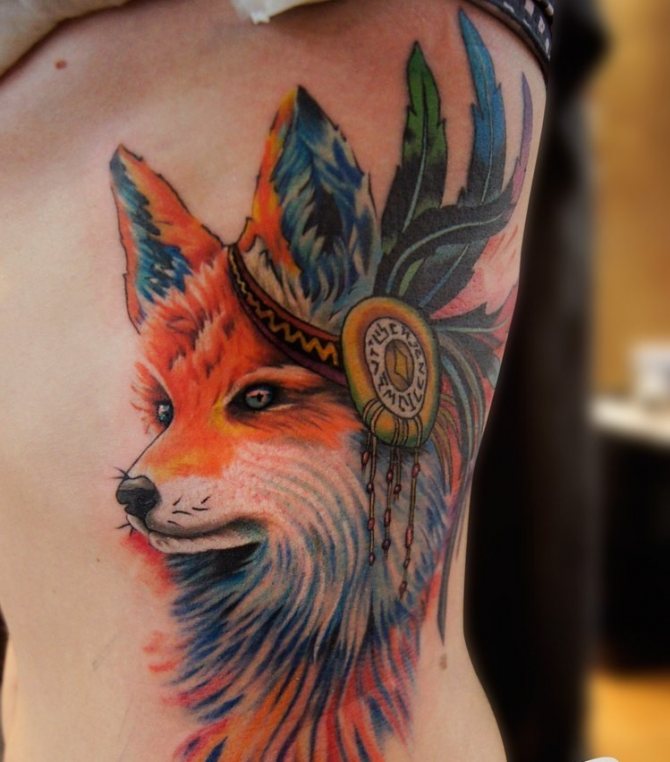
Indian tribes equated the fox as a sacred animal, respected and revered it, especially warriors, hunters and shamans. The reason for this is that the beast has all the qualities necessary for the success of each of them. That is why many Indians painted the image of a fox with a grinning mouth on their bodies.
Many also believed that the image of a fox on the body would protect against burns. In this regard, the fox tattoo was very popular among blacksmiths. The inhabitants of Scandinavian countries considered a fox a symbol of rebirth, the beginning of a new life, for them, this animal was the patroness of infants and pregnant women. It is believed that the fox stole the fire and brought it to Earth, so tattoo with the image of this animal used witches and healers, trying to gain power red-haired animal.
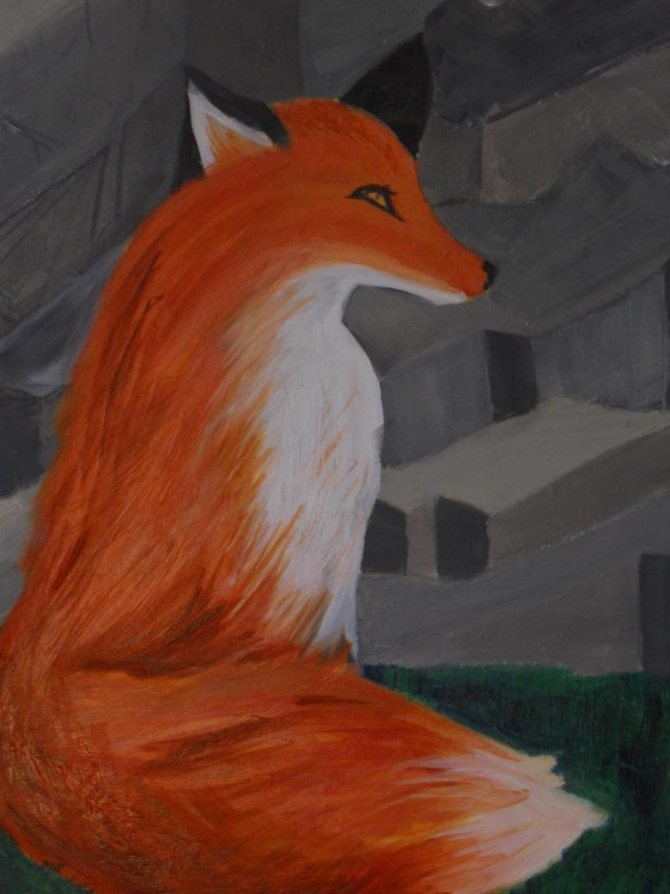
How to draw a fox standing on four paws
Study the reference carefully:
The shape is quite complex. but I will not do the sketch in pencil. First we moisten the paper with water, but to make sure that the paint does not spread too much, let it dry a little.
We look at the photo and try to draw the shape of the fox. If it is easier for you, you can do a pencil sketch first.
Before the paper dries, we apply the dark areas with brown.
Create texture and volume with a squeeze brush.
Dark color highlights areas of ears, nose eyes, paw tips.
To the left of the nose is a shadow. Take a light gray paint and carefully apply to the desired area.
The last step is to take a thin brush and add the remaining details. And don't forget the highlights.
To give more realism to the drawing, you can finish drawing the background and create the effect of falling snow with white gouache.
The meaning of the tattoo for men
Such a drawing can say a lot about its bearer. Here we are talking about purposeful and not deprived of intelligence and skill young people. They are ready to stand firmly on his feet and protect his family from the dangers threatening them.
Most often such men know exactly what they want and are able to react quickly in any situation. It is easy enough for them to get used to any conditions and get out of anything because they are quite resourceful. If for women this image gives more to windiness, then for men it is the opposite.
The fox symbolizes loyalty, as animals have a different love than people, because they choose a couple for life. Many also wish to prove their courage, depicting a wise fox on their bodies.
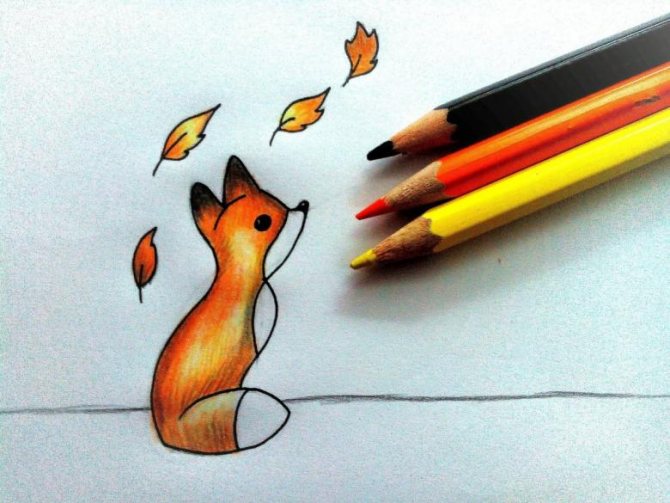
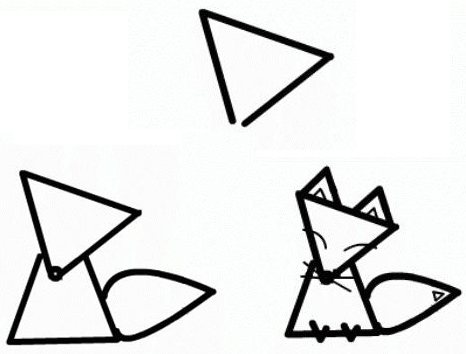
Foxy in a couple of minutes
If you are a novice artist and for the first time picked up a pencil, you probably still doubt your abilities. To increase your confidence try this cute red fox.
The description of the work is accessible to every student and anyone can do it without difficulty in just five minutes. All you need is to be familiar with such a geometric figure as a triangle.
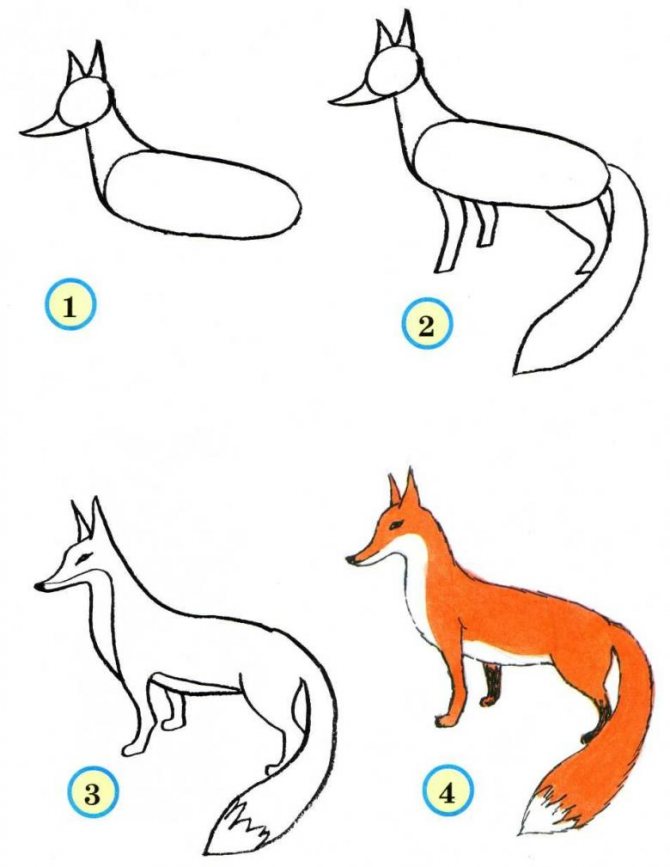
Red Beauty
The main decoration of the fox is its rich coat and, of course, its fluffy tail. It helps her in running to keep her balance, keeps her warm in winter, and is a source of her pride. But how to draw a fox in pencil without this bright virtue?
In this step-by-step guide we get a picture in which the huntress appears before us in all her glory.
- Draw three circles of different sizes, which later become the head and body.
- Give a muzzle shape.
- Strokes combine the outlines of the beast to the tail.
- We make a fluffy tail and optionally give color to the picture.
Tricky fairy tale heroine
The fox is a popular fairy tale character, whose image is associated with cunning and deviousness.
Kolobok
Scheme for drawing the Fox from the fairy tale "Kolobok":
- First it is necessary to make a general sketch of the entire drawing, approximately outlining the location of its elements. The stump is drawn first, it is positioned at the bottom of the sheet. Further, at a distance equal to 2.5 times the height of the stump, it is necessary to draw a big circle, which will be the fox's head. Below the circle, sketches of clothes are made, and to the left of the stump - paws.
- The next step is to draw the face of the character. First the forehead is formed, then the elongated nose, after which the forehead is drawn. At this stage, it is important not to forget about the ears, which must have the shape of a rounded triangle and be placed below the crown, as well as the eye, which should be placed between the forehead and the nose. At the end of traced back of the head and the bottom line.
- The third stage is a more detailed drawing. With fine curved lines it is necessary to draw the area of the white cheek, then on the eye to make eyelashes and a pupil, above the eye - an eyebrow. Next, the inner part of the ear is drawn, the sleeve is outlined, and the lines of the garment are made smoother.
- The penultimate step is to draw the second hand, add paws, peeking out from the sleeves, and make fingers on them. After that, the skirt hem and legs are drawn.
- The final step is to add a puffy tail and work out the details of the clothing: the neck of the dress, the fishnet on the sleeves, the belt line, and the hem. At the end, the coloring on the hind legs is separated and the tree bark on the stump is traced.
The fox and the crane
How to draw the fox from the fairy tale "The Fox and the Crane":
- In the center of the sheet, you need to draw an oval, located with a slight slope - this is the fox's torso. From it should draw two concave lines - the neck - which should go into a small circle - the head. At the bottom of the head is drawn long sharp nose, at the top - 2 triangles-ears.
- The next step is to draw paws - 2 front and 1 back paw. Left front paw should be a bit longer and bigger than right one, because it is situated closer. Now we can proceed to the tail: it should be a little longer than the body and widening towards the end.
- Next, the details are traced: the tip of the nose is painted over, the eye with the pupil inside is drawn, auxiliary lines on the head and neck are erased, and the color on the neck and belly is separated. Then are removed auxiliary lines on the body and carefully finished paws, separated the coloring of the tail.
Teremok .
Drawing a fox in pencil for children according to the fairy tale "Teremok" is created in a certain sequence of actions:
- First, the marking of large details of the drawing is made: in the upper part of the sheet, it is necessary to draw an oval - this is the head; immediately under it - a small rectangle (neck), from which the narrow part of a large trapeze (torso) should begin.
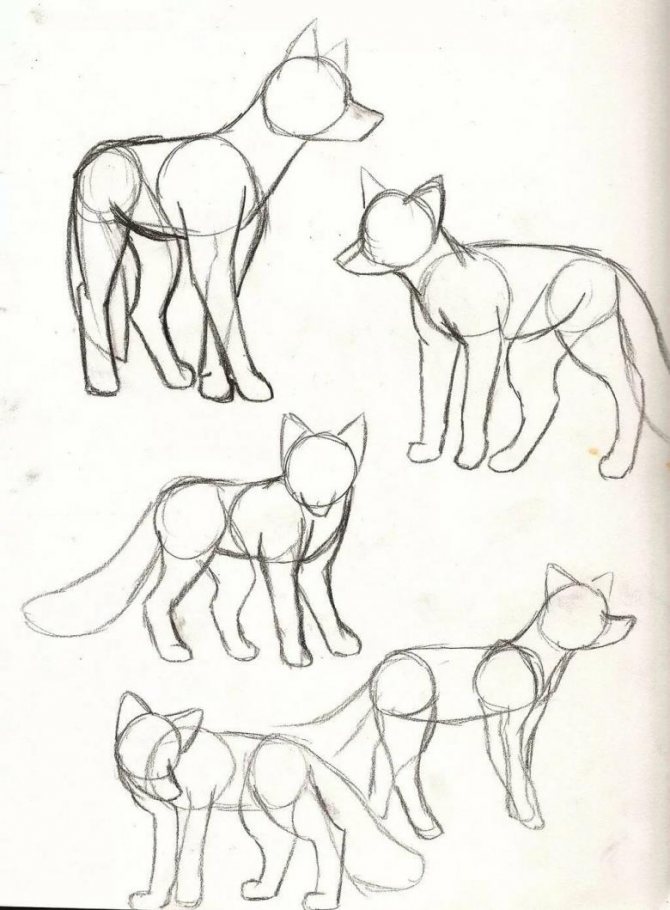
Techniques for drawing a fox in pencil from geometric shapes
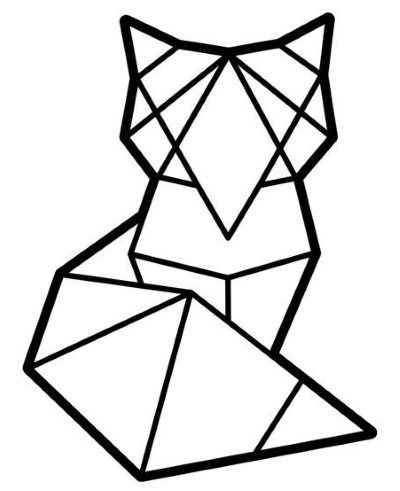
Drawing a fox in pencil for children from geometric shapes can be simple and complex. Simple includes, for example, a fox of triangles or ellipses. Complex is the drawing of a fox of polygons.
| A drawing variant | Step by step description |
| Fox from triangles |
|
| Fox of ellipses |
|
| Fox of polygons |
|
Schemes designed specifically for children will help to create a drawing of a fox, using only pencils and paper.
Step-by-step pencil drawings of a fox for sketching by children
You can draw a fox in pencil in different poses and images. Drawing this animal is not difficult, the scheme will prove clear and accessible even for young children.
Sitting Fox
Scheme for drawing a sitting fox:
- At the top of the sheet, it is necessary to draw the head, which should have the form of an uneven rhombus with rounded edges.
- On both sides of the top should be drawn triangular ears. They should be unequal, as the fox sits in a half-turn.
- It is important to carefully draw the eyes. They should be placed obliquely, with an iris and pupil inside.
- Next, the inner part of the ears is drawn, volume lines are added. After that, it is necessary to draw a fluffy fur on the cheeks of the animal and carefully draw the nose.
- Using smooth lines, you need to draw the back and the outer line of the left front paw.
- Next, the right front paw is traced and the outline of the hind paw is made.
- Now you need to draw the feet and toes and then start drawing the tail. It has to be placed behind the fox, and its tip has to be neatly placed next to its left front paw.
- With fine lines you need to draw fluffy fur on the chest, hind paw and tail, not forgetting to leave lines that delineate the coloration.
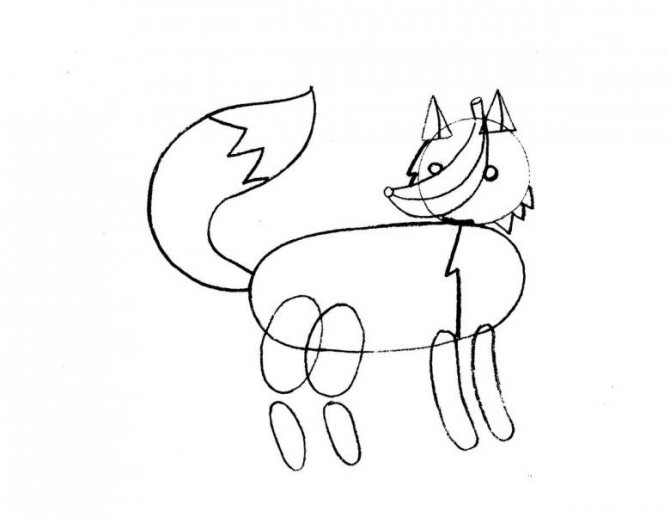
Cheerful fox
To create an image of a cheerful fox with a mischievous look, you need to follow 6 steps:
- First, the frame of the drawing is sketched. It should consist of a circle (for the head), an oval (for the upper part of the body), a curved line (for the tail) and reference lines for eyes, nose, ears, paws.
- The second step is to draw the ears, eyes, lower body and left front paw.
- Next depicted fluffy fur on the muzzle of the animal, traced chest, right front and left rear paws, the upper part of the tail. On the tail smooth line delineates the color.
- The next step is traced cheeks, eyebrows, separated color on the ears and breast, finished drawing the tail.
- At the end the inside of the left ear is traced, the color on the paws is delimited and auxiliary lines are removed. The outline of the drawing is outlined with a simple pencil brighter.
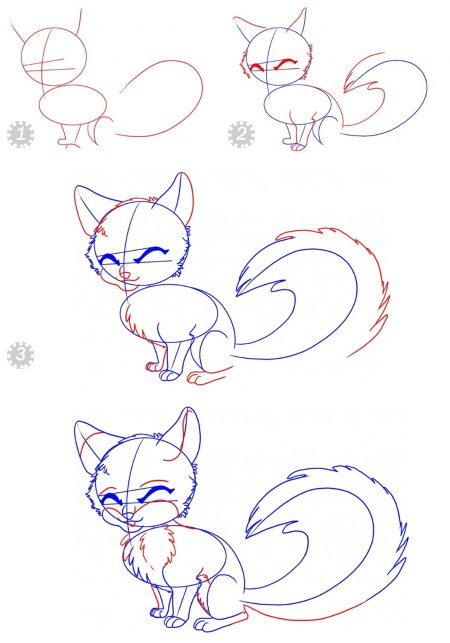
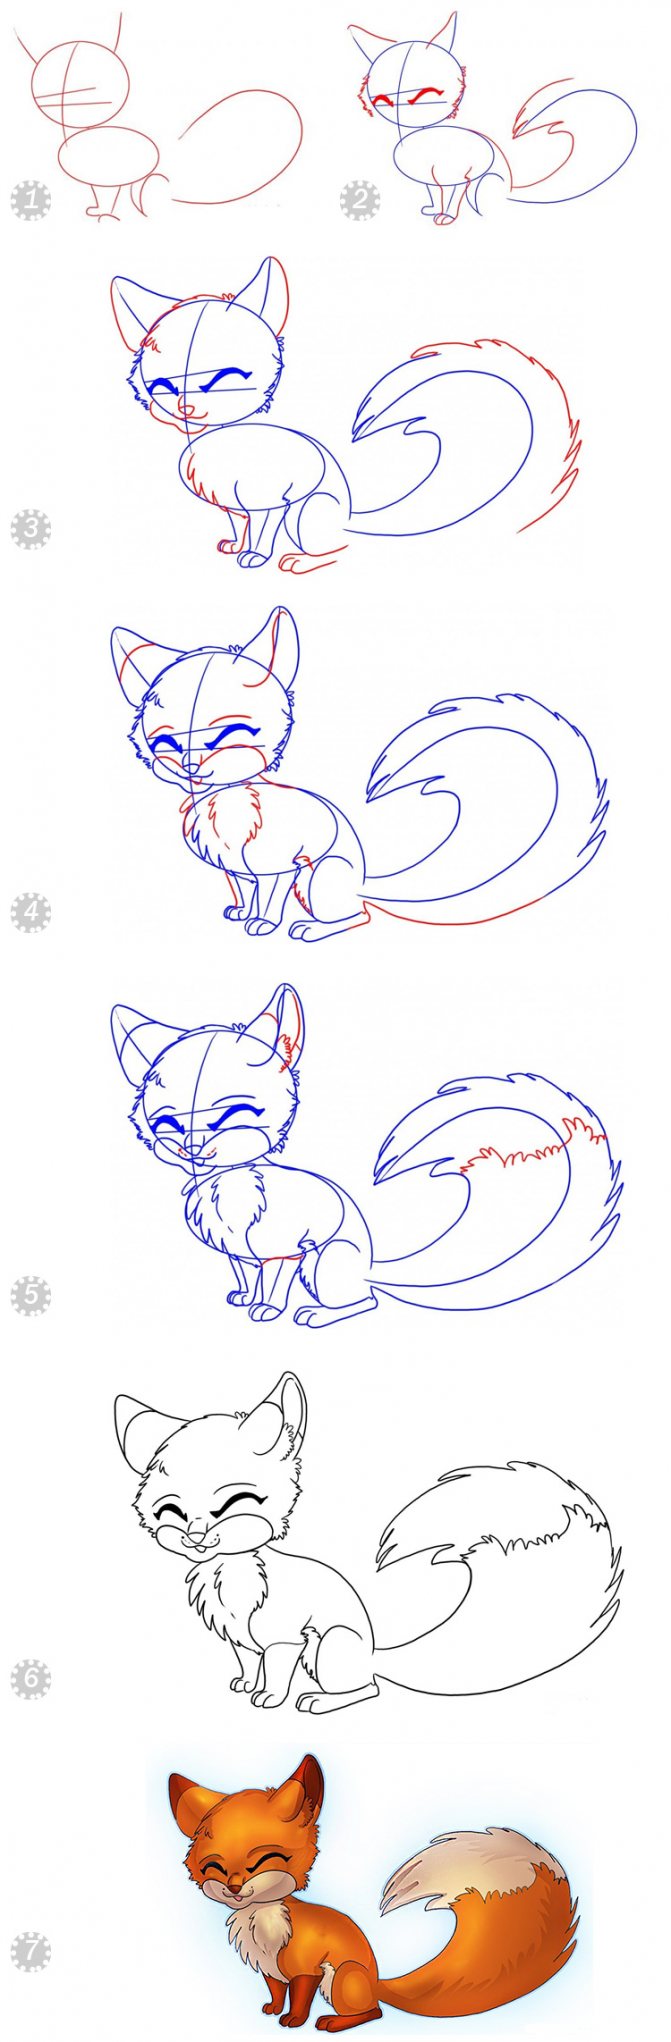
Cheerful fox
Such a wonderful little fox with shining eyes will become a great friend and will always delight you with his smiling appearance. It is not an easy scheme, but were the real winners ever afraid of difficulties?
After gaining experience, you can bravely proceed to conquer higher peaks. Let this prankster be one of them. After sitting and studying the description a little, you will definitely understand how to draw a fox's face, body, paws and tail in pencil steps.
And then it remains only to paint it with bright, rich hues. And you're sure to get a picture no worse, and maybe even better than the finished sample. The main thing is to do everything with a good mood and bright thoughts.
*When copying the text please be sure to provide an active link to the source