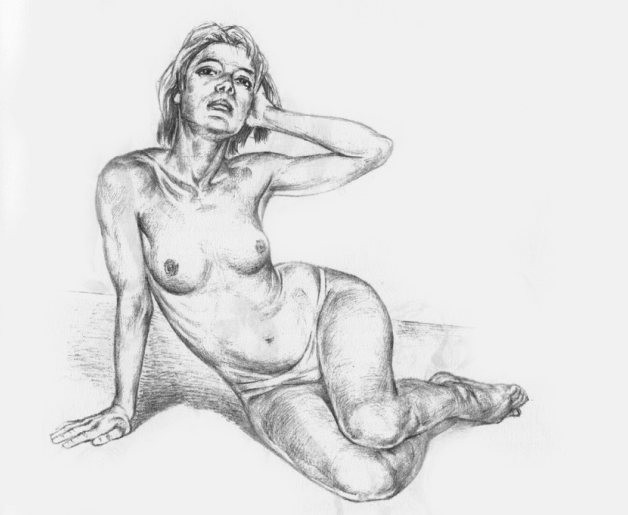
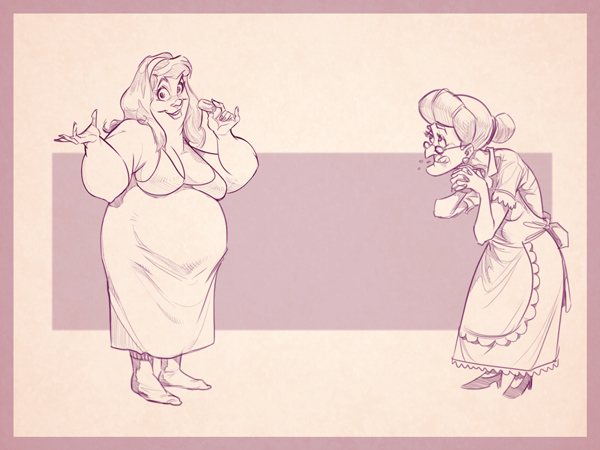
Today I would like very much to acquaint you with the technique of drawing nudes. Female nudes.
The technique that I want to share with you (and which I learned myself), is not aimed only at women's body. It can be applied to men as well as children. But because the most expressive forms, and hence the lines, have exactly the ladies, so today we will consider exclusively on their example.
Basic human proportions
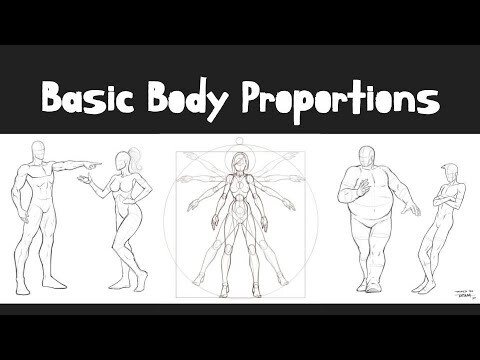
One of the most important factors in drawing and sketching the human figure is proportions. Have you ever seen children drawing people? Often the drawing looks "childish" not because of a lack of detail or proper shadows, but because the legs are shorter than the arms or hands are larger than the feet.
All bodies are different, and no body is perfect. Don't confuse proper body proportions with perfect body proportions. Even if you are not the world's greatest artist, as long as the proportions in the drawing of your figure are accurate, realism and integrity will remain.
We see bodies all the time, which is why it is so striking when the proportions are not correct. The human body is one of the most complex forms on the planet. Proportion is the first thing you need to learn when drawing bodies because it teaches you to be anatomically correct. This can be achieved by making a diagram of the body and determining how the joints relate to each other.

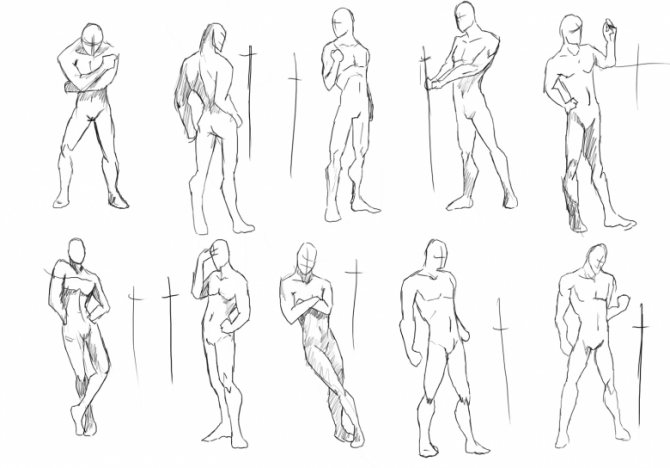
Line of Motion
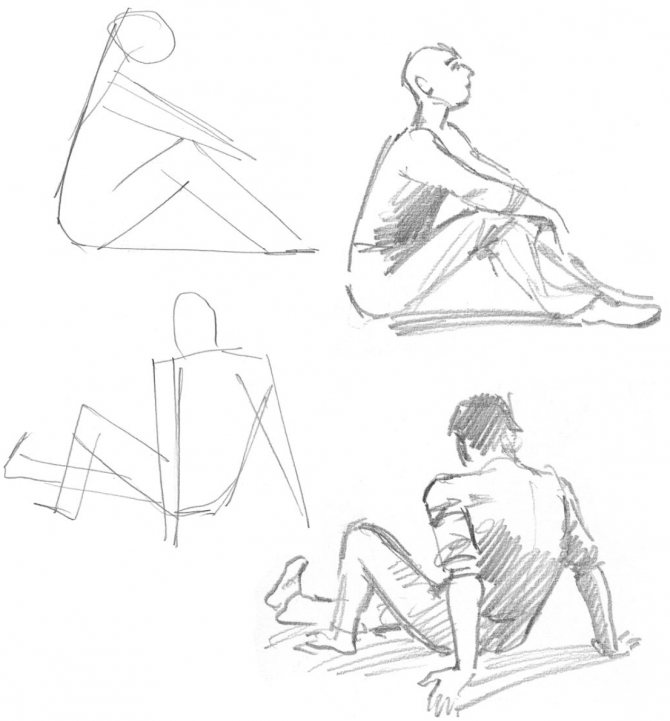
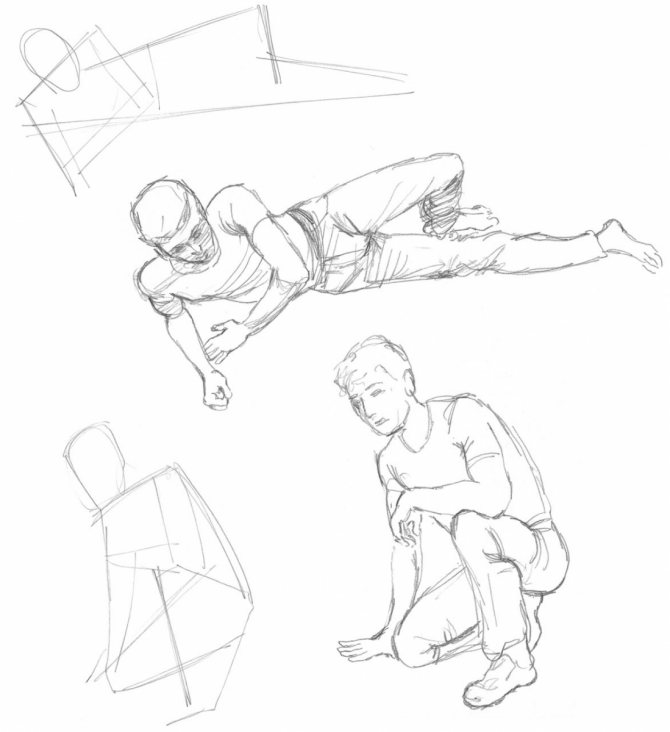
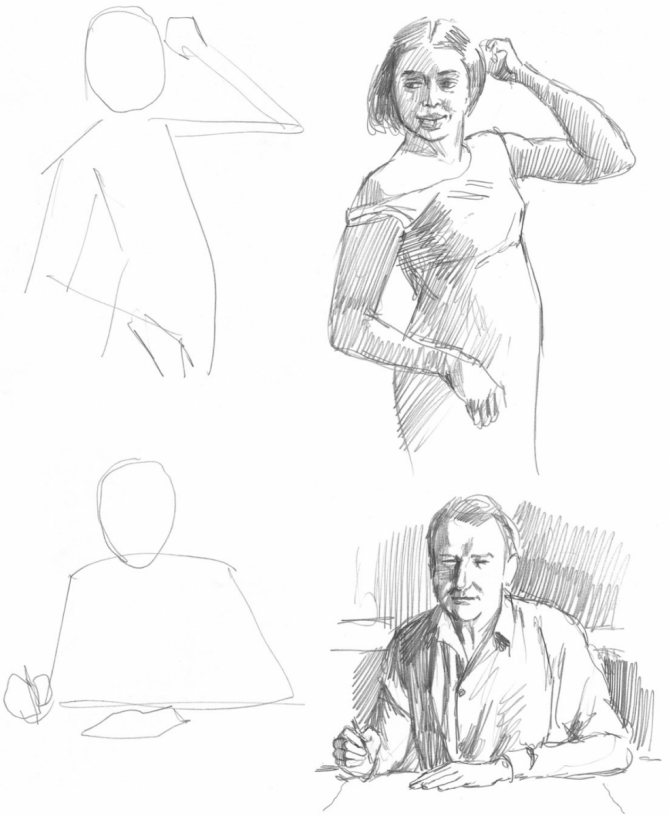
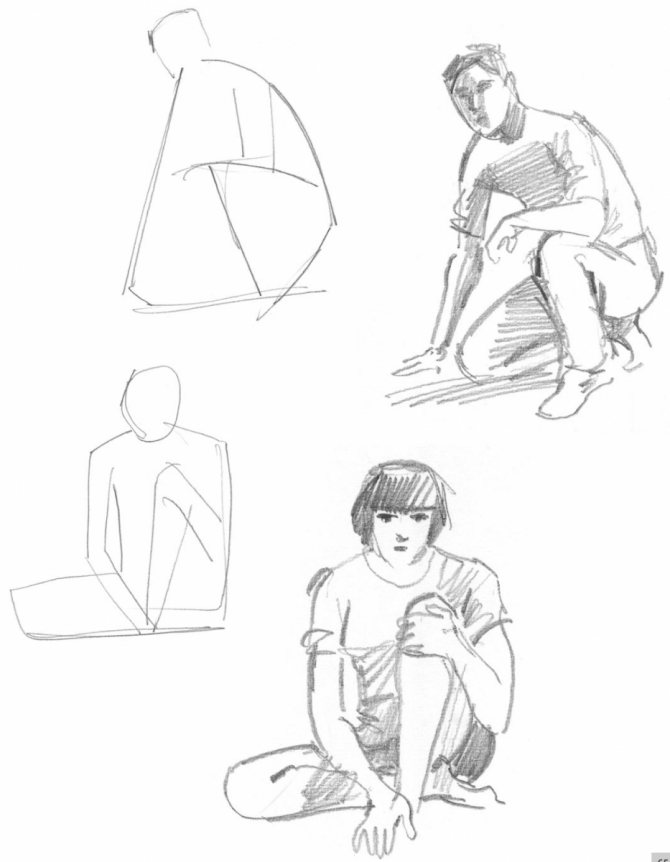
In my drawings, I used the technique of sketching with lines to convey the movement of the figure, to feel the flexibility of the human body form.
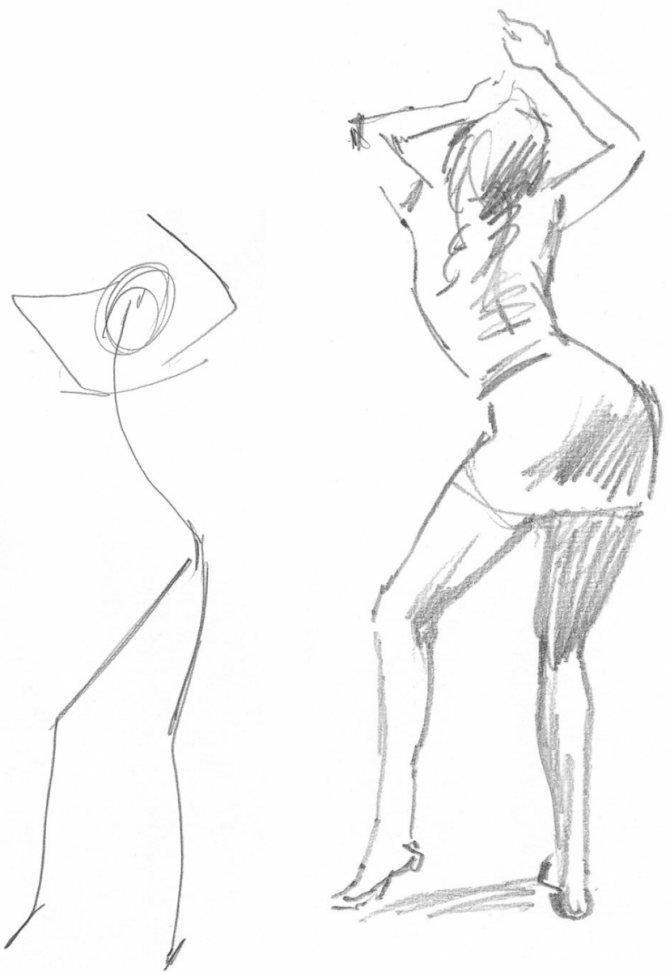
Do this sketch first before drawing the figure more thoroughly, saving the sketches and laying them at the side of the more elaborate drawings to refer to them. Draw the figures as simply as possible, discarding all details and taking no more than 10 minutes to draw.
Create your diagram.
A figure with correct proportions, regardless of gender or otherwise, is determined by the arrangement of the joints, which is constant. If the arrangement of the joints changes, we immediately notice the catch, the figure looks strange to us. This is our basis for proportions.
Draw your own diagram. It is a great help in learning the material.
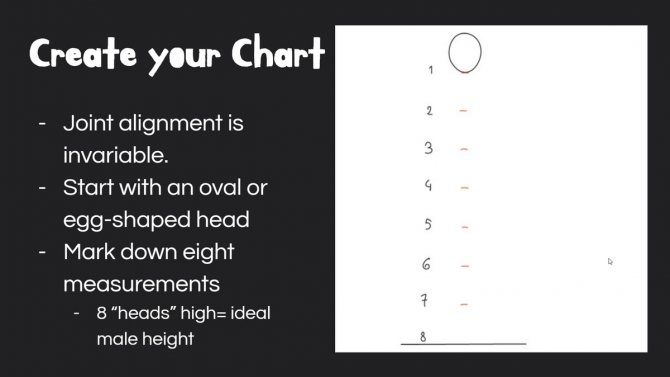
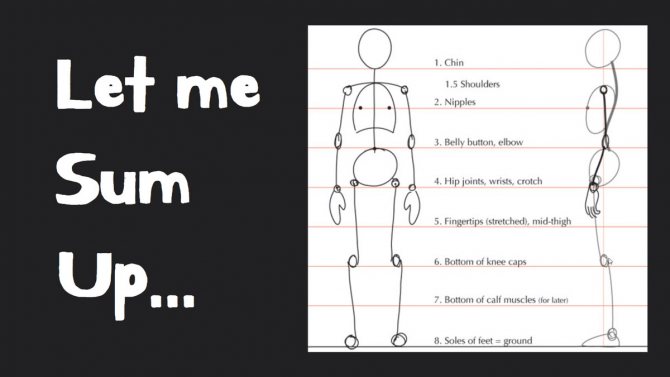
Start by drawing an oval at the top of the sheet, pointed end down. This will be the head. And mark down eight segments the same size as the head, the last of which will be the ground. Number them from one to eight.
During the Renaissance, the "ideal" height for a man was set at eight heads. Clearly, few men are actually that tall. Not even the northern Europeans who served as the basis for this model. They were closer to seven heads tall, but this is still the best model to start with because it makes it easier to understand the ratios.
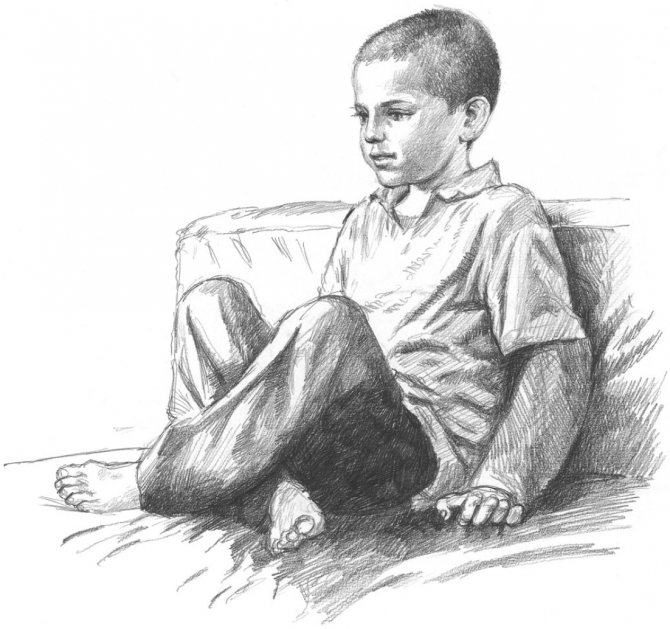
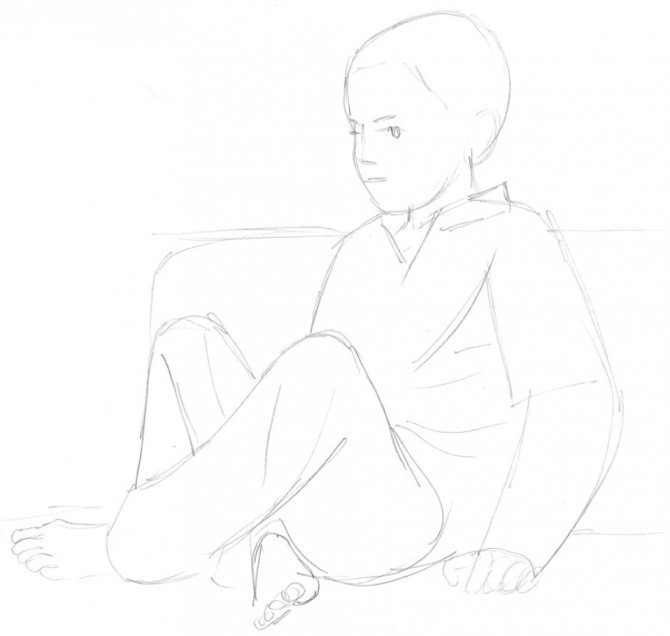
A baby with a dog.
The next drawing shows a baby with his four-legged friend. The process itself is simple and doesn't take much time.
- Draw a straight line and a centerline. This is needed to indicate the direction of the baby's body. A little higher, we draw a circle. Small sections will indicate the position of the arms. Let's define the area of the head covered with hair.
- The baby will be depicted in profile, and the facial features are directed to the right. It is necessary to outline a neat nose and chin. Draw around the hair ear.
- Moving on to the face. Lips should be slightly pulled out, eyes squint with thin lines. The hair on the head is placed loosely in a chaotic order, then it will be slightly disheveled. The shadows under the hair are worked out, the cheek is highlighted with an arched eyeliner.
- Next, the body is traced and the back and tummy are depicted. The sleeves of the t-shirt, from which the arms, raised up, are drawn.
- In the hands of the boy, the outline of the puppy's body is drawn. It is not worth much pressure on the pencil. If you're happy with the result of the sketch, then the muzzle, hair and other details are finished.
The drawing can be considered finished, but for contrast you can add dark strokes to the clothes with a soft pencil. In order to draw well, you need to opt for a particular subject. The main thing is to follow the recommendations and think about how everything will look in the final version. Using different techniques, you are sure to find the most comfortable method for you.
Pelvis
Next add the pelvic bone, the most important part of the body. It is our center of gravity and stability.
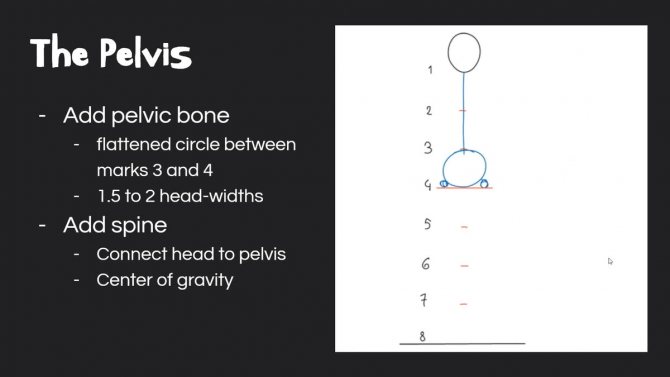
Simplify it as a flat circle between marks three and four, with the hip joints at the fourth mark, the little circles you see on the sides. The width of the pelvis is about one and a half to two heads. Now you can draw the spine that connects the head to the pelvis.
How do you draw a woman's legs in pencil?
A woman's legs are also more rounded than a man's legs. To draw them:
- Draw her hips as a triangle, resting at the base
- At the corners of the triangle, draw dots that are a schematic representation of the hip joints.
- from these points draw straight lines, the axes of the legs (they do not have to be parallel, make them a little closer together at the bottom)
- divide the lines roughly in half and draw points to mark the kneecaps
- Draw the contours of the legs, remembering that a woman's hips are denser than her shins.
- Draw the kneecaps
- mark the feet in the form of trapezes and large bases at the bottom (if the feet are turned upright)
- Detail the feet and draw the toes
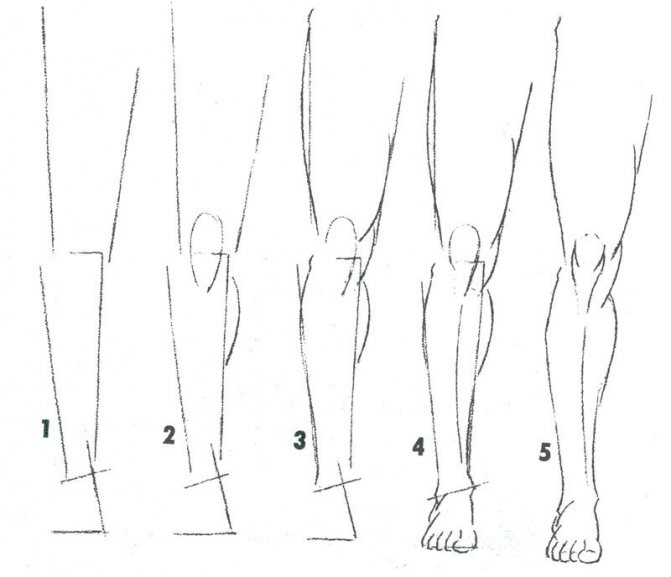
Legs of a woman in pencil.
Feet and knees
Assume our figure is standing, feet upright at hip joint level:

The knee joints are at the sixth mark, this line running directly below the kneecaps. When the leg is extended, the knee joint is in a straight line with the hip and ankle, as shown in the left figure in the picture. But this straight line is conditional. To complete the leg, join the hip joint to the inside of the kneecap and then the outside of the knee to the inside of the ankle, as in the figure on the right.
This is a very simplified but accurate representation of the actual bone structure, and it helps to draw the human leg naturally. It will expand from the hip and taper toward the knee, then expand again. This will also help place the muscles later in your drawing.
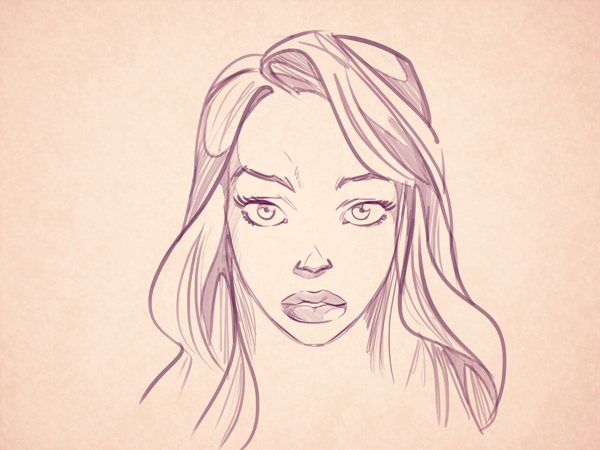
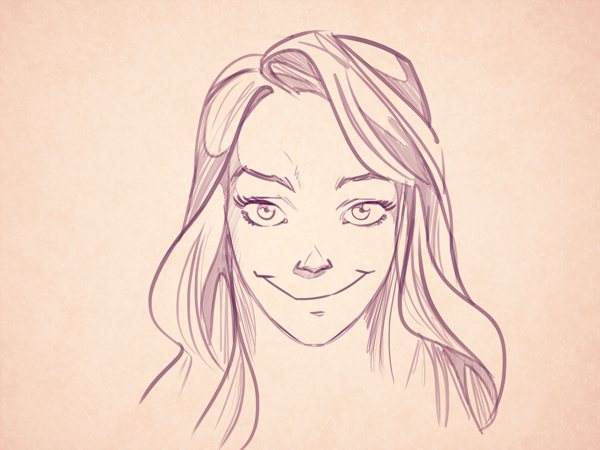
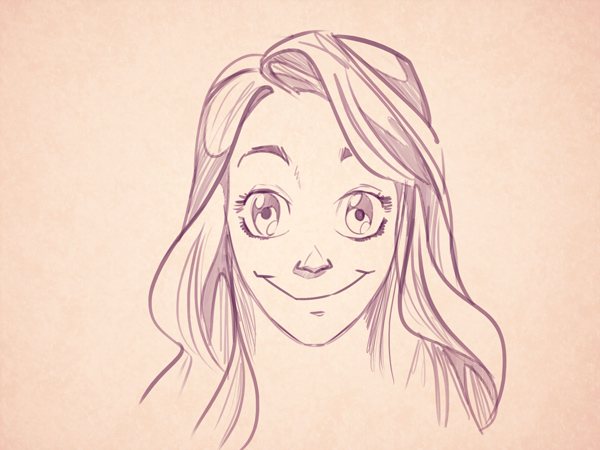
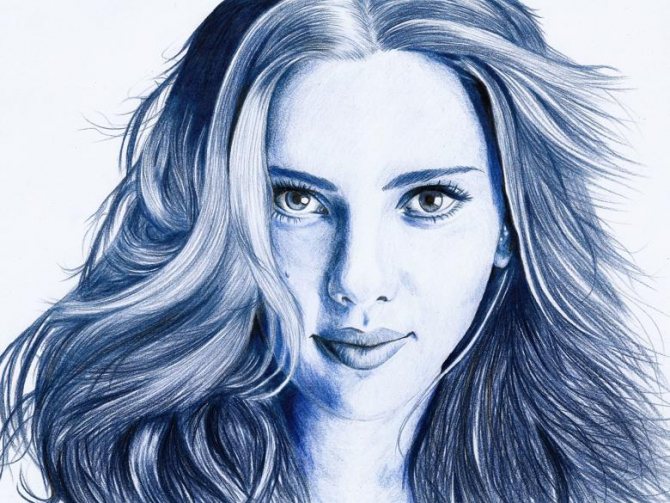
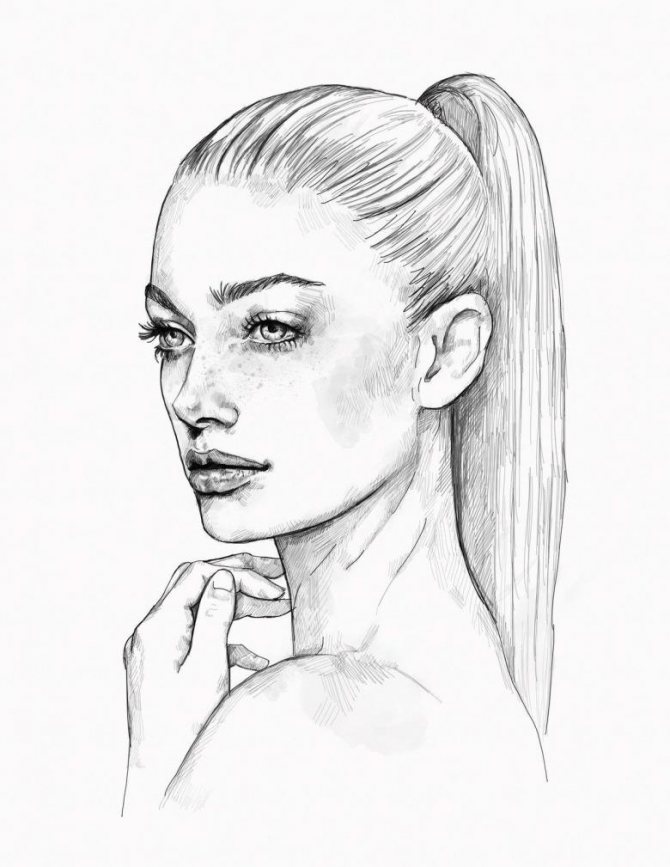
Pencil drawings of girls for sketching are easy
You should always start small - that's why these images are as easy to do as possible. Having learned how to redraw each of them without problems, you can go to more complex faces and images of girls. Don't forget to be patient and put some effort into it, and you will succeed!
Follow the example of sketching to get a quality work. First make a sketch that repeats the finished sample. Correct the mistakes with the eraser and start sketching the lines. The final step is hatching. It is performed using a pencil with a soft lead. Shading is applied sideways, holding the pencil at an angle.
Sources
- https://gidrukodeliya.ru/kak-narisovat-devushku
- https://megamaster.info/kak-narisovat-devushku-pojetapno/
- https://handsmake.ru/kak-narisovat-devushku-karandashom.html
- https://megamaster.info/kak-narisovat-volosy-devushki-karandashom/
- https://bakemono.ru/lessons/pencil/792-osnovy-risovaniya-volos.html
- https://1igolka.com/rospis-i-risovanie/pic1119_kartinki-dlya-srisovki-devushki
- https://ArtRecept.com/risunok/chelovek/kak-risovat-volosy
- https://srisovat.ru/risunki-devushek-dlya-srisovki-legkie/
[collapse]
Chest and navel
The chest and lungs are the third most important body shape after the head and pelvis:
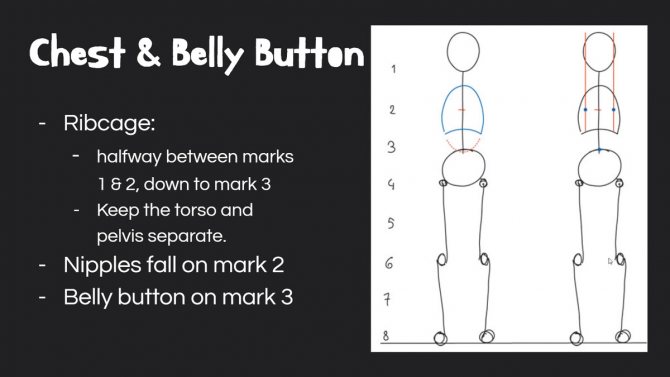
In simplified form, it is an oval that begins exactly between one and two and ends at the third mark. But it's best to cut off the bottom of the oval, as shown in the image above, to simulate a real rib cage.
The empty part between the rib cage and the pelvis is very important. It is soft and can be different: a fat belly, a soft belly, or a flat belly. And it is also the place where the spine is most mobile. You should keep this in mind and not put your torso and pelvis together like two big blocks, as this will rob your figure of plasticity. The width of the oval for the chest is about the same as the pelvis for now.
A couple more details. The nipples are located at the "two" mark. To determine how far apart to place them, draw two parallel lines from the sides of the head down, going slightly inside the contour of the head. ). And the navel falls on the third mark. Note the blue dots on the right side of the image.
How to draw a female figure
There can be difficulties with drawing women, whether it's realistic or cartoon style. Technically, this shouldn't seem to be the case because women have far less visible muscle compared to men. They have adorable curves and gentle facial expressions - most of the time! So, why is it so hard for us to transfer this to paper? I'll answer this and other questions about how to draw a cartoon-style female figure.
The feminine side...of a man!
The most common mistake students who want to portray a female character make is to think of her as a man in high heels and with long hair. More often than not, this is due to the fact that there are many strong male characters around us. In addition, regardless of the style of drawing, masculinities are of great interest to artists. Everyone wants to learn how to draw muscular arms and all those huge veins! And so you run to the nearest bookstore and buy a fantastic anatomy book with 300 pages devoted to the male body and only 20 pages to the female body.
You'll never be able to draw the female figure correctly if you think in the wrong direction!
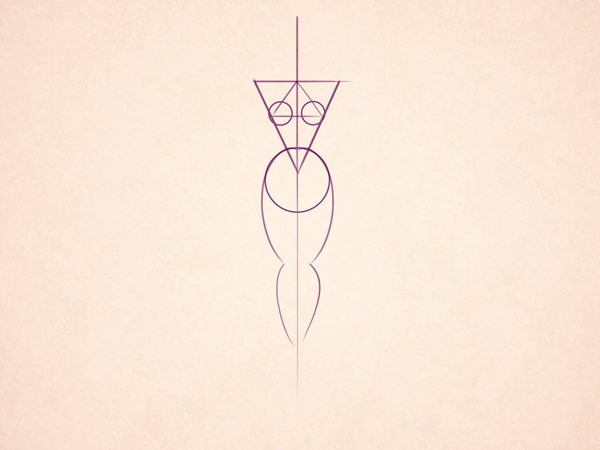
1. drawing a woman's face.
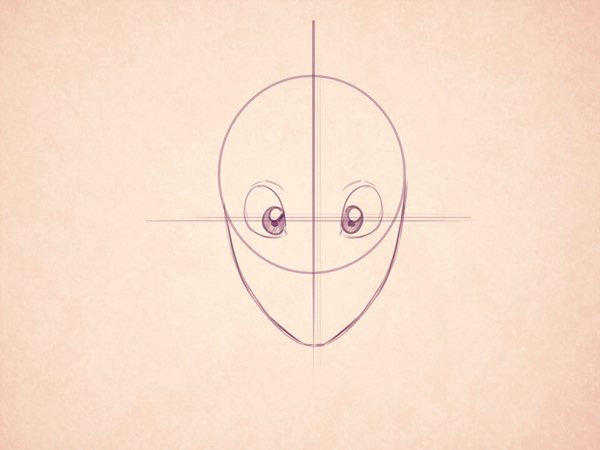
Let's start by drawing a woman's face in a pin-up style, using a general scheme.
Step 1.
We'll start with the classic round base for the character's skull
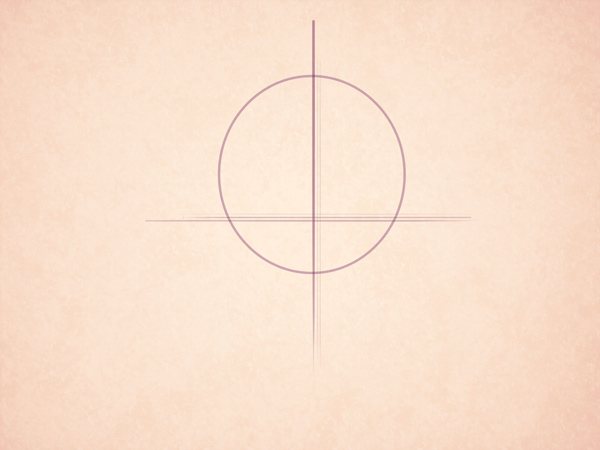
Circles are the starting point for any cartoon character
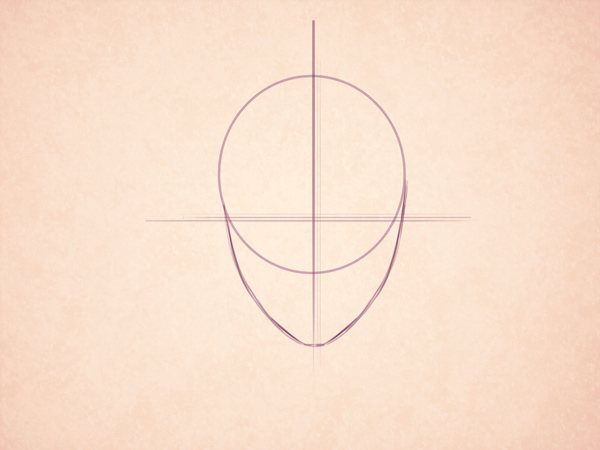
Step 2
Let's outline the shape of our character's chin. It should be narrow and pointed.
Step 3
To outline the eyes, we will draw the classic oval base, which you may have seen in my first lesson https://design.tutsplus.com/articles/cartoon-fundamentals-how-to-draw-a-cartoon-face-correctly-vector-15792.
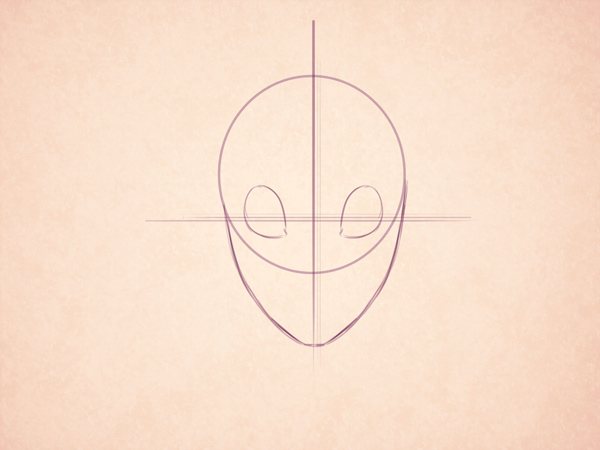
If you have any doubts about the distance between the eyes, just draw the eye in the middle, it will help you measure the gap. This is by no means a rule, it's just a hint. Over time, you'll be able to draw the eyes automatically, but if you're just a beginner (or haven't practiced in a while), this tip will help you not get confused.
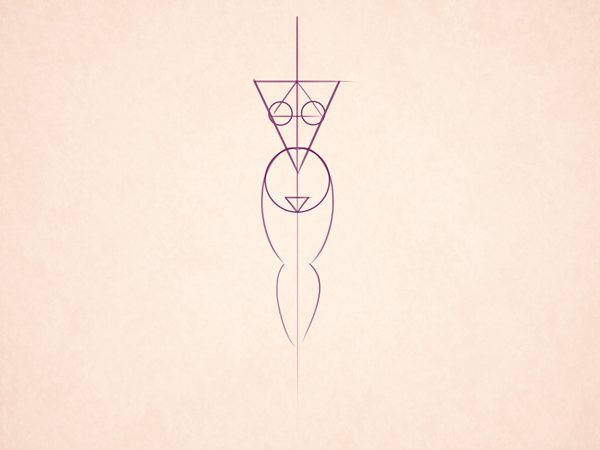
Step 4.
Draw the iris and pupils so that they stand out on the heroine's face. Women's eyes are very expressive, so we need to try a little harder and make our heroine pretty:
Notice the light spot in each eye. We do this to show the glow of the light on the iris. This technique is widely used in animation.
It makes our character more interesting! Let's move on to the eyebrows and eyelashes.
Step 5
Let's draw the nose and the mouth. I will allow myself a little freedom and choose an interesting style.

Step 6
Shall we play stylist? It's time to choose a hairstyle for the character! Try different sketches until you get a dynamic enough shape.
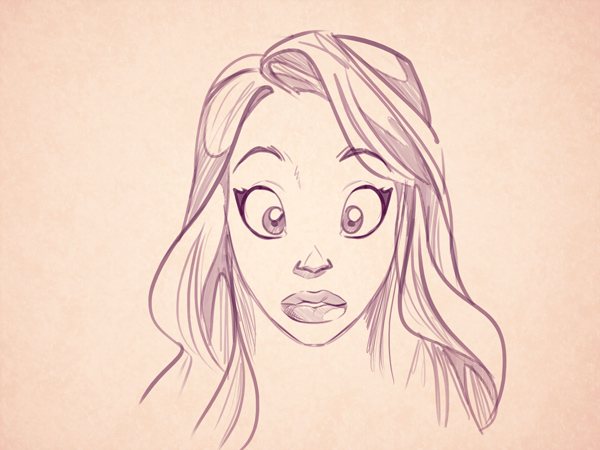
Done - a female character with a good share of sex appeal! Now we'll look at how you can change her facial features.
2.More on facial features.
The eyes and mouth are the main thing in a woman's face. That doesn't mean you have to draw them differently all the time, but draw them carefully!
Pin-up eyes have two basic emotions: "surprise" and "sexy. The difference is the position of the eyebrows and eyelids.
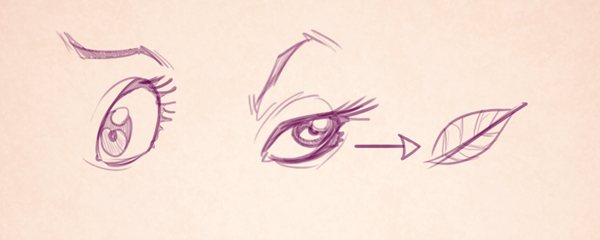
Pin-up eyes: to make the eyes more sensual, draw them like a tree leaf.
A slight change in the line of the mouth along with the eyes completely changes the expression of the character's face.
Notice that I only added a slight smile in the second picture to give her a seductive look. If I hadn't done that, she would have seemed sleepy!
Mouths can also vary in shape, style, and size. It depends on the character of your character.
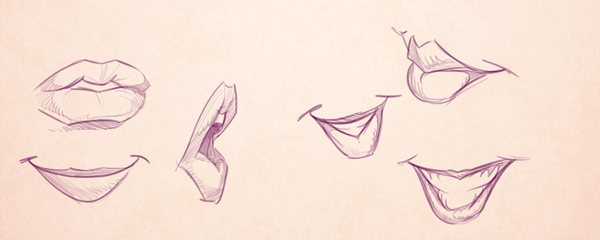
Notice how many ways there are to depict a woman's lips. You can draw them cartoonish or realistic, as long as they are not masculine!
You can achieve a completely different effect with the drawing we just finished, just by changing the eyes to a more realistic side. Here's an example:
We can do the opposite and change the mouth of the character, achieving a more "childlike" effect.
In the manga style, the eyes are responsible for expressing emotion, and their role in Japanese animation is very important.
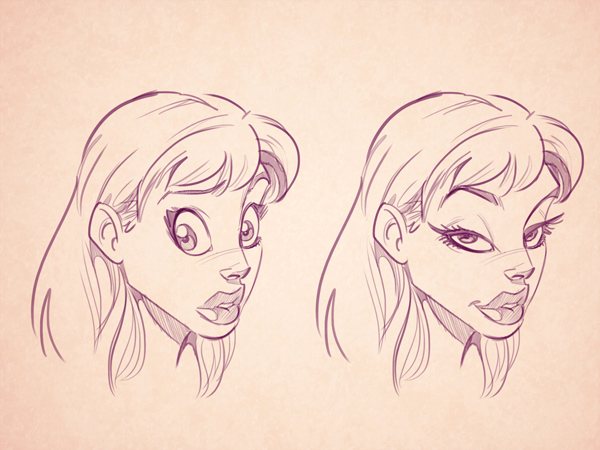
Side View
When viewed from the side, you can see slight differences in the female face compared to the male face. This means that the features used to emphasize a character's masculinity should be reversed when it comes to women.
Here's an example:
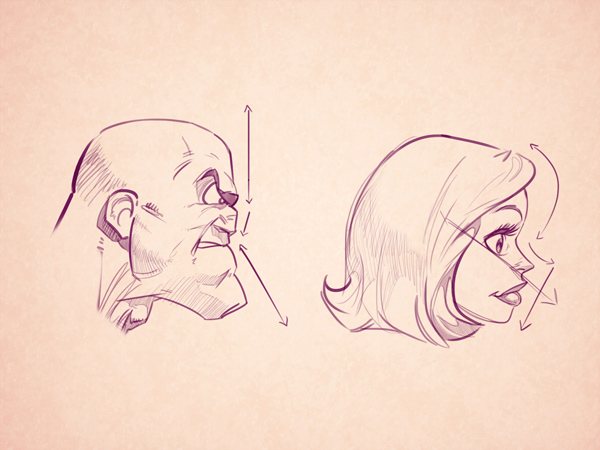
Notice: the features of a woman's face are contrasted with those of a man's face. Also notice the line that goes over the woman's upper lip and under the eye: this is an effective way to maintain the correct proportions of the face.
So, we conclude that women have:
- a small nose, upturned upwards.
- The lower lip is more plump than the upper lip, but the upper lip protrudes slightly forward.
- thin eyebrows with a graceful curve.
- A rounded forehead, never flat.
- A less massive chin.
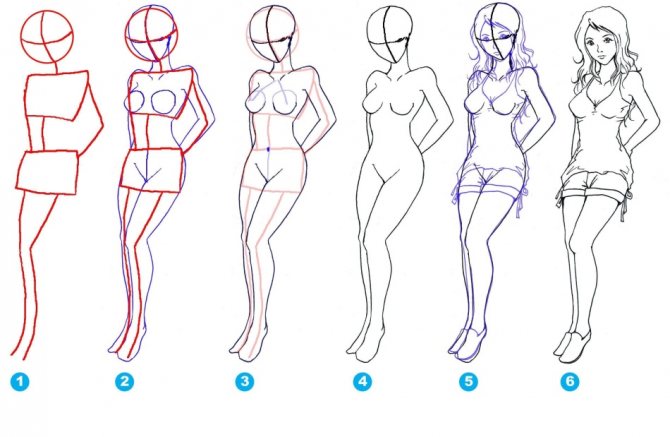
3. female body
Anatomically, women have the same body as men, with slight differences. For example, the hips and waist, where the proportions are usually different. The legs look longer (thanks to the waist) and much more gracefully contoured. Most of the differences become obvious when looking at the bone structure.
Let's explore the process of building a "typical" cartoon-style female body.
Step 1.
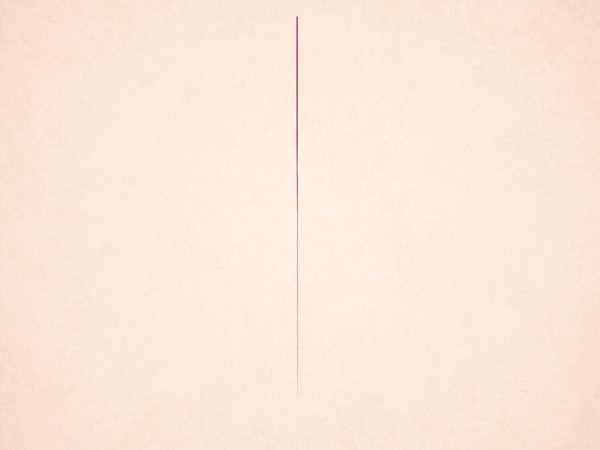
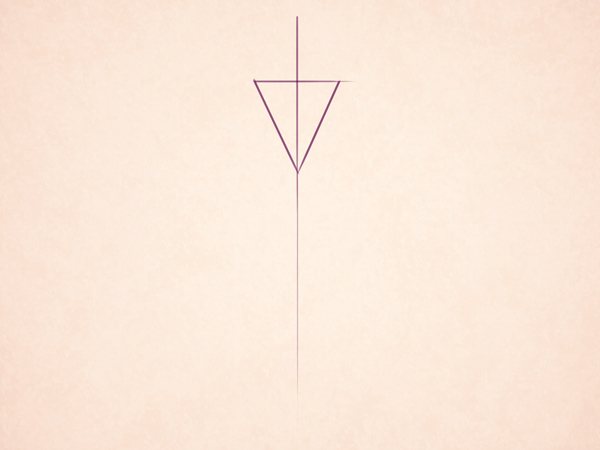
Let's start with the central axis. Draw a straight vertical line using a ruler:
Now label the torso. Draw an inverted triangle, like this:
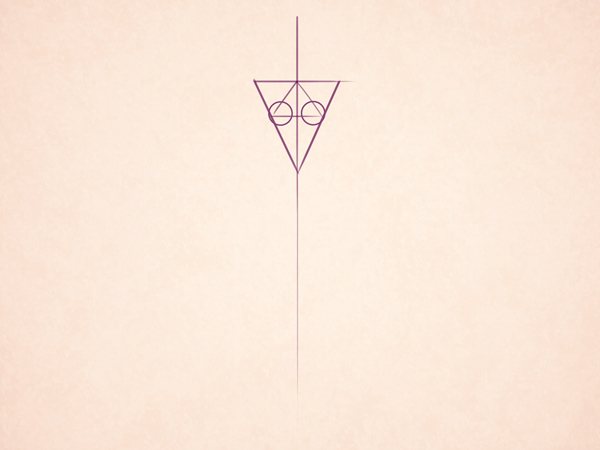
Step 2.
To determine the position of the chest, draw a triangle inside the torso pointing upward.

Great! Now draw two circles at the corners, marking the breasts.
Step 3.
Using a simple circle, outline the hips.

Step 4
To represent the legs, simply draw curved lines coming from the top of the circle, as shown below.
Step 5.
Now add a new triangle at the bottom of the circle, marking the groin.
Step 6.
Very good! This is the basic silhouette of the female body. Now let's add the contours and finish our beautiful female figure.
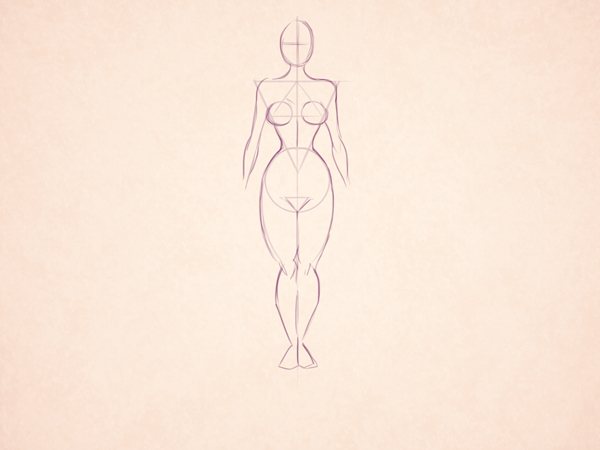
Now that we have a basic female body template, we can change the proportions! It's all about developing the character according to your goals.
After defining the basic proportions, we can play around with the body structure.
The difference between the male and female body goes further than you think and is not limited to muscle and bone size. Note the figure below and remember these simple rules:
- Women have lower trapezius muscles and their necks appear longer
- Their collarbones protrude from the ends of their shoulders.
- The navel is lower than the waist.
- The female pelvis is longer, and the pelvic bones are higher.
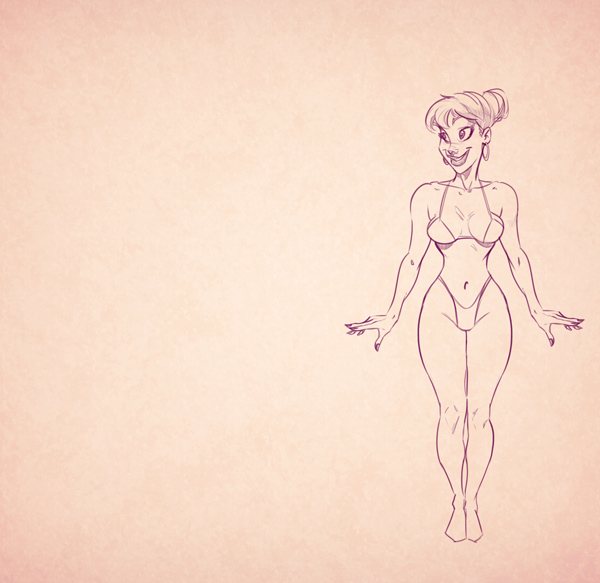
4.Flexibility and sexuality
Drawing a sexy figure is easier than you think. Just add flexibility to your back!
Even in situations where this technique seems inappropriate for you, its use provides more dynamism to your drawings and allows you to experiment with the stereotypical "hourglass" figure.
Example of using the technique. Note the analogy above. The more flexible the female figure is, the more expressive it is.
Another way to use this technique: position the line of the shoulders at an angle to the hips. It's as if the character is bending all the time!
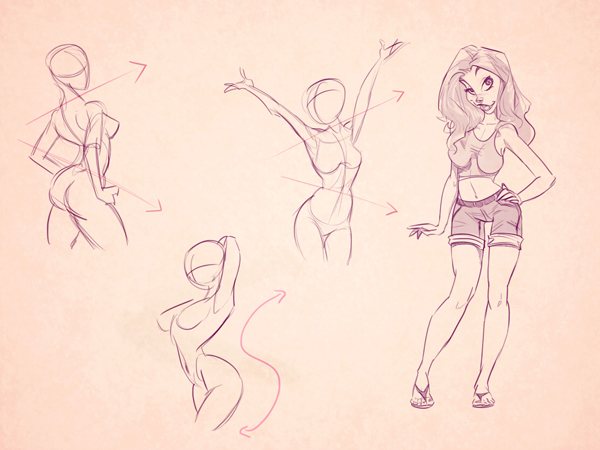
Example of different positions. When the right shoulder is raised, the left hip is lowered and vice versa. Note the S-curve when drawing the spine.
5.Continue your designs.
An artist's work does not end the moment he understands how the female anatomy works. You need to know how to represent your character as a whole. The hairstyle should match her age, her place of residence, the same goes for accessories with clothes - according to her age and social status. This process is called character design..
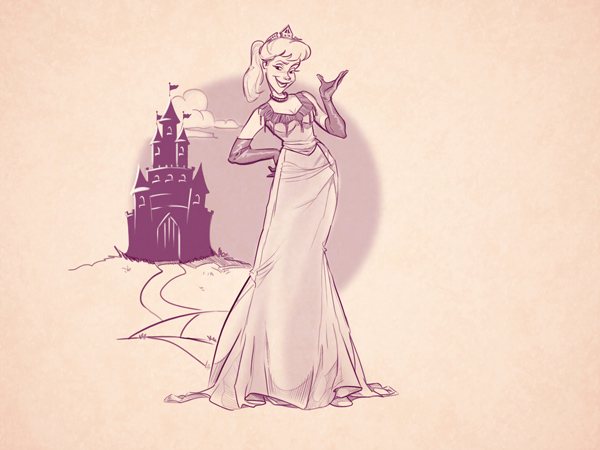
Note the heroine's long legs, although they are hidden. This decision provides the necessary elegance. In cartoons, we allow ourselves creative freedom for the sake of making the characters attractive.
Great job!
It's important to learn how to portray reality through stylization, because not only does it ensure that you get the audience's sympathy, but you also get out of your comfort zone, try new things, and constantly evolve.
I hope you enjoyed this class. Until next time!

Shoulders
The shoulder line is about midway between the one and two marks, and the width of the shoulders is two to three head widths:

But their visual position can vary greatly. To begin with, the shoulder line is slightly curved downwards, but with shoulder tension the curve can go up and appear higher. Also, the trapezius muscle, which visually connects the shoulder to the neck in full-face, is very different from person to person.
If the figure is very muscular or has a lot of fat, the shoulder line may appear so high that the neck is not visible. Conversely, an underdeveloped trapezius muscle, often seen in very young women, gives the impression of a long neck. It is important that there is no confusion between the actual position of the shoulder line and its visible position on the depicted body.
Arms and hands.
The wrists are on the fourth point just below the hip joints. The fingers end about mid-thigh, which corresponds to the fifth mark.
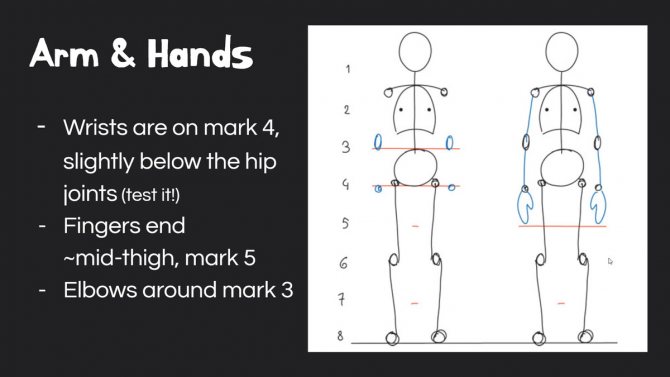
The elbow joints are a bit complicated, but we will look at that in detail later. For now, we will mark them as elongated ovals, located at the third mark.
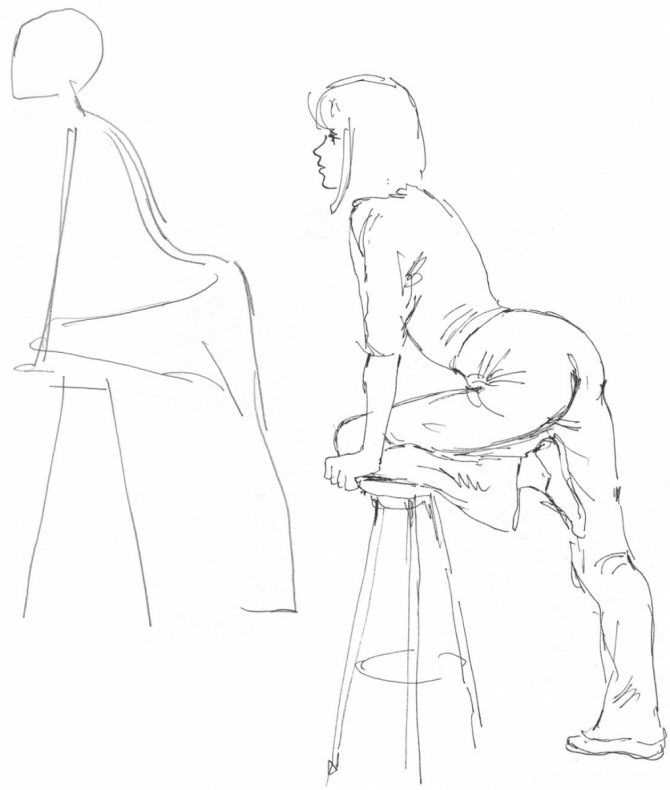
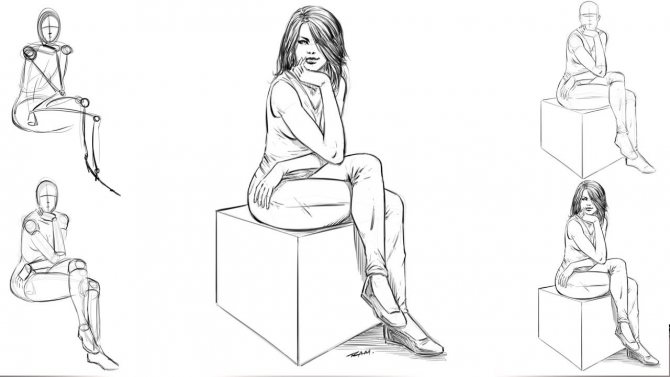
Positioning
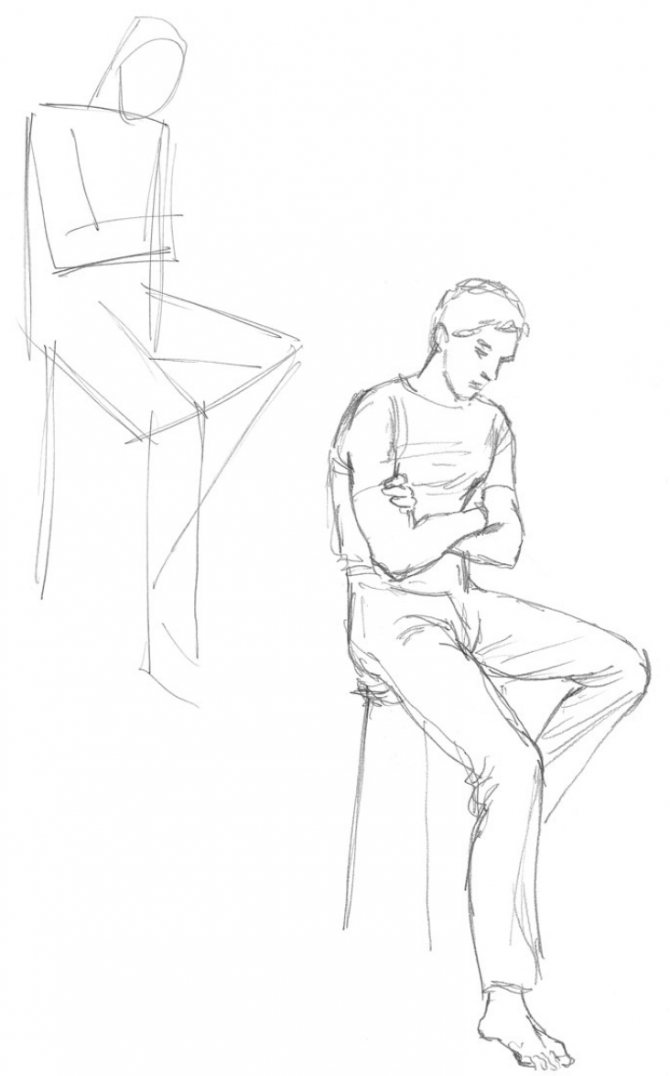
After the girl has taken the pose we need, her staging on the sheet begins with hinting at the overall mass of the figure, determining the center of gravity. If the girl is standing, it is much easier to draw this vertical (a reference point for body stability). In the sitting position, the first attention is paid to the slope of the hip and shoulder girdle along with the mass of the figure. The middle line is also marked, but after the schematic configuration of the whole silhouette. For simplification, it is possible to outline the direction of movement of arms and legs at once with lines. Then we find the general proportions of the figure, the angles of inclination of the shoulder girdle and head, the volume of the pelvis, shoulders, back. We mark the volume with points, starting to outline the frame of the figure.
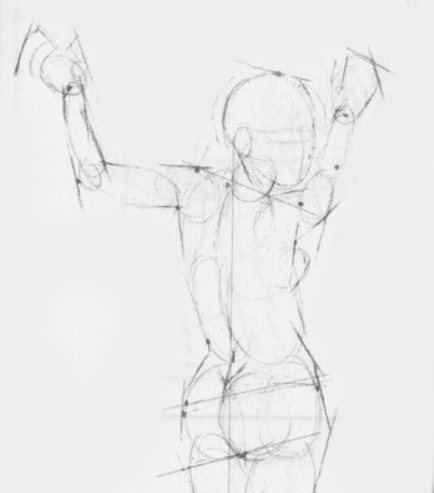
You should not accentuate anything, first give the silhouette (drawing with paired shapes), moving throughout the figure. Trace the tension of the muscles, marking well highlighted parts of them with a stroke (eventually a shadow will lie there). After outlining the skeleton, move on to drawing the hands, from them to the forearms and elbow joints, transfer the general features of the face. Move on to the outline of the pubic arch, kneecaps, gradually removing or softening the lines of construction. Then work through the hips and lower leg, marking the shadows.
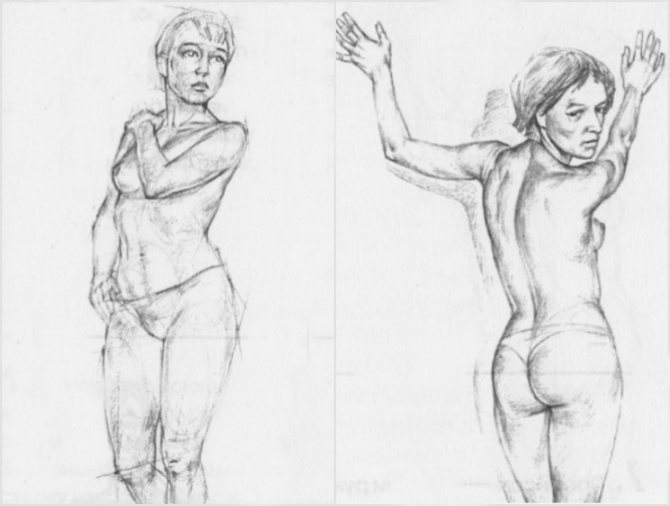
And finally we go back to the head. We give tone to hairstyle, of course, forming face, adding light and shade, and paying a lot of attention to small details: we trace hollows of clavicles, mark extensions of fingers, we put shade accents. Reconcile with nature, although the completion of the figure (if, of course, all the shadows were outlined earlier) occurs purely automatically, more often than not, we do not need a girl for this.
Figure in profile
Again, start by drawing the head - the same egg shape, but with the narrowed end pointing diagonally downwards. And drop a vertical line from the top of the head to the ground.
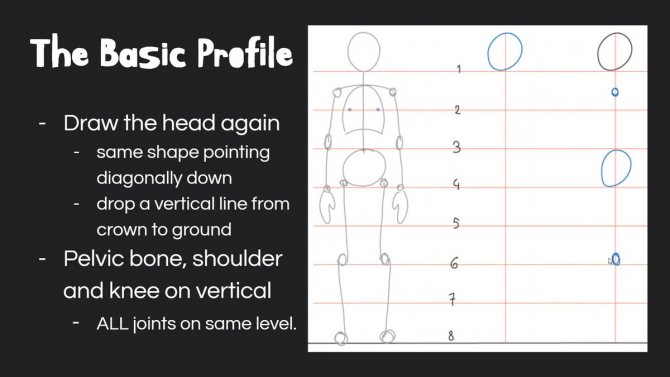
When the figure is standing upright, you can depict the pelvic bone almost like the head: the shape will be the same, but narrower. The shoulder and knee are about the same vertical line. They are at the same level as before.
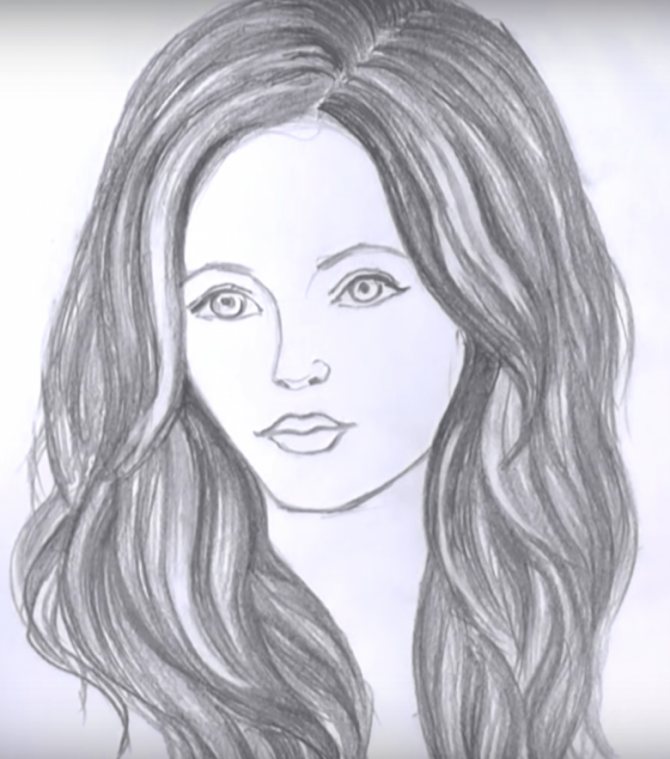
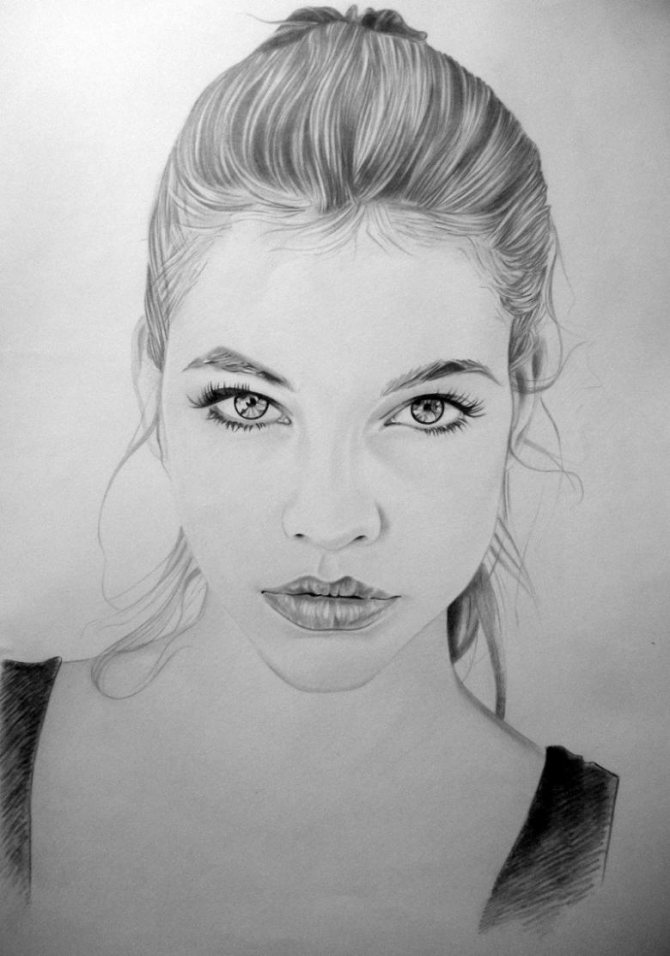
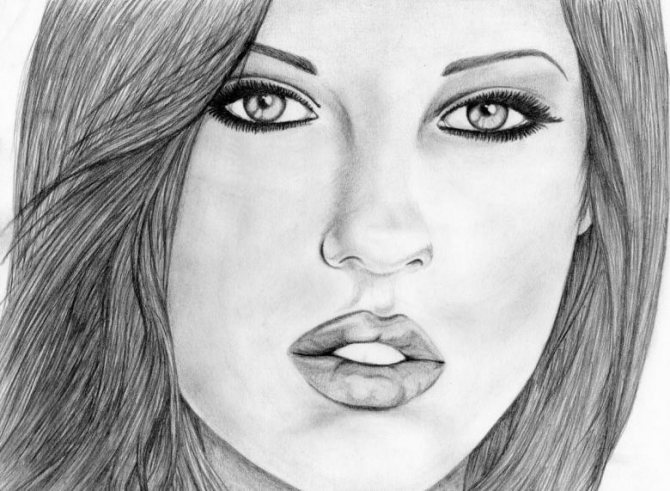
Drawing the face
You should start drawing the portrait of the girl by drawing an oval. It will indicate the future shape of the face. Next, a vertical line is drawn, dividing the face into two equal parts. It is the vertical axis. Now draw all the parts of the face: eyes, nose, lips and ears.
Sometimes additional auxiliary lines are traced, allowing to define the exact position of this or that object. At the end of the work, auxiliary lines are erased with an eraser. If the face is set in profile, work begins with auxiliary lines. Only then they are combined, details are traced and the original lines are erased, leaving only a beautiful image.
The spine in profile
From the side, the spine is shaped like a compressed letter S:
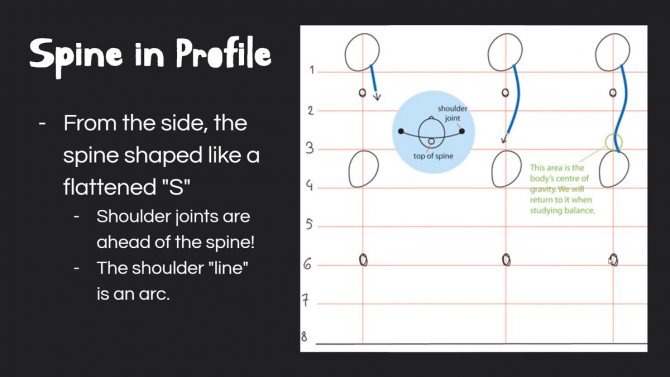
From the base of the skull, the line runs down and back until it reaches the farthest point at shoulder level. Note that the shoulder joints protrude in front of the spine. This is because the line of the shoulders is actually an arc, as shown in the picture when viewed from above (in the blue circle).
Then the spine again protrudes forward and protrudes slightly above the pelvis. This happens at the lumbar level and the depth of the curvature can vary, which can make it look like the character has a curved back. Finally, it changes direction again and ends at the tailbone.
Chest and legs in profile
The rib cage is tight against the spine, and in a fairly taut body standing upright, the chest naturally extends forward.
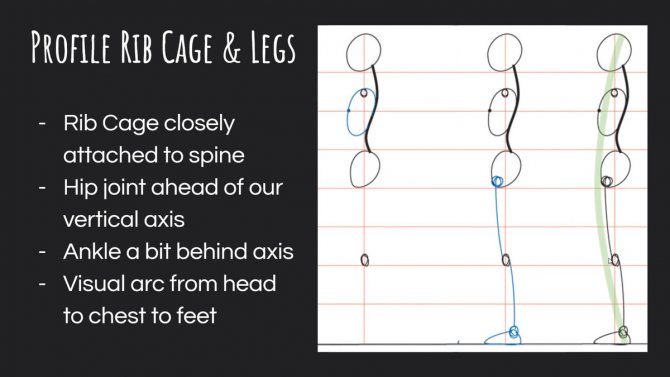
The hip joint moves slightly forward from our vertical axis, and this is balanced by the fact that the ankle is slightly behind it. Therefore, the line running from the hip to the knee and then to the ankle is angled backward and has alternating curve directions: from the hip joint to the front of the knee joint, from the back of the knee joint to the ankle joint.
The overall effect of this pose is a visual arc from head to chest (shown in green on the right side of the image). When this arc straightens or reverses, we feel insecure or slouchy in the pose.
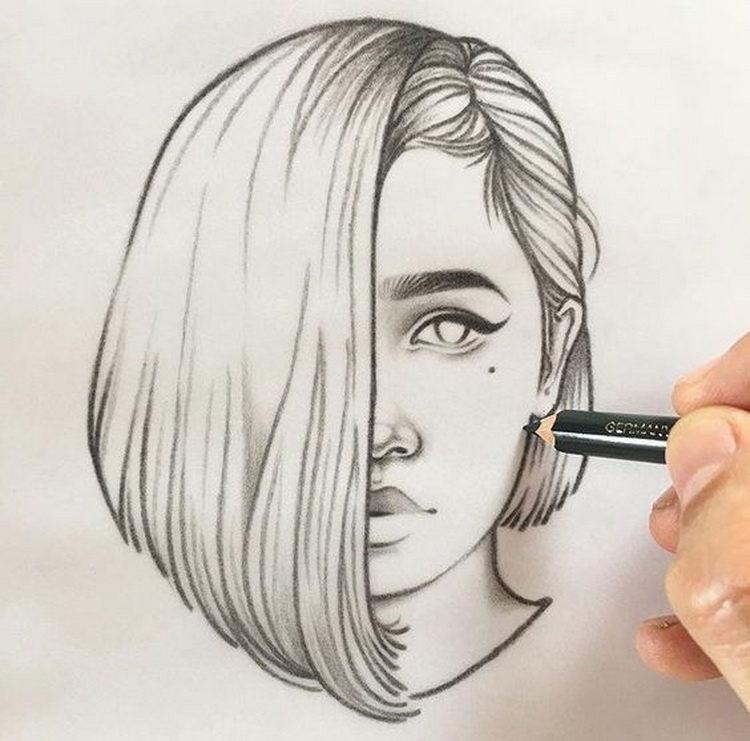
Drawing the hair
There is hair on a person's head. The artist doesn't have to trace every hair, strand or lock. It's enough to determine the direction of hair growth and mark the contours of the hairstyle. The image will be more realistic if you first outline the large strands, and then draw and shade them. Draw the outline of your future hairstyle. Then shade it with a pencil.
Hands in profile
The upper arm descends fairly straight from the shoulder, so the elbow may be in line with it or slightly tilted back.
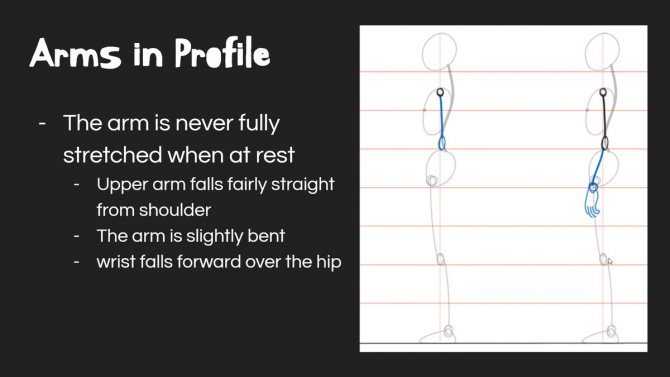
The arm is never fully straightened at rest, so the forearm will not be upright. The arm is slightly flexed, with the wrist dropping forward just above the femur. When the hand is relaxed, the fingers are slightly bent, as shown here.
At this point, we are done with basic human proportions. And this diagram will help bring together all that was mentioned earlier:
Male and female proportions
Male and female proportions differ so much from each other that even the skeleton or parts of the skeleton can be used to identify gender. Keep in mind, however, that there is no significant difference in the vertical axis. Gender does not affect the position of the joints, they will not move up or down. But gender does play a significant role in the width of certain body parts, creating variations in the figure.
How can you make a basic figure more feminine or masculine?
On a structural level, there is only one big detail to master, and everything else is just useful trivia.
The tools and technique needed
The human figure can be drawn with any materials, from a simple pencil, all the way up to professional paints. Due to its versatility and ease of use, pencil is the most common. It is better to buy paper smooth and dense enough.
The mixed technique combines different materials. A hard pencil can make a light drawing, and an increase in pressure will add accents. Sometimes to soften the intensity you can apply ink diluted with water, the exact contours are erased with an eraser. In a drawing with a pen, you can give a sepia effect by picking up a watercolor of the right color. Beginning artists must constantly experiment in order to find their own style of drawing.
Childbearing Thighs
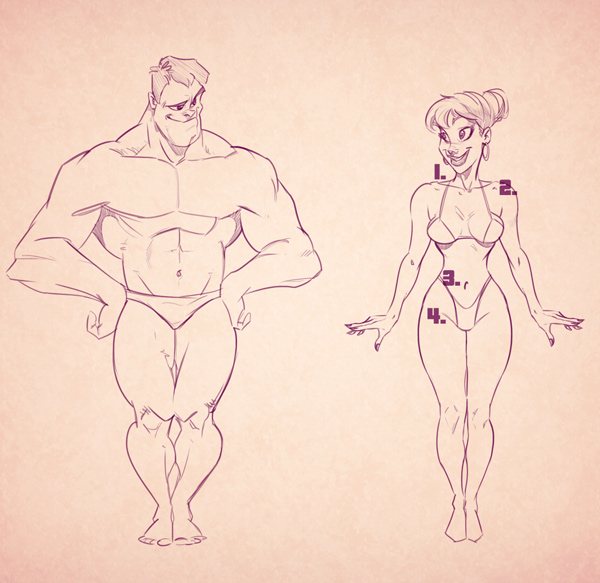
The main difference between male and female proportions is the ratio of the width of the shoulders to the width of the hips:
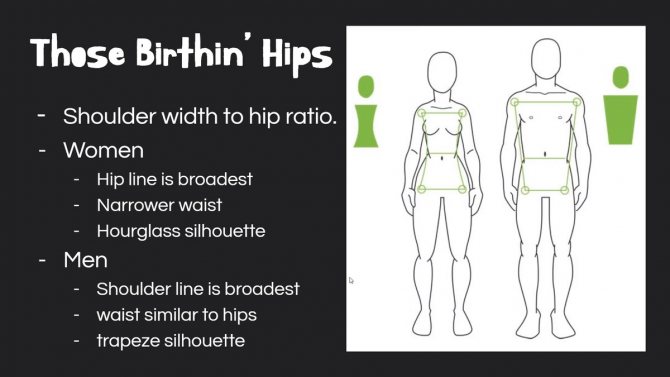
Women have a much wider pelvic bone than men because they have to be able to bear and bear a child. It is a key detail that affects the structure of the rest of the body.
In women, the hips are the widest part of the body and the narrow waist contrasts with them, whereas in men, the broadest part of the body is the shoulders and the waist is almost the same as the hips. Thus, the overall female silhouette is an hourglass, while the male silhouette is more trapezoidal in shape.
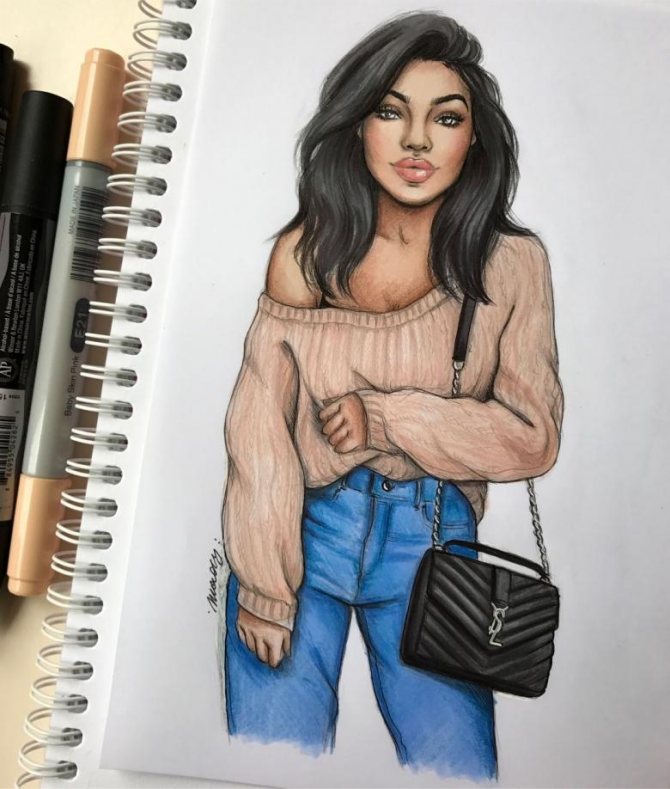
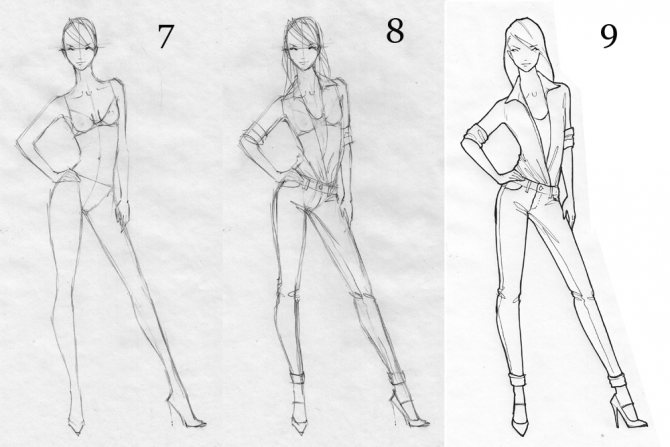
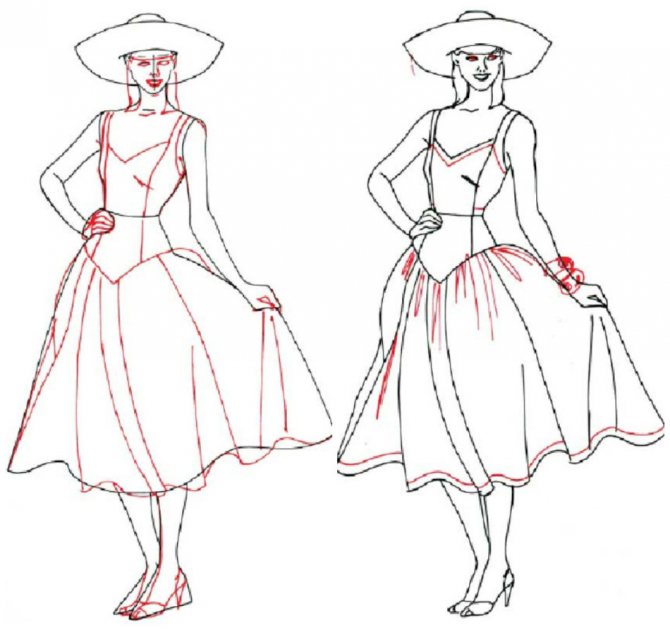
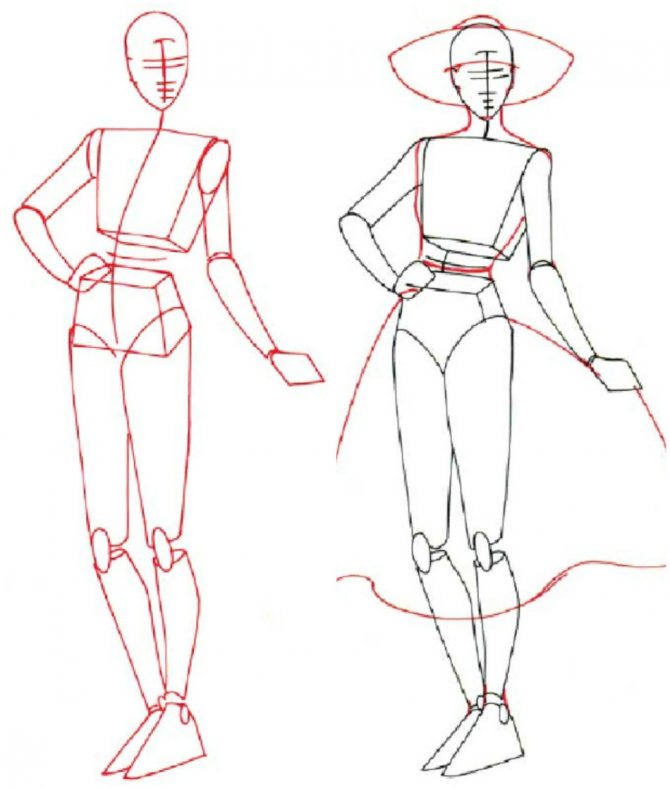
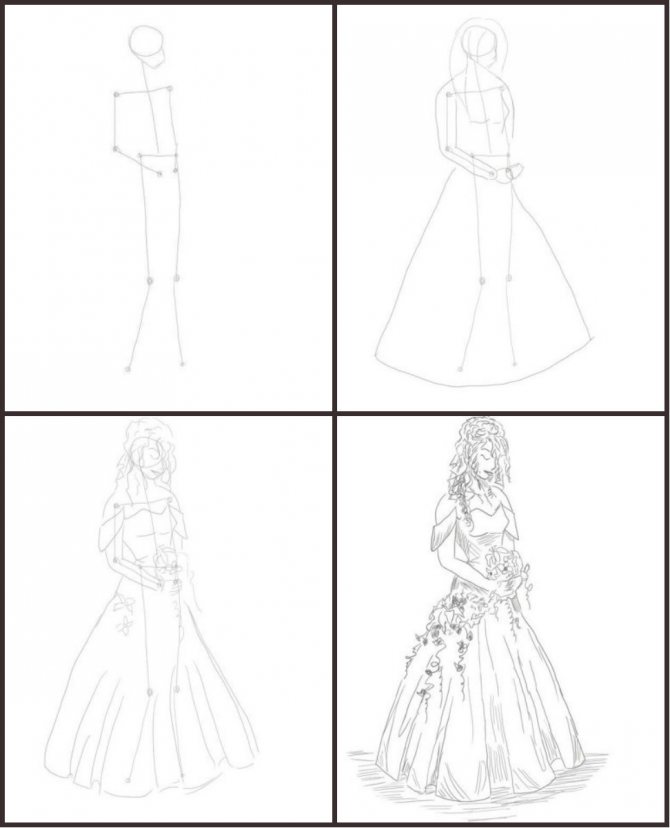
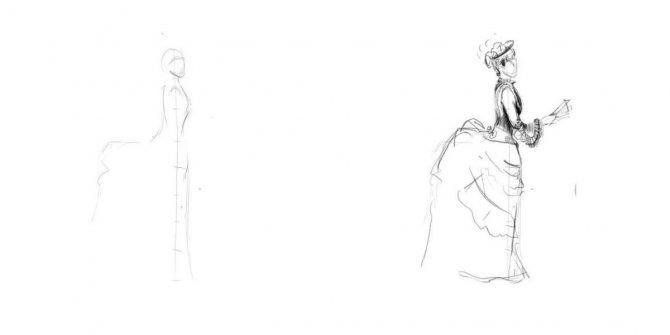
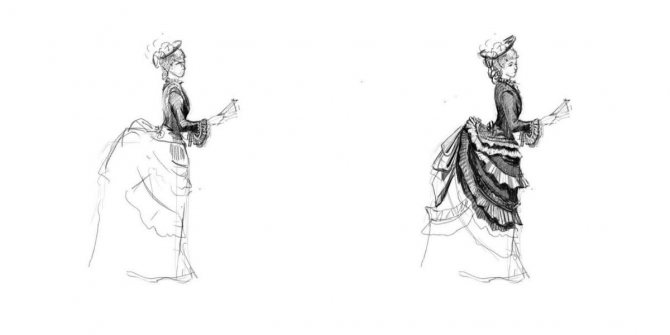
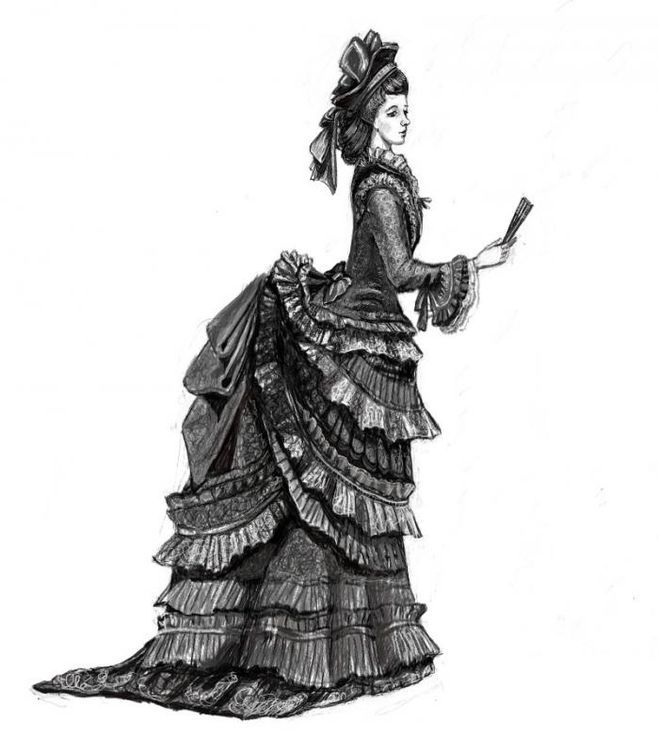
Drawing a girl in a dress
Getting down to creating a drawing of a girl in a dress, you should first draw the figure without clothes. Apply auxiliary lines, mark the contours of the human figure, only now on the girl's body you can "put on" clothes, "put on" shoes or boots.
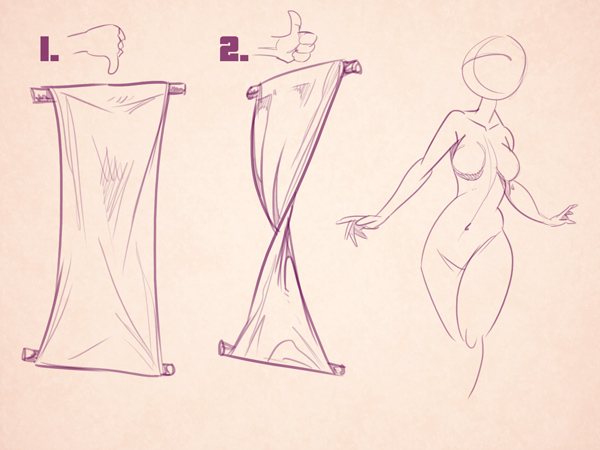
It is believed that it is easier to draw a figure with clothes on than a naked body. Clothing helps to hide those parts of the body that the artist fails to draw realistically. Pay special attention to the material of your model's dress.
A light fabric hugs the body, while a dense material slightly deforms the contours of the body. Do not forget about the pleats. They must be marked with additional strokes.
The waistline and elbows.
In women, the waist is at the level of the navel, and in men - slightly lower. This makes the man's torso visually longer.
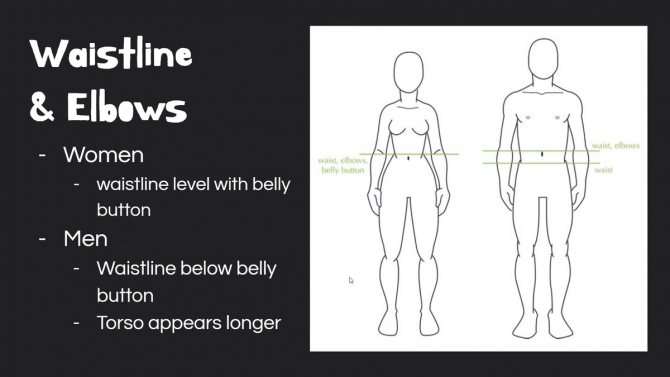
It is important to remember that men's elbows should not be in line with their lower waistline. The navel remains the reference point for the elbow joint. Unlike the female figure, if the man's waist is visually where the pants begin, the elbows will be much higher.
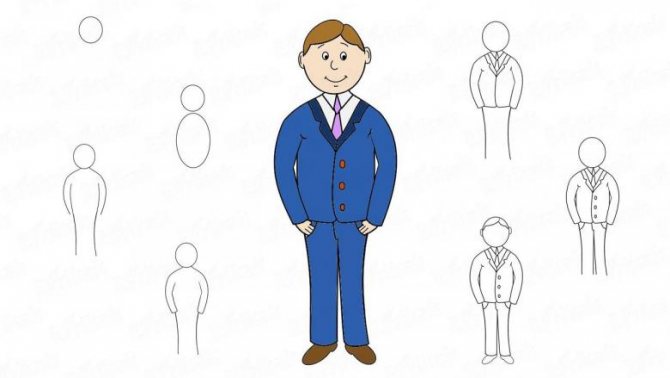
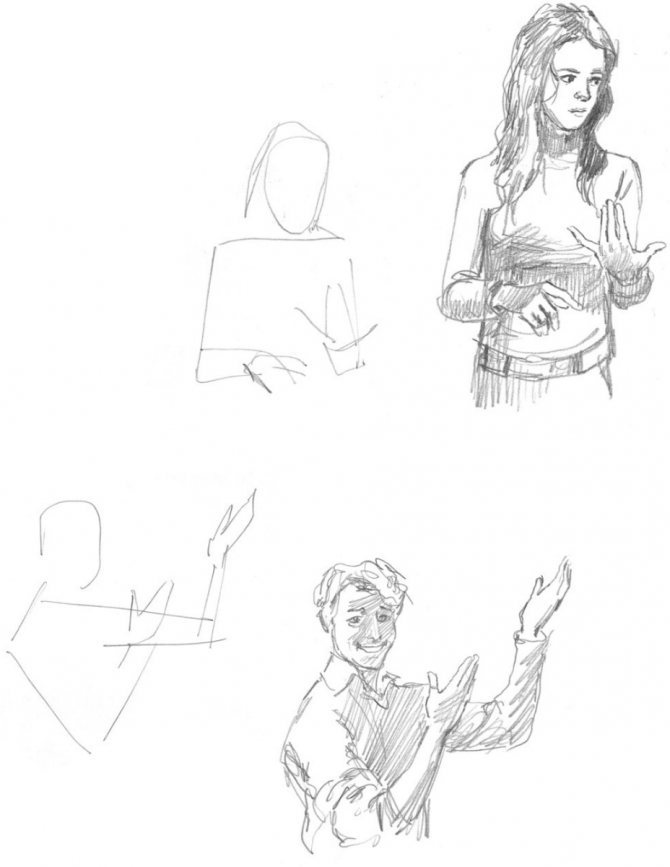
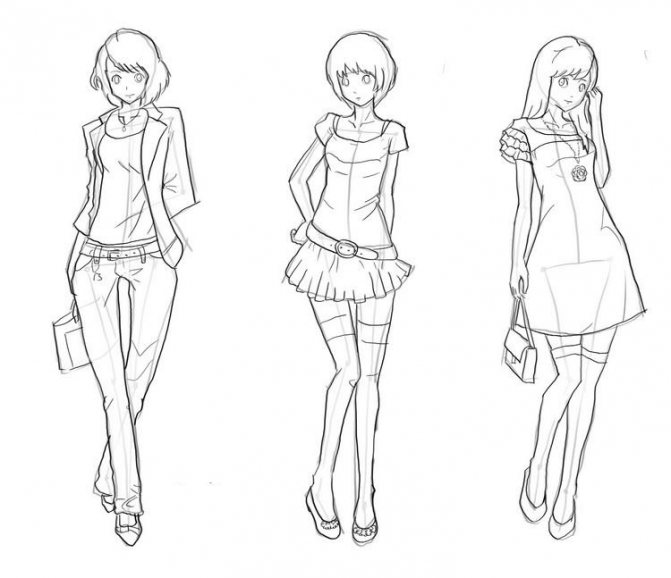
Drawings of a man of a woman in clothes for children for sketching: photo
You will be able to draw a woman with clothes from one of these pictures.
Woman wearing clothes for sketching: example 1.
Woman in clothes for sketching: example 2.
Woman in clothes for sketching: example 3.
Woman in clothes for sketching: example 4.
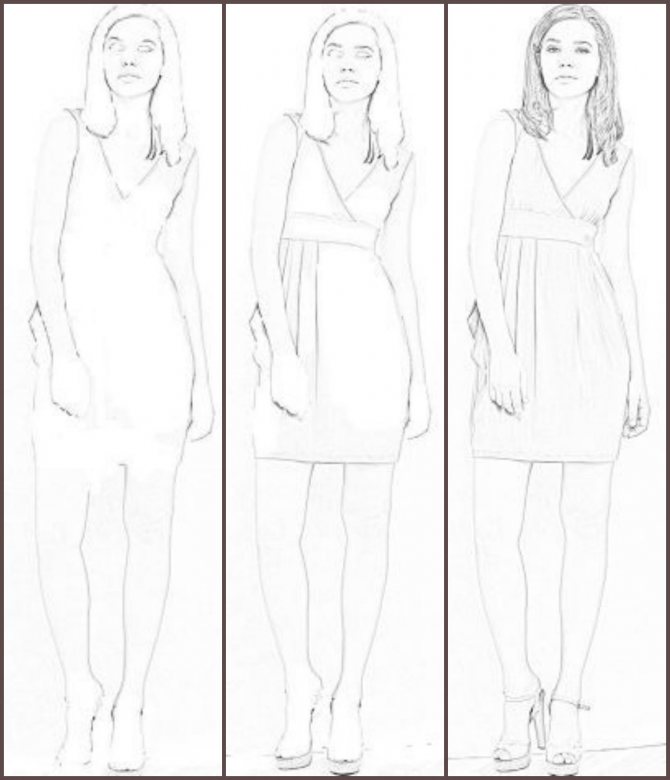
Woman wearing clothes for sketching: example 5.
Woman wearing clothes for sketching: example 6.
Woman in clothes for sketching: example 7.
Rounded shapes vs. angular shapes.
It is helpful to sketch women with more rounded shapes and men with more angular shapes, as this reflects the overall impression of each body type.
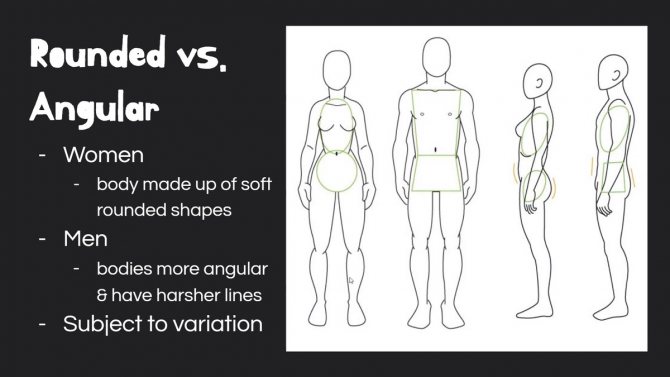
A woman's body consists of soft, rounded shapes. If it is not worked out, not athletic, it accumulates more fat under the skin. Men's bodies are more angular. If they are muscular, they have sharper lines. Of course, this is not always the case: you can have angular shapes, for example, for a thin woman and soft ones for a full man.
However, note that a fairly slender female body has a slightly curved abdomen and rounded buttocks, while men's abdomen and buttocks tend to be flatter.
Romantic hairstyle
Now, based on the previous lesson, we propose to depict a beautiful romantic hairstyle. Hair here will be gathered in a Greek hairstyle, as well as add a braid. This is the kind of image that is most often difficult for novice artists. We are going to use colored pencils.
How to draw a girl's hair:
- As in the previous lesson, first of all it is necessary to draw a sketch.
- We start with the rounded contours of the head, neck. Draw the shoulders. Their lower part is narrowed.
- In our drawing will be visible a small part of the face. On the right side we will draw its contour. Add a thin triangle for eyelashes. Step back to the left of the eye and draw an ear.
- Determine the direction of the hair with one line. Beginning to depict the shape of the hair. In the back we draw an oval. And let's highlight the location of the braid. In our hairstyle will be a daisy. Place it in the back and draw a big circle and a small circle inside it. You can add petals.
- Let's move on to detailing. Divide the form for the scythe in half. Draw her details. As already said, they look like petals. With neat lines we draw the strands in the curl at the back and on the head itself, they should be positioned so that the direction of growth is indicated. Under the hairstyle, with neat strokes, add a few dislocated hairs.
- The sketch is ready. Now remove all the auxiliary lines with an eraser and start painting.
- The body of the girl will paint a light pink. Dark brown is for the darkest parts of the hair. Determine where the light will fall and highlight these areas. Use black pencil to detail the hair and darken the areas where the curls go into shadow. Light brown shaded areas where the light falls.
- There are a few details left. Shade the daisy in yellow and blue. The dress can be shaded with a blue pencil, but it's up to you.
Why bother?
How important is all this, why do we need this information? Let's see clearly: the image below shows what happens when a man is drawn with female proportions, and vice versa:
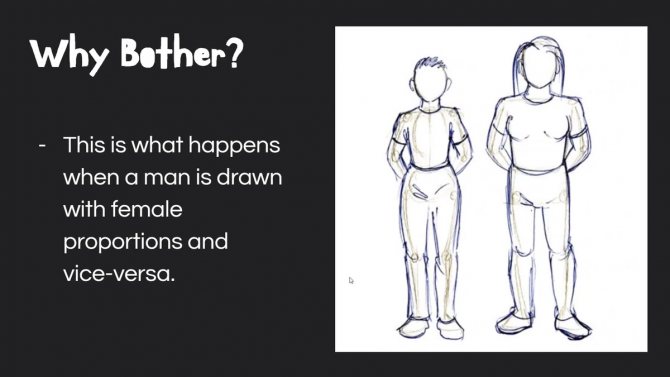
Even with the addition of gender stereotypes about hair and such, because of the ratio of shoulders to hips, bodies look very different than usual. Therefore, it is very important to keep proportions in mind when creating a character.
Proportion and age.
Take a look at these four figures:
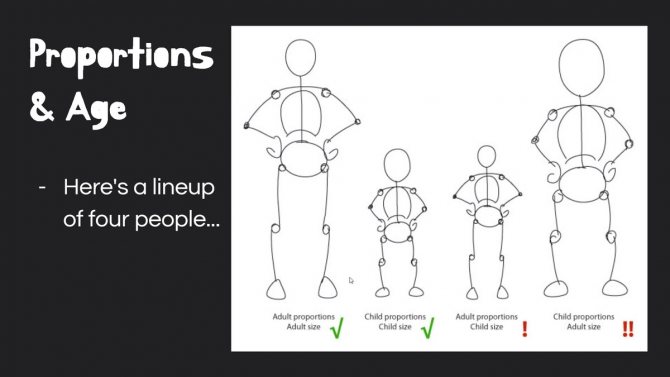
The proportions of the first two figures here correspond to their size. The third figure demonstrates what you get if you draw a child with the proportions of an adult. This works if you're drawing a fairy or Ant-Man, but it definitely doesn't look like a child.
It works the other way around, too. The fourth drawing shows an adult man drawn with childlike proportions, and an adult with this shape looks strange, it looks more like a giant child.
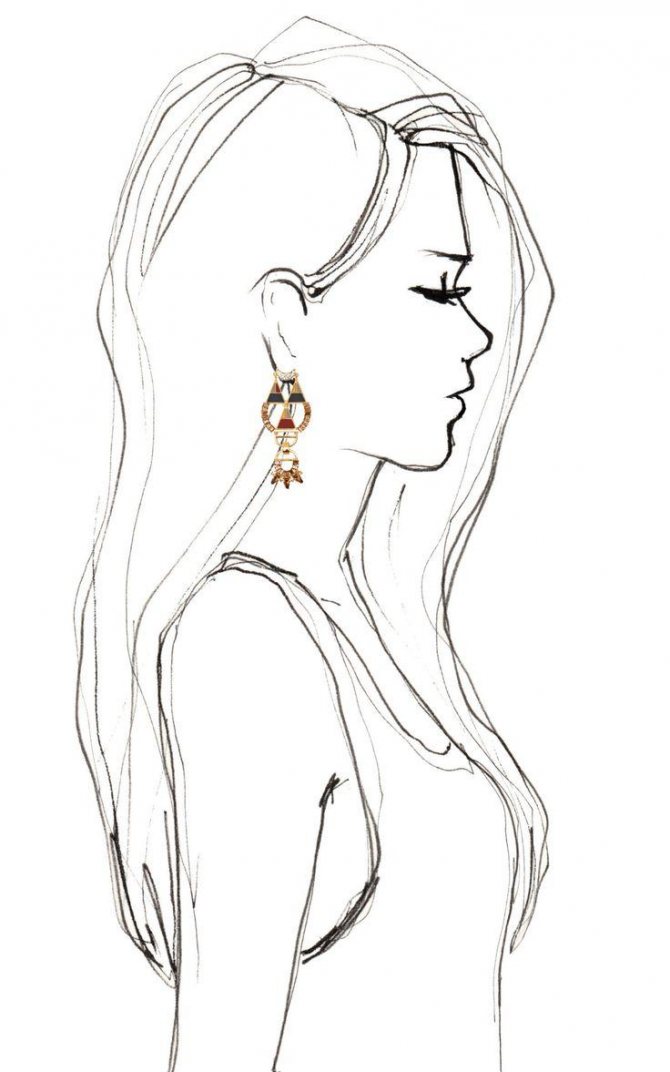
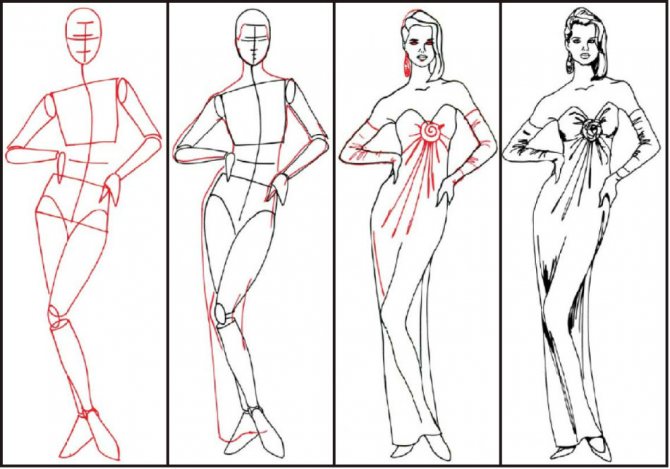
How do you draw a man dressed as a woman sideways in pencil?
If you have learned how to draw a woman in full-length clothing in a standing or moving position, it will not be difficult for you to portray her sideways. The pictures - instructions will help you.
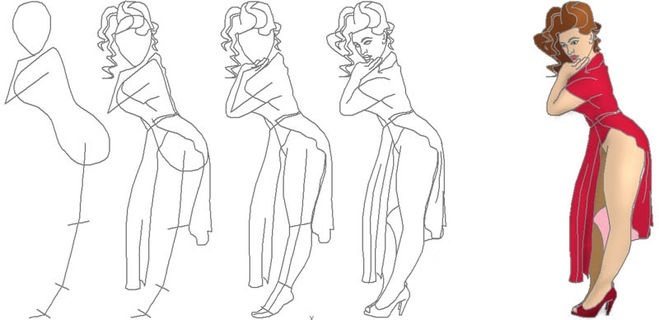
Woman wearing clothes sideways: step-by-step drawing.
Woman wearing clothes sideways: steps 1-2.
Woman wearing clothes sideways: steps 3-4.

Woman wearing clothes sideways: steps 5-6.
Woman wearing clothes sideways: pencil drawing.
Practice!
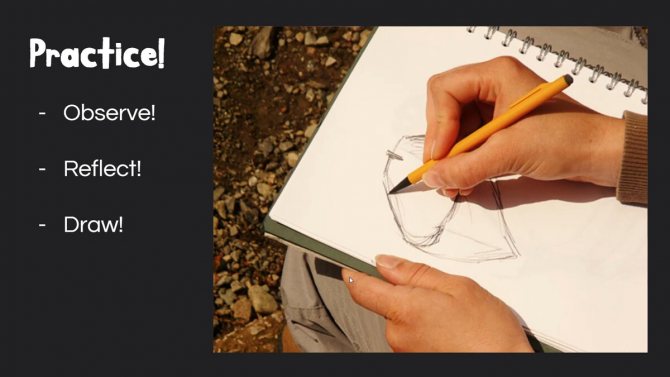
Let's put some of these theories into practice. First, we need to be observant, to look at the people around us. Pay attention to what in their structure distinguishes them from one another. Look closely at children and people of different nationalities to see how different they are in their structure.
Second, you can dig up some of your childhood photos at different stages and sketch a basic figure. See how your proportions have changed over time.
Finally, draw a crowd of people with different proportions without using references. If any of the people you draw look disproportionate, try to determine what's wrong with the figure. These exercises will help you work on your proportions and sweep your eyes.
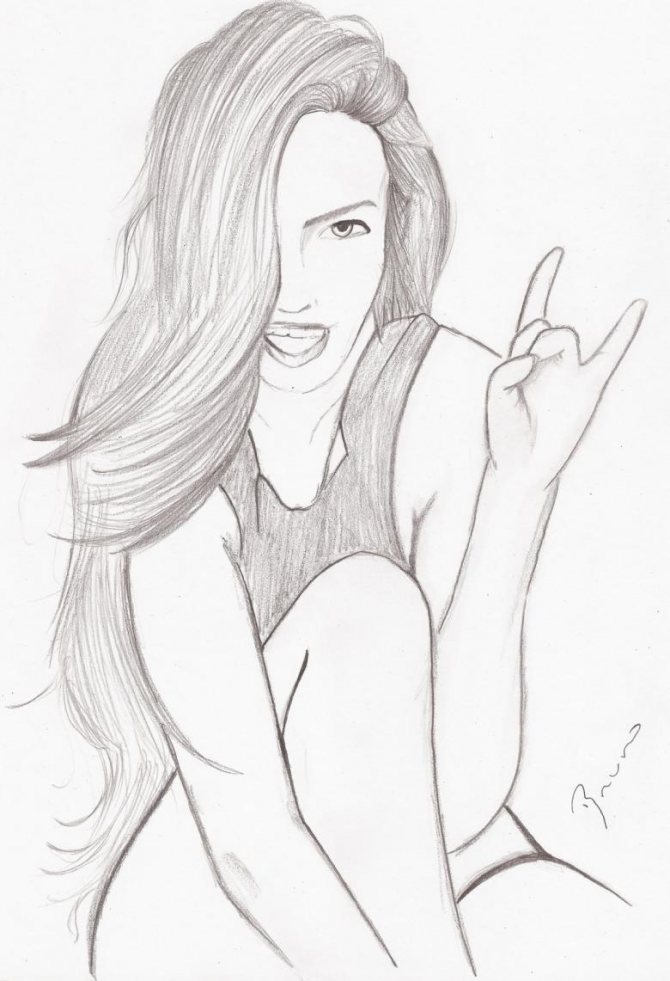
Beautiful
Beautiful girls for sketching can be done in different styles, from sketchy images to anime, from sketching to details with which to draw the face and body. This can be an image as a solitary standing (sitting, lying, etc.) girl, and a group picture, where the main drawn heroine is among her friends. Drawings of girls for sketching can depict cool girls with different accessories: wearing headphones, talking on the phone, with books or even weapons.